Reference

Run visualization

Schema reference for activating the routing-based visualizations in Console.

Nextmv Console offers a default run visualization for routing apps if a minimum schema requirement is met for the input and/or output. This visualization is available by default for the Nextroute and Pyvroom Marketplace apps, and is shown on the run input and output view, as well as the create new run view.

Screenshot showing the result of a routing run with multi-colored routes on a map.

To enable these views for your custom routing app, a minimum schema requirement must be met. These requirements are outlined in the sections below. Note that the visualization for input and output is activated independently, you do not need to adhere both your input and output files to the minimum schema requirement to activate the visual in Nextmv Console.

Also, the visualizations do not modify your actual app input or output in any way. And in both views, the actual JSON code can be viewed alongside the visualization and downloaded as well.

Input

Note that this section only covers the minimum requirements for activating the routing-based visuals in Nextmv Console, it does not cover required minimum schema for run functionality (e.g. defining vehicle speed).

The minimum requirements to activate the routing visual for run input is to include top-level stops and vehicles properties that follow the schema outlined for each in the subsections below.
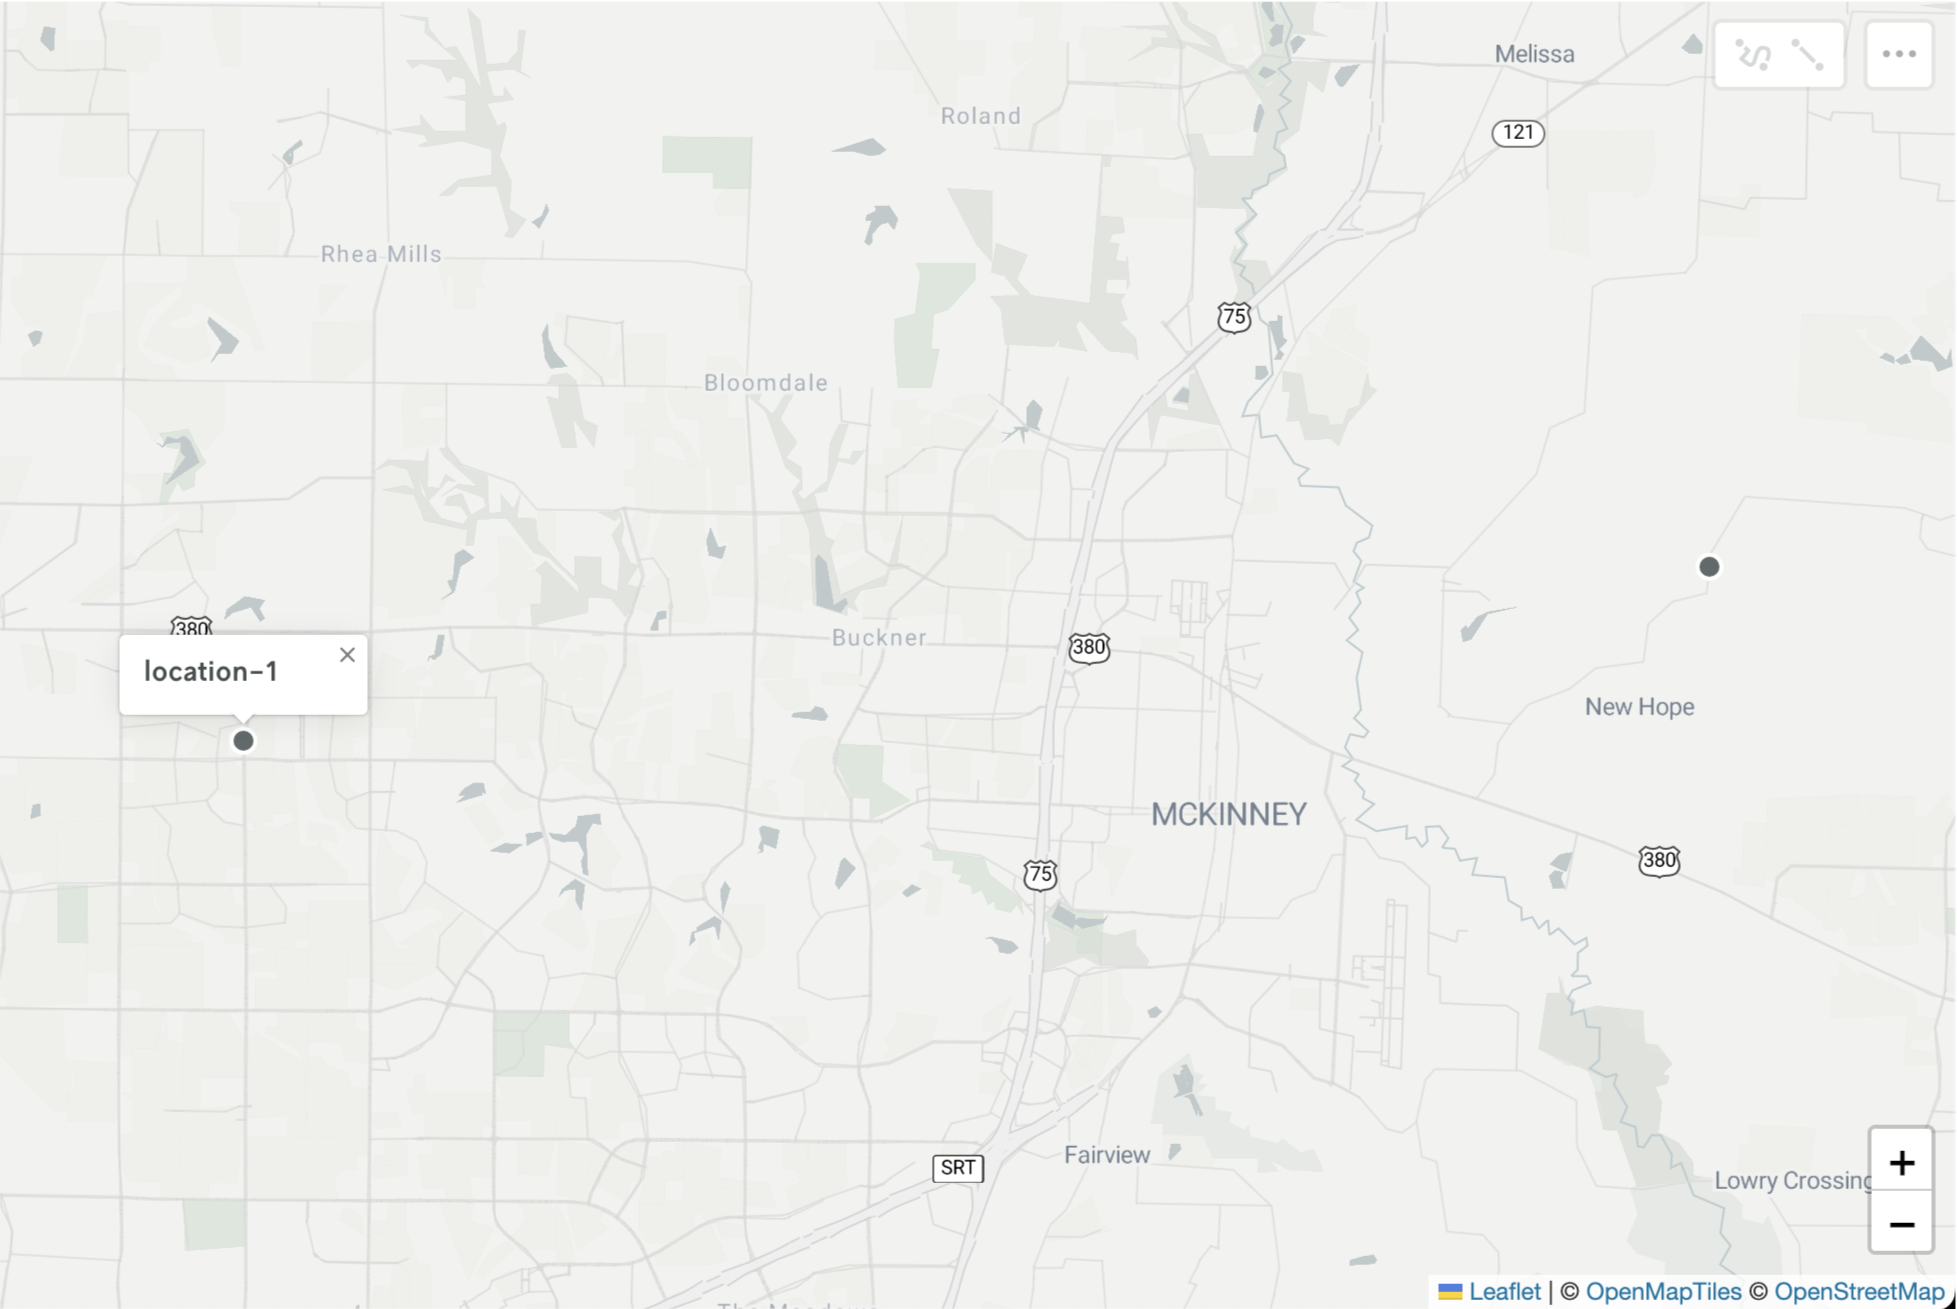
{
  "stops": [],
  "vehicles": []
}
Copy

Stops

To define routing stops, specify the lat and lon of a stop’s location in a location block along with a unique id field, and then place these stop objects in a top-level stops array:

{
  "stops": [
    {
      "id": "location-1",
      "location": {
        "lat": 33.20580830033956,
        "lon": -96.75038245222623
      }
    },
    {
      "id": "location-2",
      "location": {
        "lat": 33.2259142720506,
        "lon": -96.54613745932127
      }
    }
  ],
  "vehicles": [...]
}
Copy

This will enable the locations on the map:
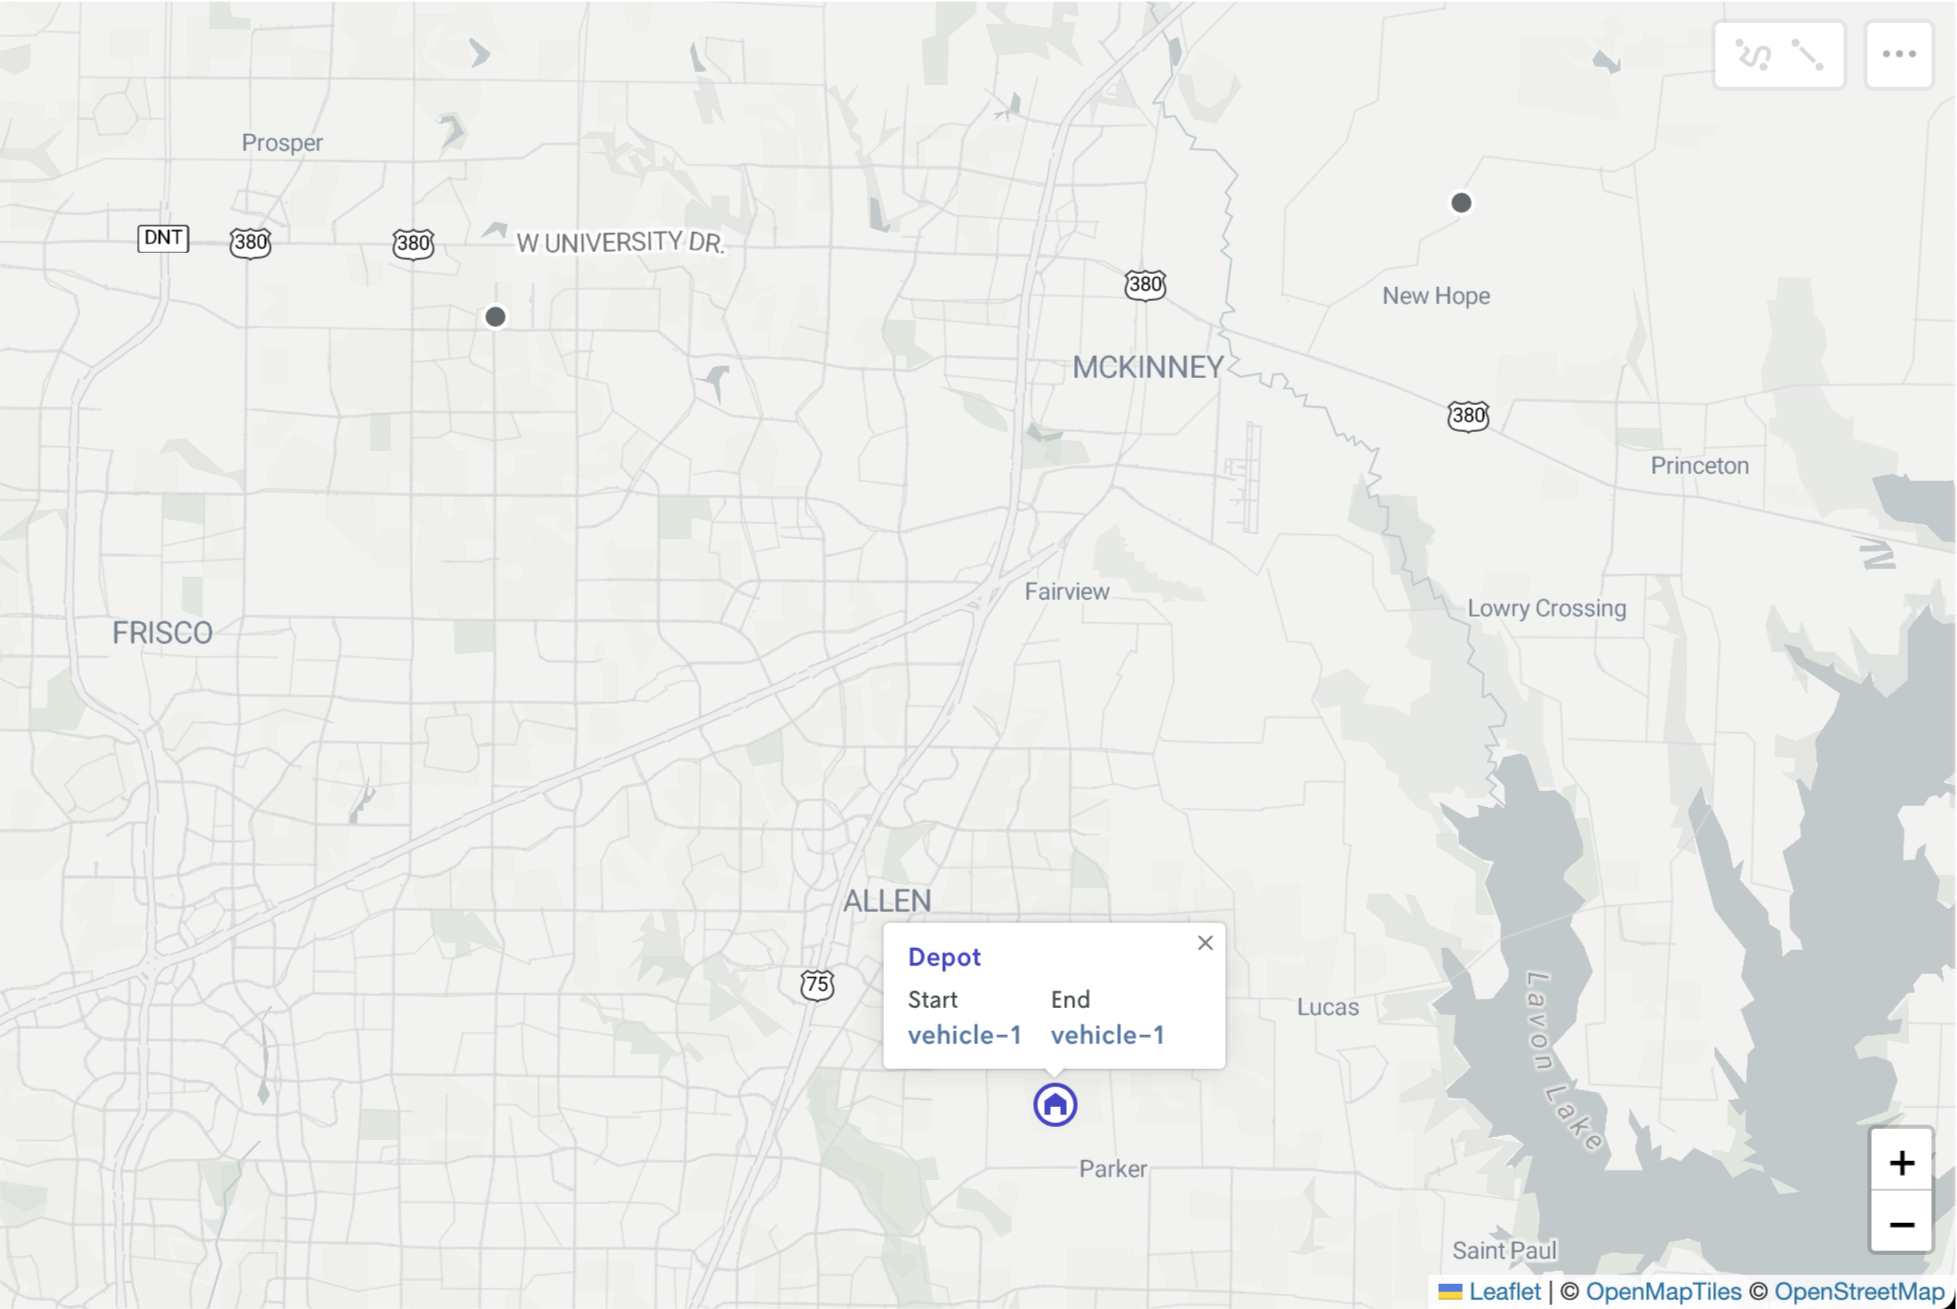
Screenshot showing the two locations plotted on a map.

Vehicles

Vehicles can be visualized on the map as well if they are given either a start or end location (or both).

{
  "stops": [...],
  "vehicles": [
    {
      "id": "vehicle-1",
      "speed": 10,
      "start_location": {
        "lat": 33.06631,
        "lon": -96.63171
      }
    }
  ]
}
Copy

Screenshot showing the two locations from the stops section and a vehicle start location plotted on a map. The vehicle location is shown with an icon of a car.

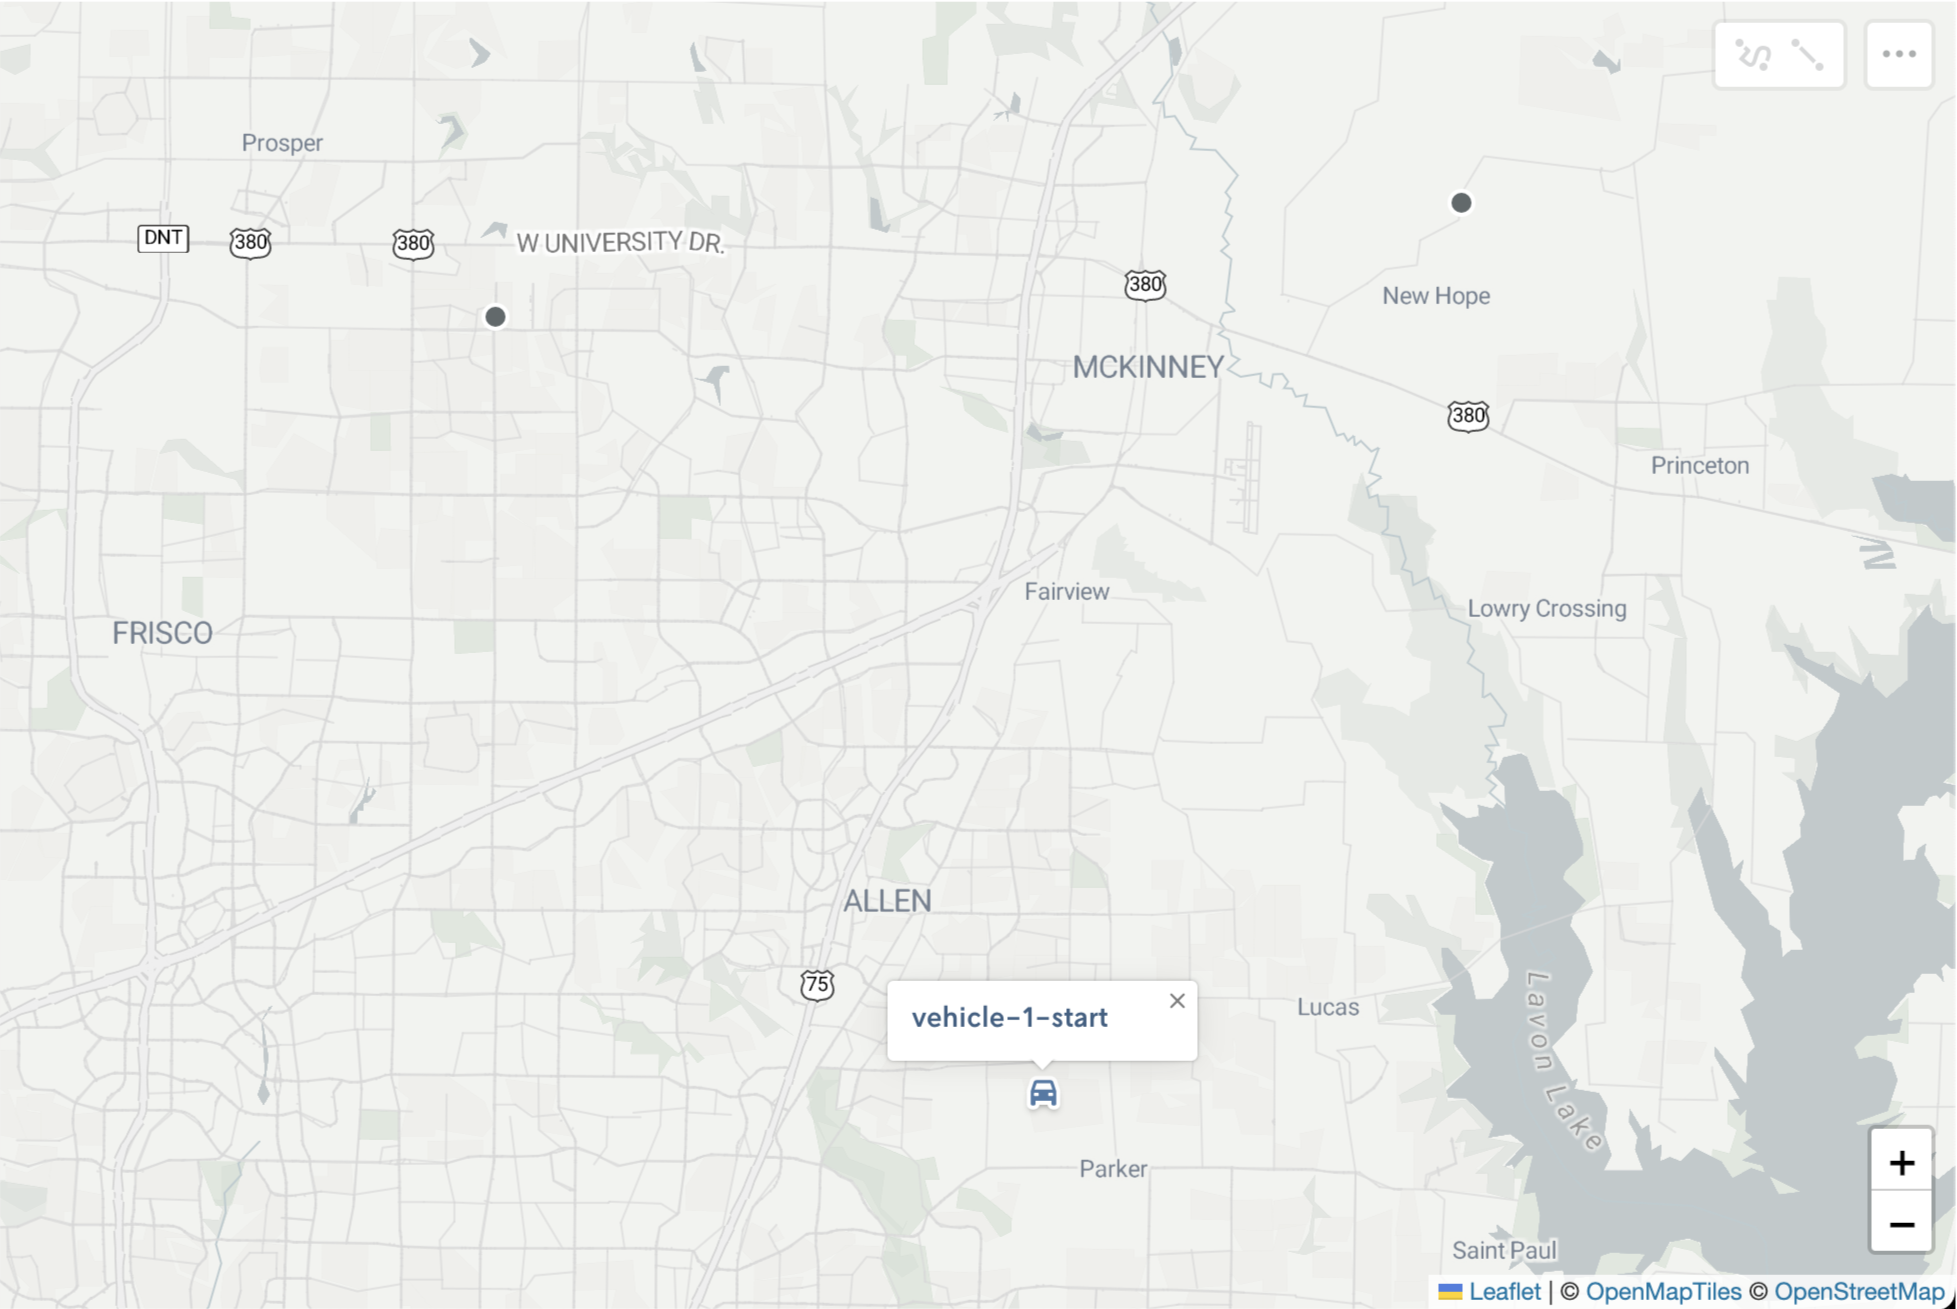
If the start_location and the end_location defined for the vehicle are the same then a special “depot” icon will appear.

{
  "stops": [...],
  "vehicles": [
    {
      "id": "vehicle-1",
      "speed": 10,
      "start_location": {
        "lat": 33.06631,
        "lon": -96.63171
      },
      "end_location": {
        "lat": 33.06631,
        "lon": -96.63171
      }
    }
  ]
}
Copy

creenshot showing the two locations and a special depot icon showing the location of the vehicle start and end location.

The start and end locations for the vehicles can also be added as defaults. See the full input schema reference for more.

Other input data

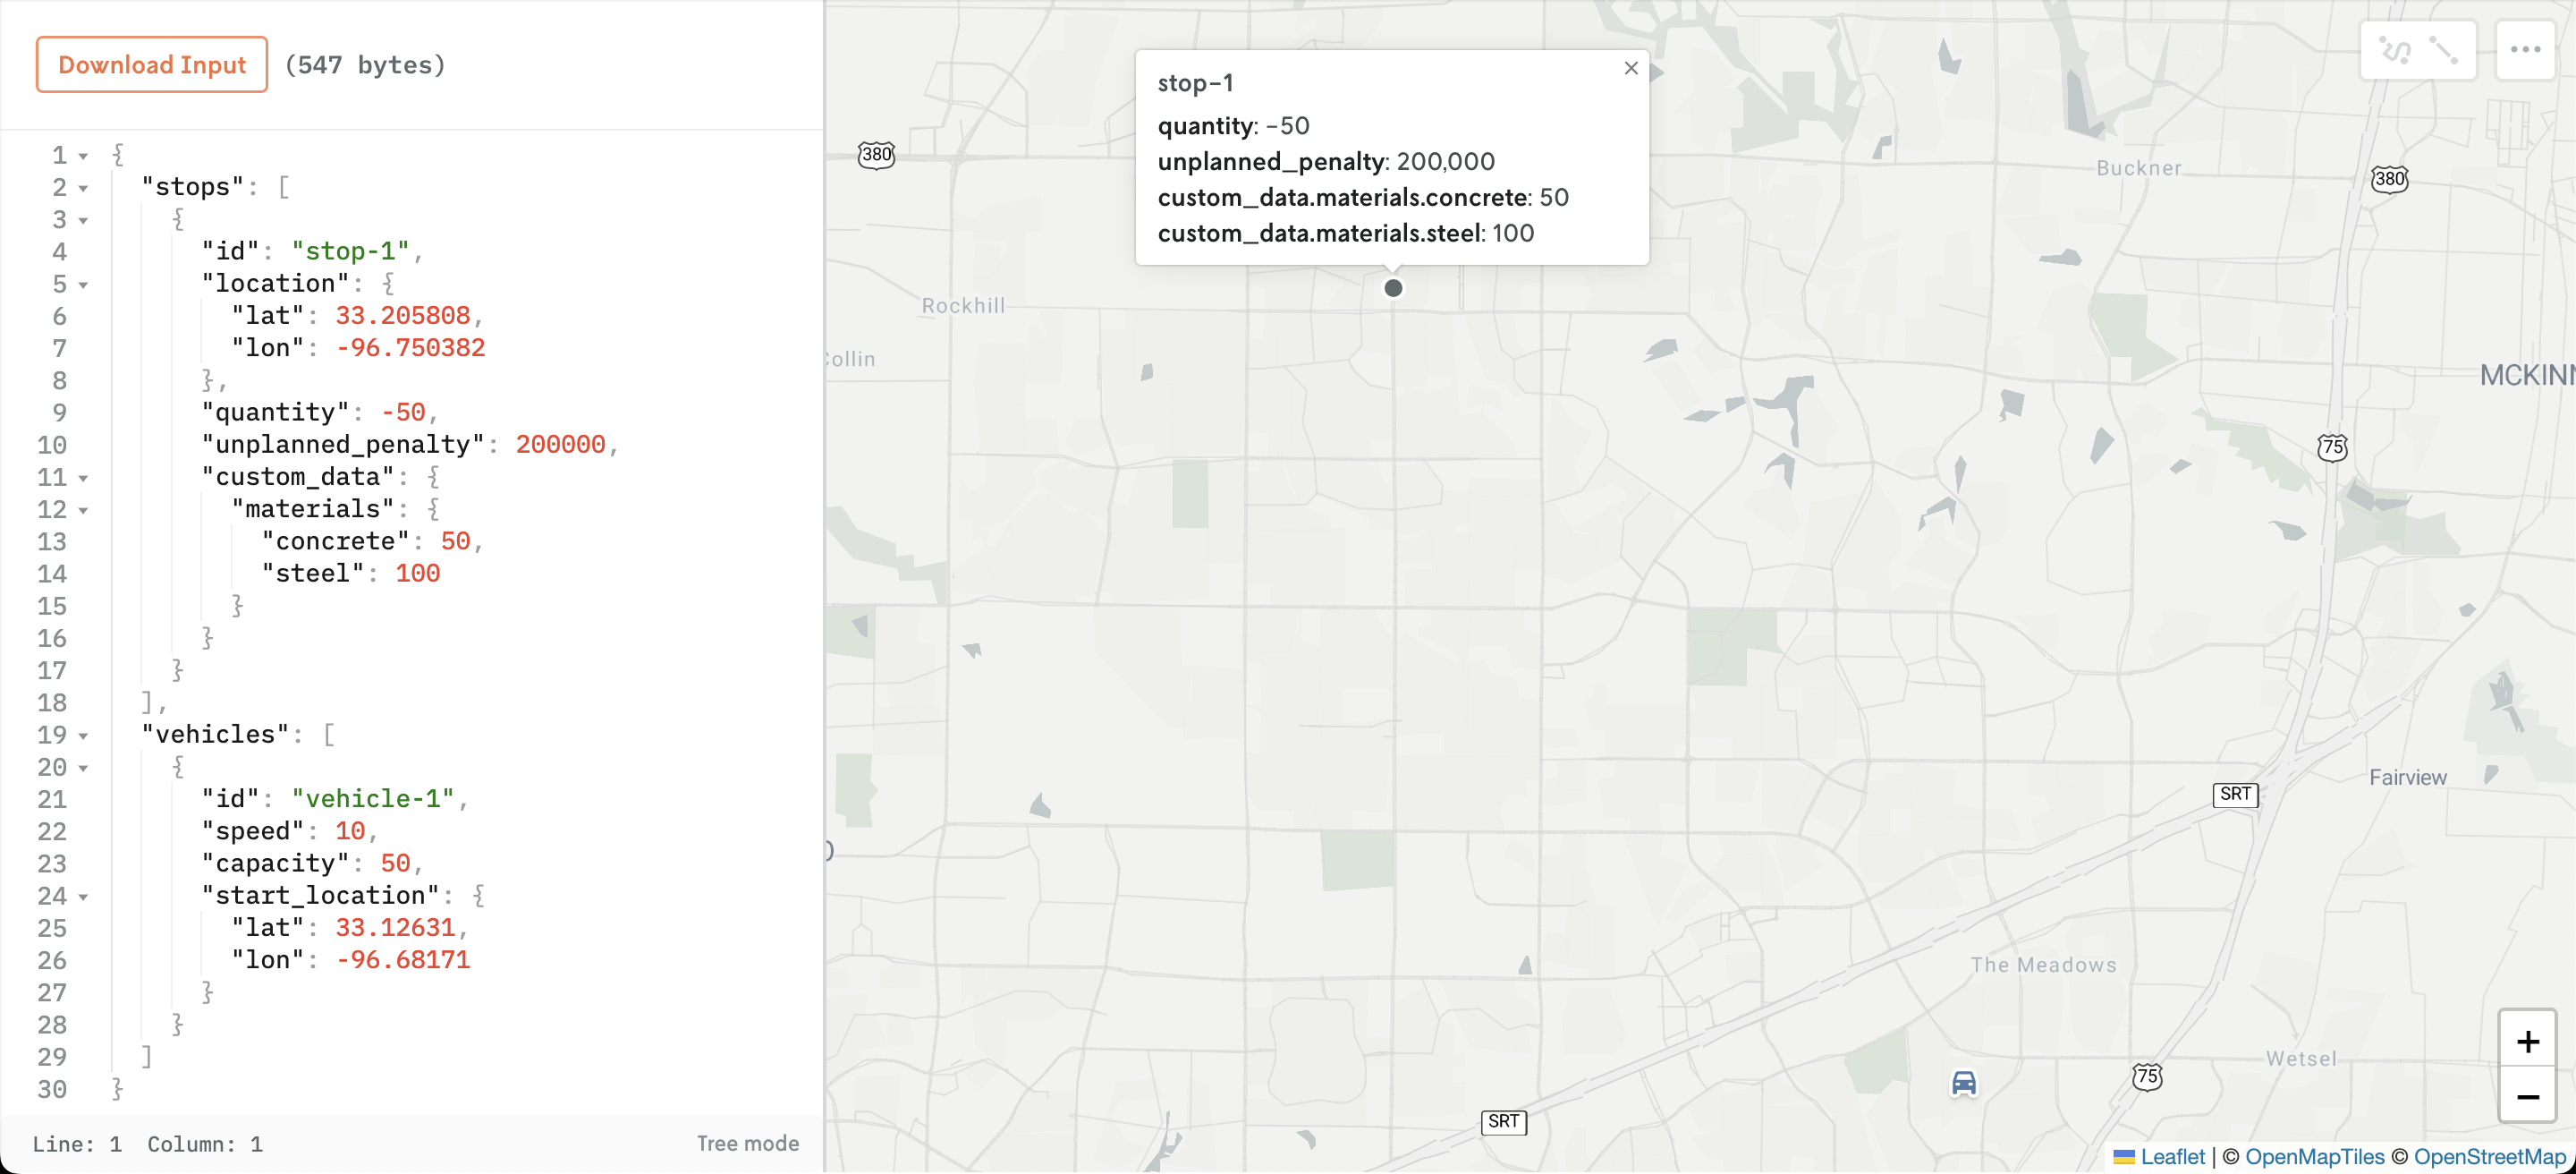
All other data associated with your vehicles and stops will be flattened and accessible in the visualization UI.

Take for example a stop that has several constraints defined along with custom data:

{
  "stops": [
    {
      "id": "stop-1",
      "location": {
        "lat": 33.205808,
        "lon": -96.750382
      },
      "quantity": -50,
      "unplanned_penalty": 200000,
      "custom_data": {
        "materials": {
          "concrete": 50,
          "steel": 100
        }
      }
    }
  ],
  "vehicles": [
    {
      "id": "vehicle-1",
      "speed": 10,
      "capacity": 50,
      "start_location": {
        "lat": 33.12631,
        "lon": -96.68171
      }
    }
  ]
}
Copy

In addition to the stop plotted on the map with its location, the extra information is shown on a popup when you click on the point:

Screenshot of a point on a map with an active popup showing the extra stop data defined in the input.

Output

To activate the routing-based visualization for the run result, your output JSON file must have a top-level solutions array that contains an object with top-level unplanned and vehicles properties that follow the schema outlined for each in the subsections below.

{
  "solutions": [
    {
      "unplanned": [],
      "vehicles": []
    }
  ]
}
Copy

Unplanned

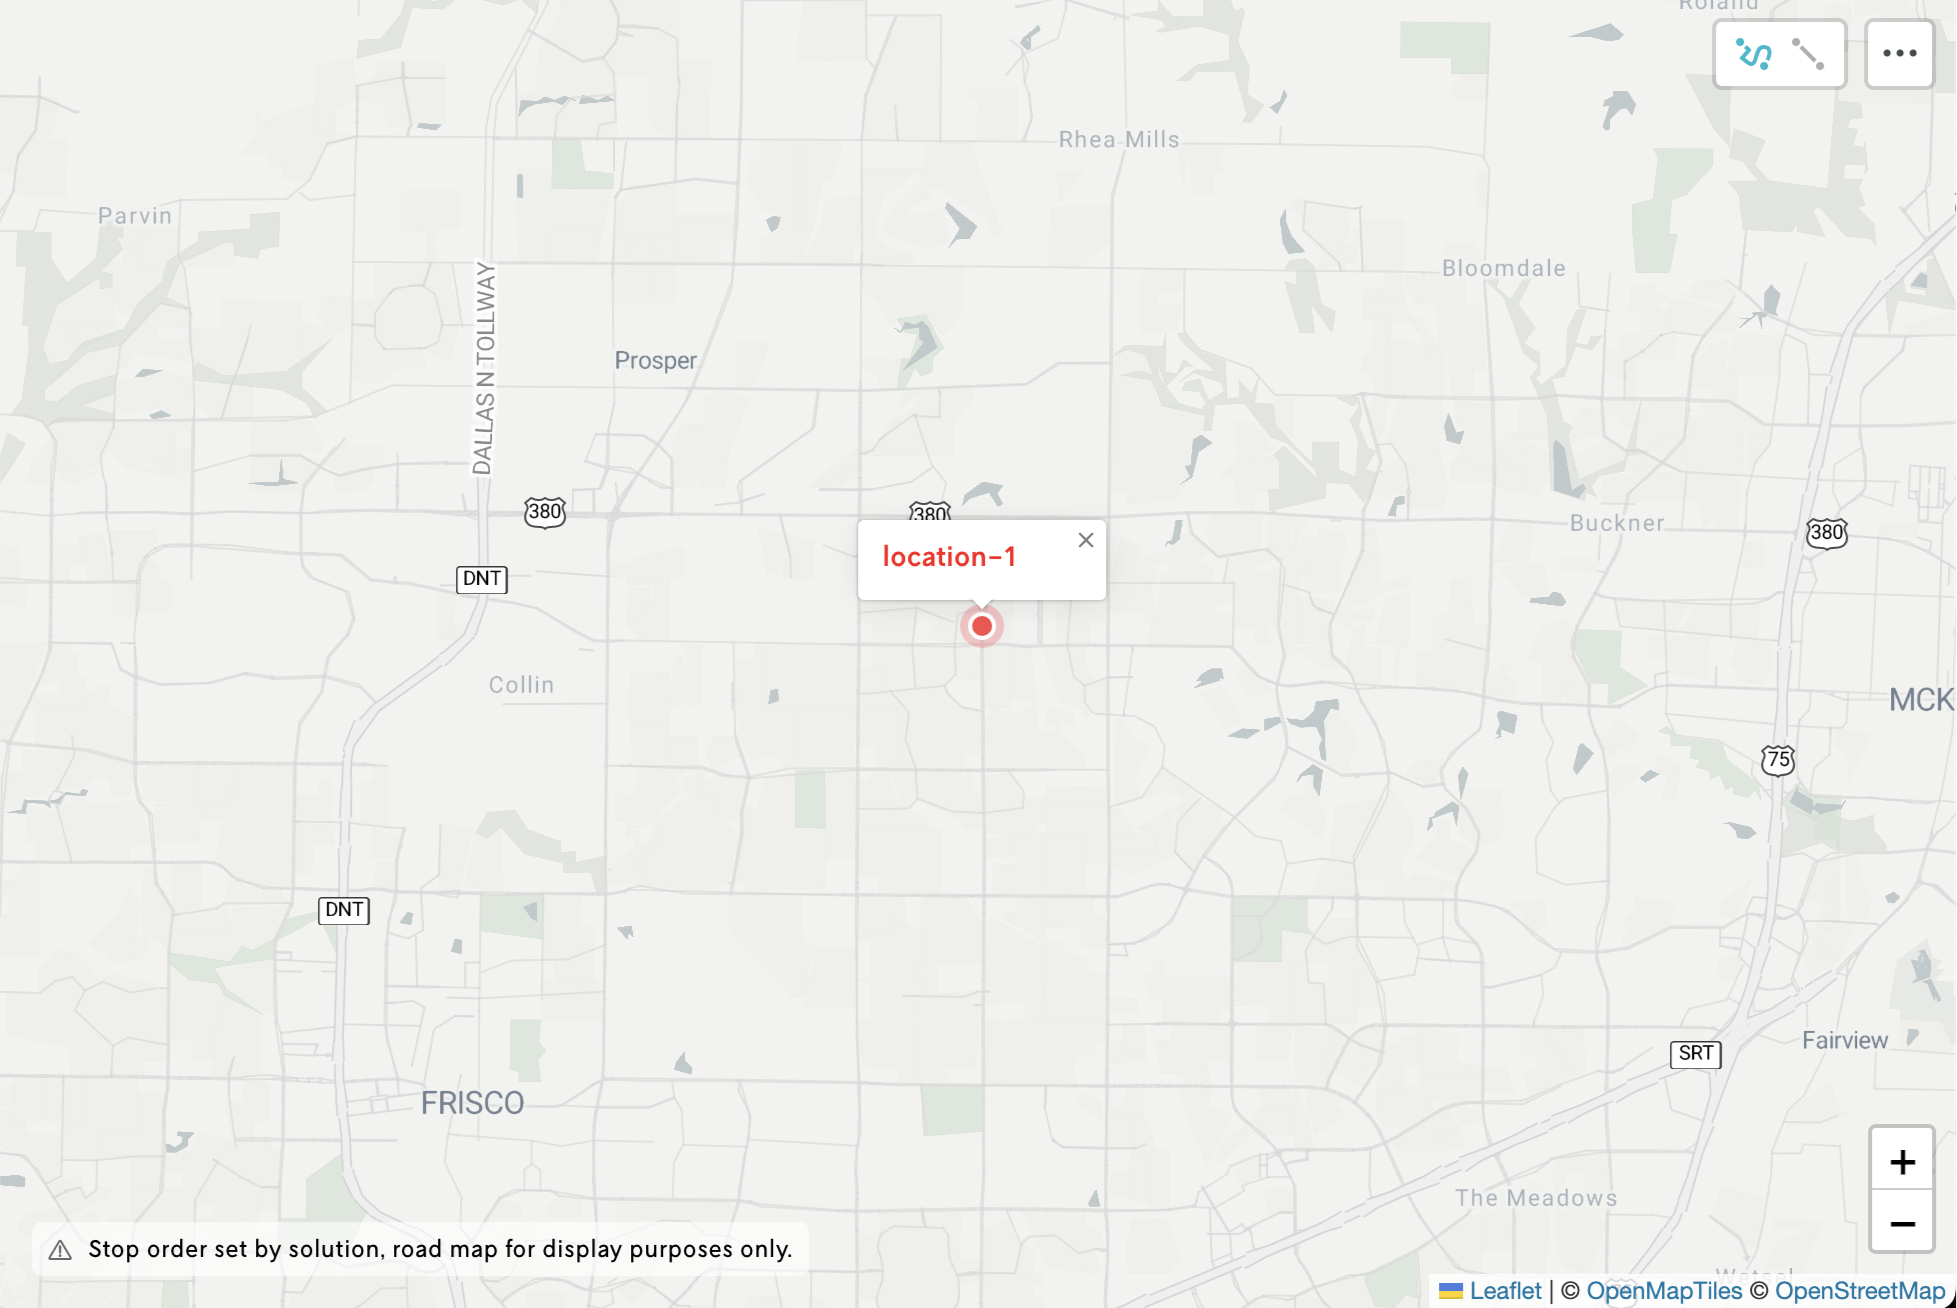
The unplanned array holds stops that were not assigned to vehicles. Each unplanned stop in the unplanned array must have at a minimum a location object and id:

{
  "solutions": [
    {
      "unplanned": [
        {
          "id": "location-1",
          "location": {
            "lat": 33.205808,
            "lon": -96.750382
          }
        }
      ],
      "vehicles": [...]
    }
  ]
}
Copy

Unplanned stops will be shown with a special red style:

Screenshot of a single point on a map styled with red to signify that it is unplanned, a popup pane also is shown with the ID of the point shown in red as well.

The routing visualization allows you to hide unplanned stops if desired. Take the example below when showing the unplanned stops would distract from viewing the focused route:

Screenshot of a sample isolated route on a map with no unplanned stops shown; a small red circle with a white label in the upper right reads 1,603, the number of unplanned stops not shown.
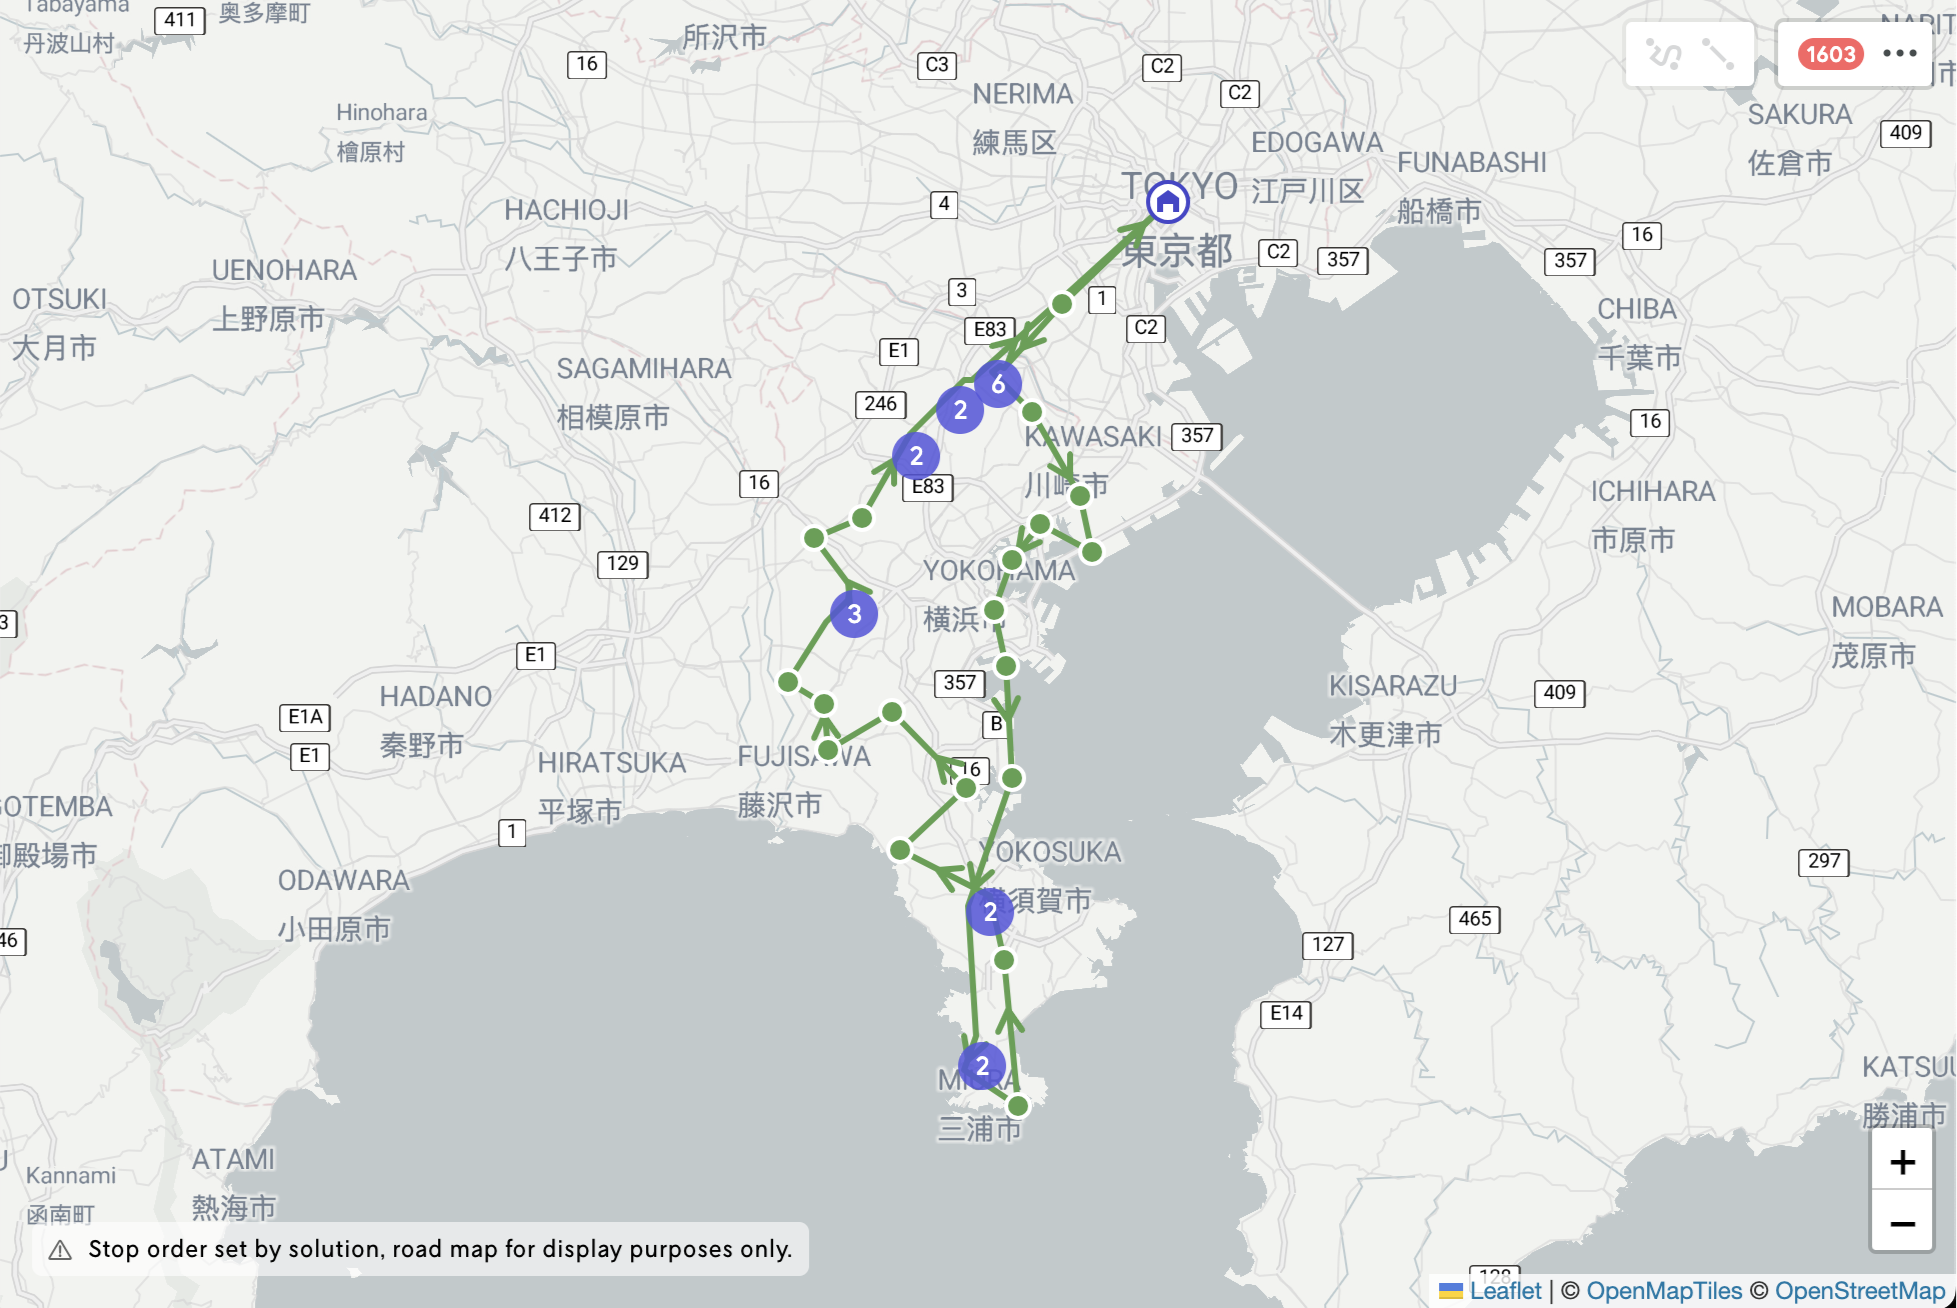
Note the 1603 in the upper right, this is the number of unplanned stops currently not shown.

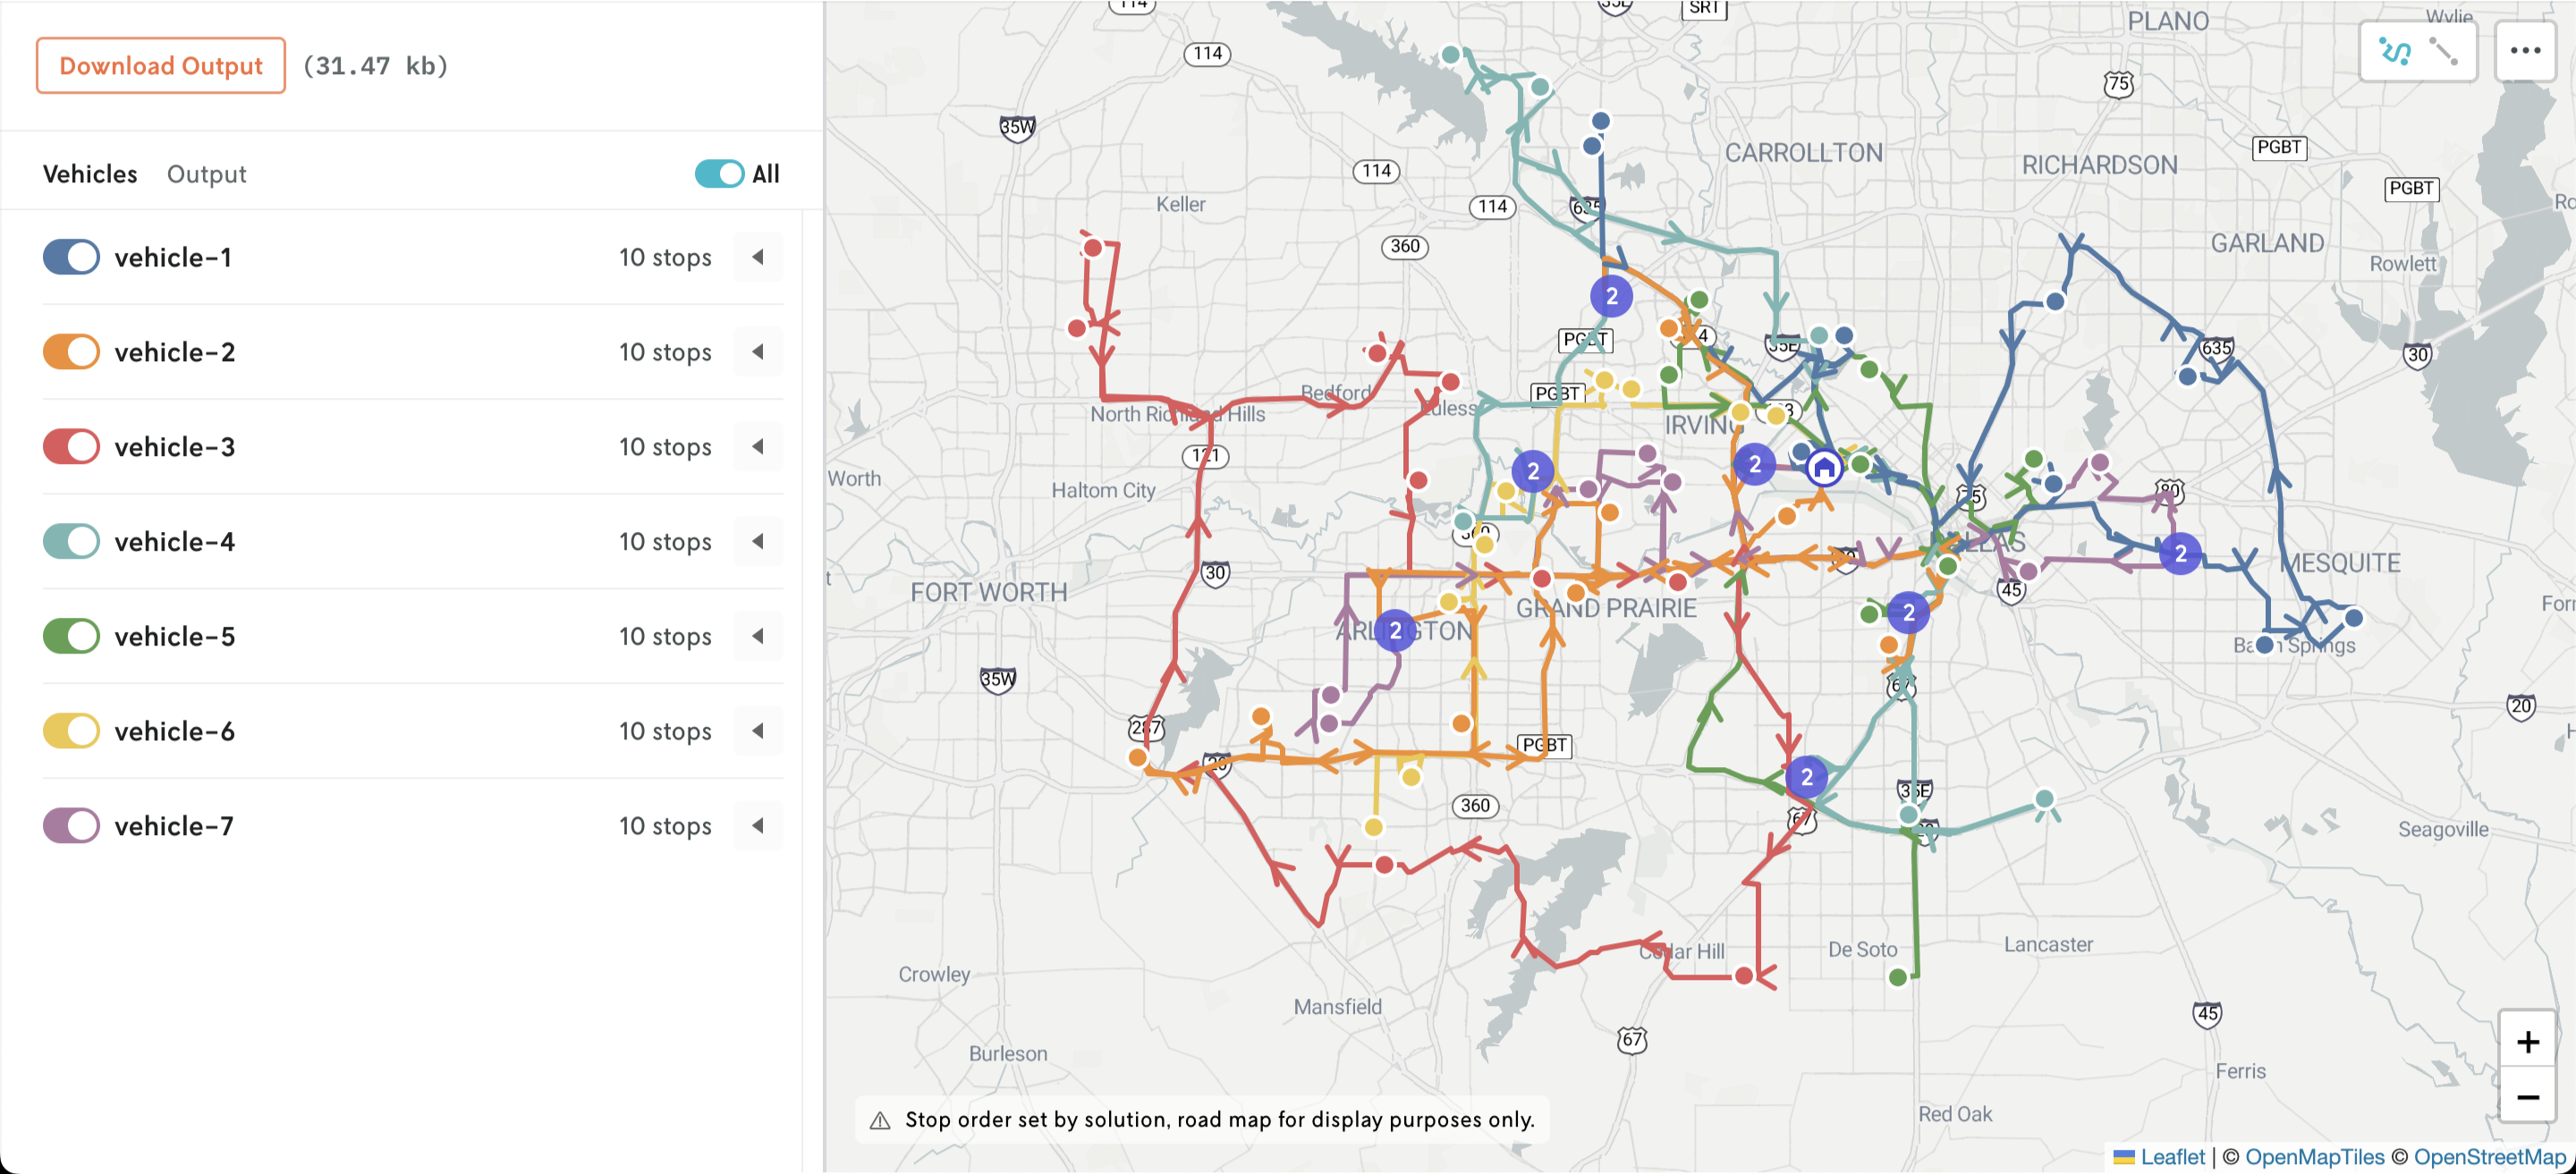
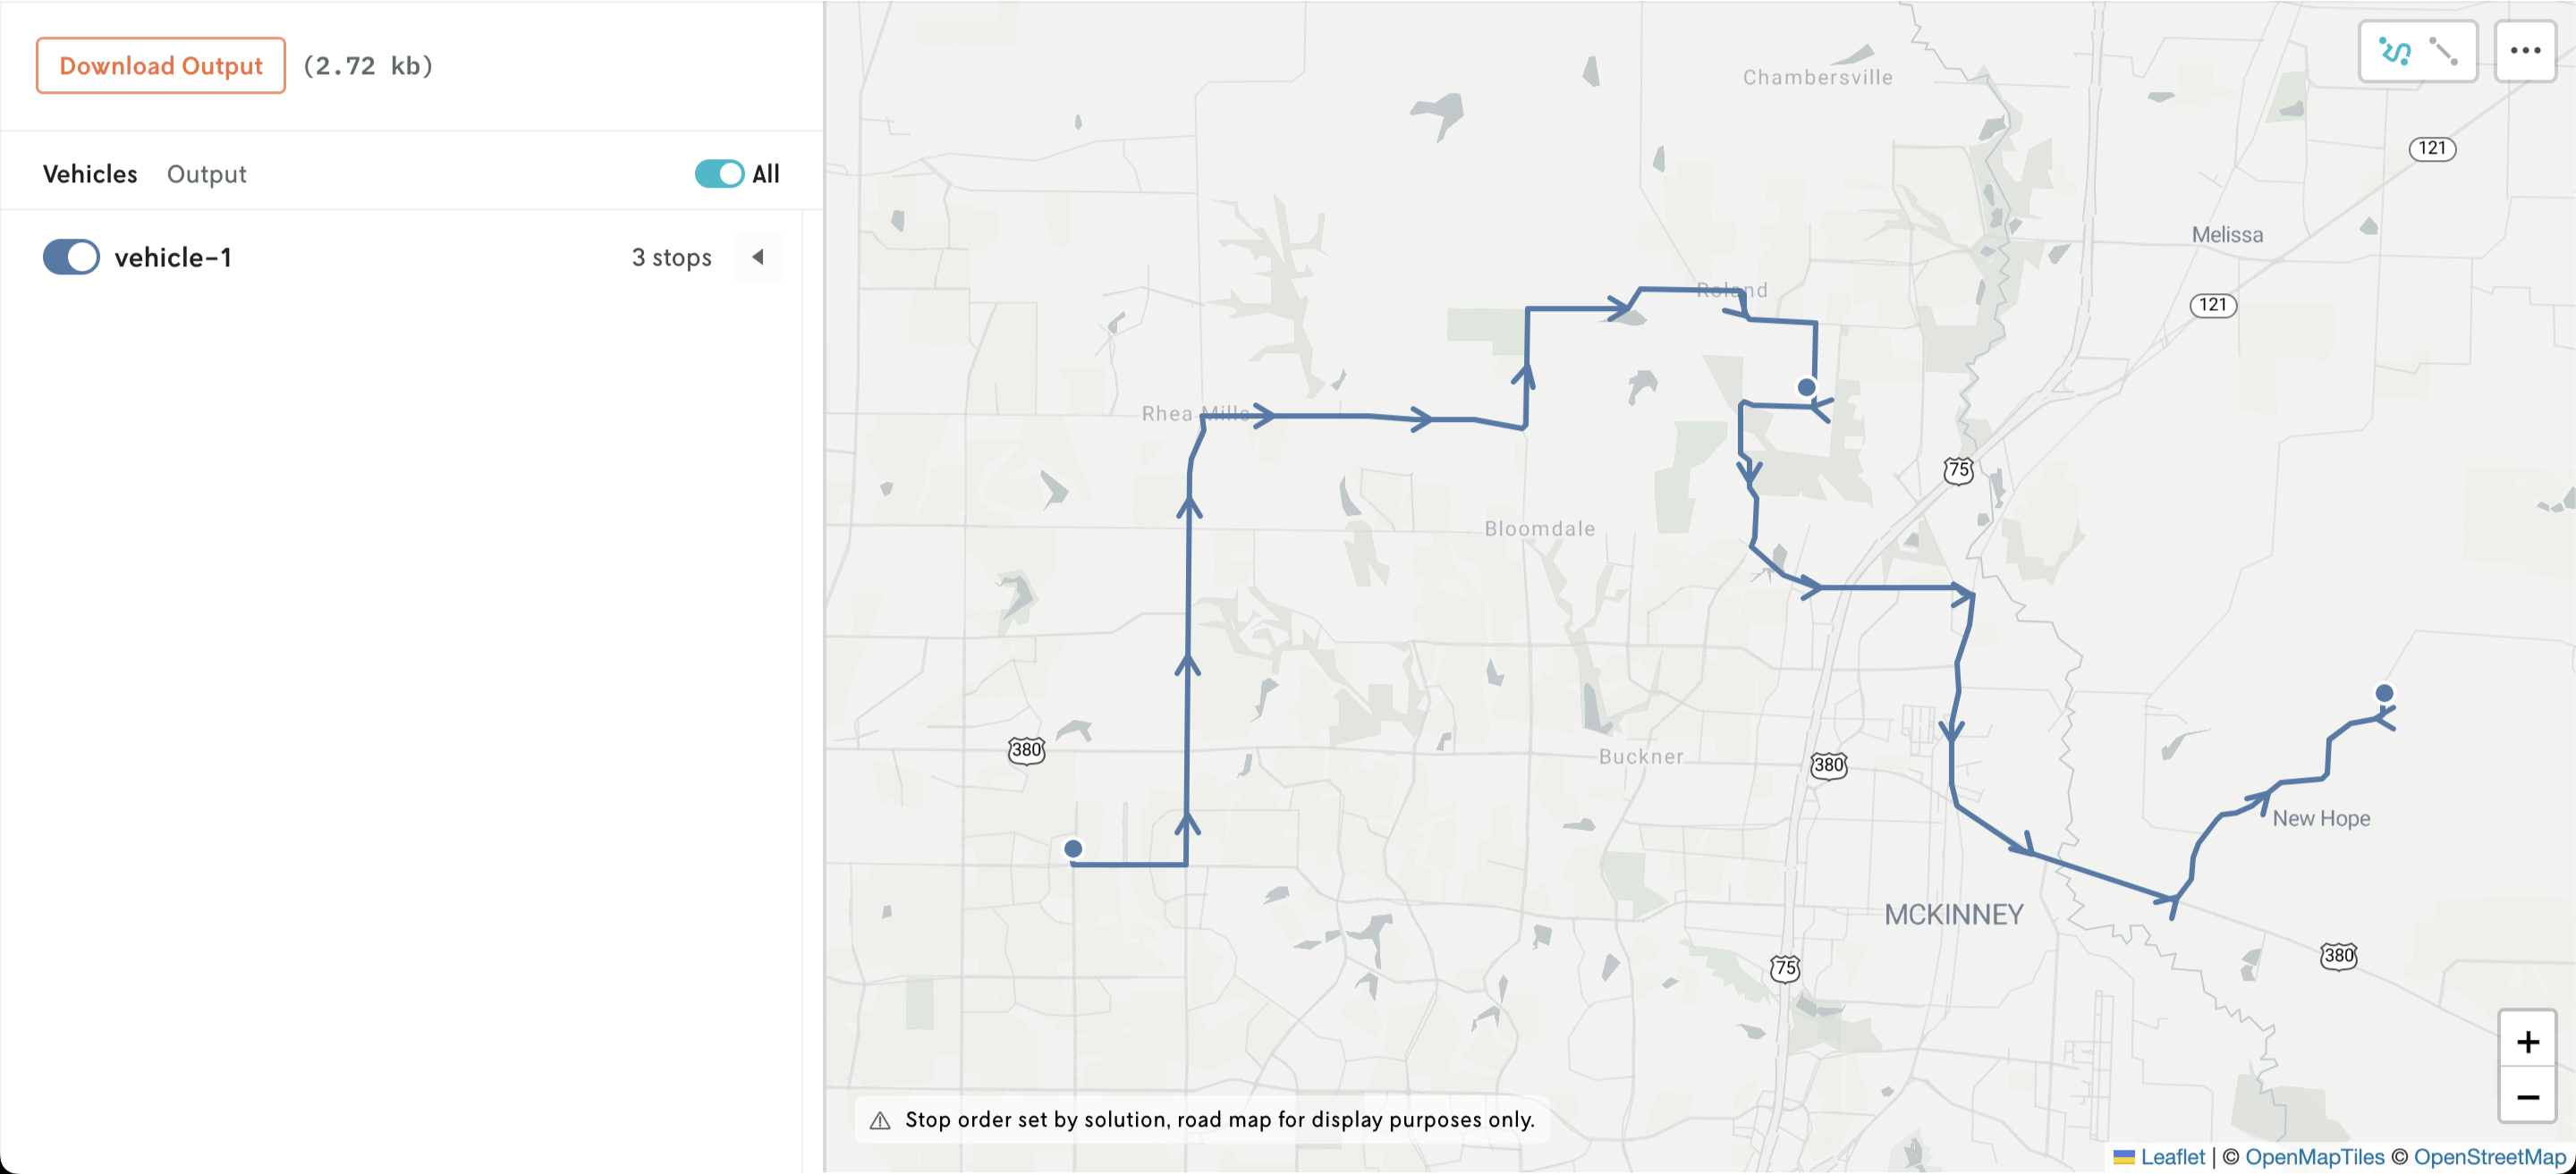
Vehicles (with and without routes)

The vehicles array holds an array of vehicle objects which must have the following minimum schema:

{
  "solutions": [
    {
      "unplanned": [...],
      "vehicles": [
        {
          "id": "vehicle-1",
          "route": [
            {
              "stop": {
                "id": "location-1",
                "location": {
                  "lon": -96.75038245222623,
                  "lat": 33.20580830033956
                }
              }
            },
            {
              "stop": {
                "id": "location-3",
                "location": {
                  "lon": -96.63613745932128,
                  "lat": 33.2659142720506
                }
              }
            },
            {
              "stop": {
                "id": "location-2",
                "location": {
                  "lon": -96.54613745932127,
                  "lat": 33.2259142720506
                }
              }
            }
          ]
        }
      ]
    }
  ]
}
Copy

Where each object in the route array represents a vehicle stop along the route, the order of objects in the array following the sequential order of stops in the vehicle’s route.

The sample code above would produce a visualization like this:
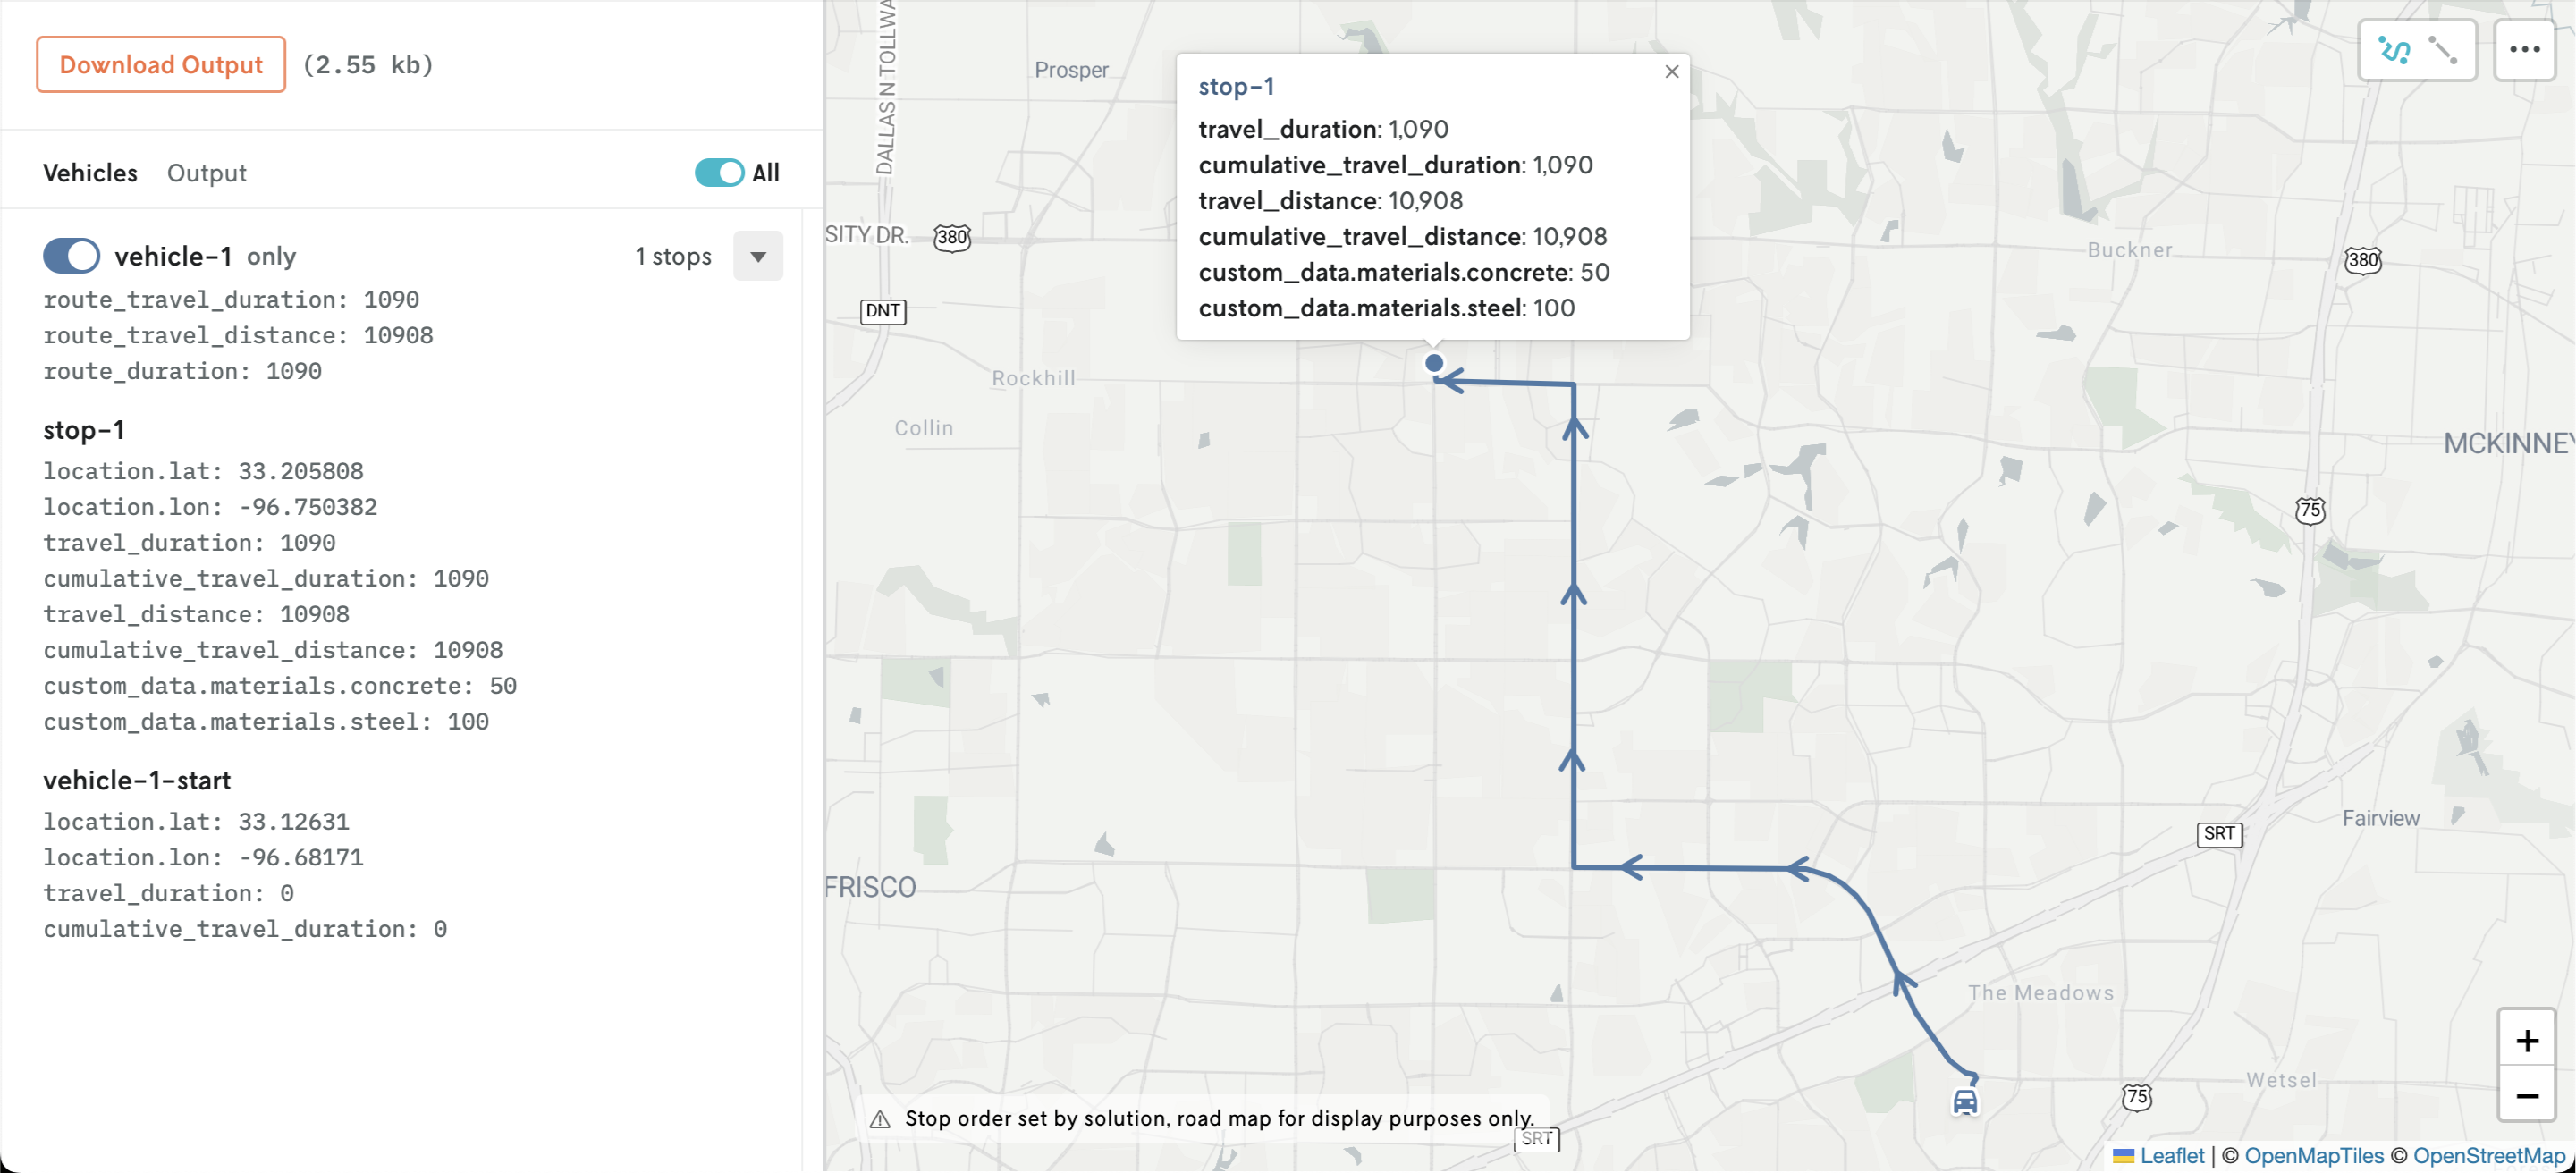
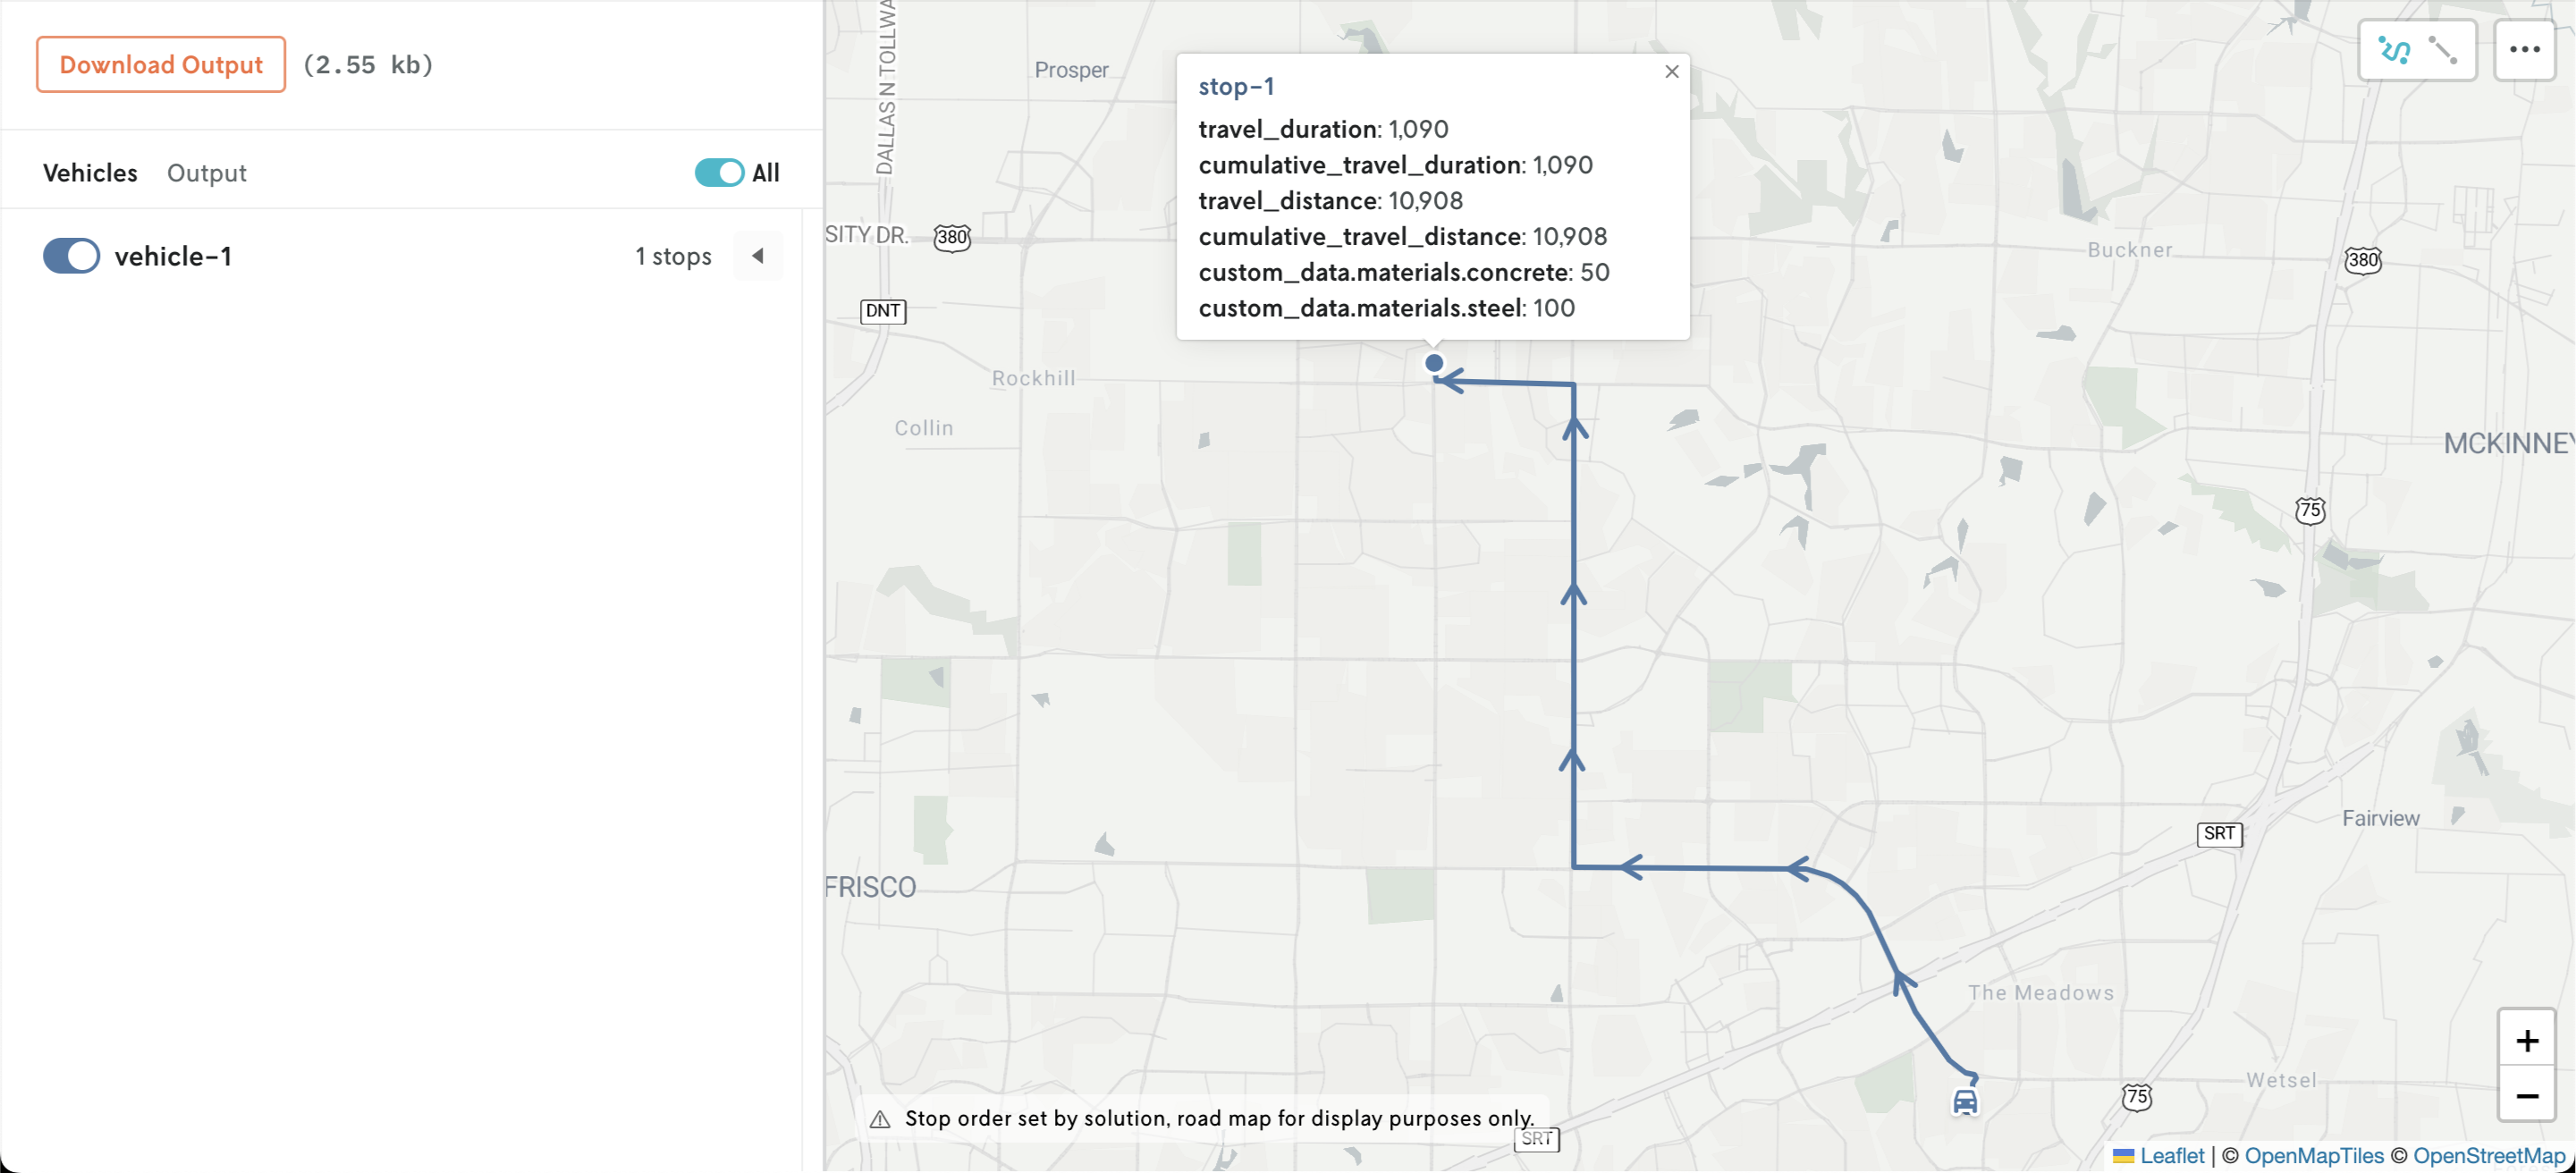
Screenshot of the three stops from the sample output plotted on a map with the point color changed to blue and a polyline tracing a sample road route showing their assigned route.

Other result data

Like the input view (with reference to the same sample data) any other data attached to the stop after it has been assigned to a route is displayed in a popup on the Result view as well:

Screenshot of a point on a map with an active popup showing the data applied to the stop after it was assigned a route.

The same information along with the latitude and longitude is also shown in the sidebar when you click the control arrow to expand a vehicle’s route details:

Screenshot showing the route details of a vehicle listed in a sidebar.

Page last updated

Go to on-page nav menu