Almost heaven, West Virginia
Blue Ridge Mountains, Shenandoah River
Life is old there, older than the trees
Younger than the mountains, growin' like a breeze

Country roads, take me home
To the place I belong
West Virginia, mountain mama
Take me home, country roads

-- Bill Danoff / John Denver / Taffy Nivert Danoff
Nextmv offers a comprehensive set of tools for solving vehicle routing problems with Nextroute. To get started with vehicle routing you have two alternatives:
- Nextmv routing app: work with all the features available via the input.
- Custom app: use one of the supported languages (like Go or Python) to work with a custom app, in addition to all the features available via the input.
After familiarizing yourself with the two alternatives, please continue with these next steps:
- Deploy your app to Nextmv Cloud.
- Run remotely on Nextmv Cloud.
- Test and experiment with your app.
- Learn how to work with defaults.
- Learn how to work with options.
- Explore the available features that come with vehicle routing.
- Understand why stops are unplanned from a solution with nextcheck.
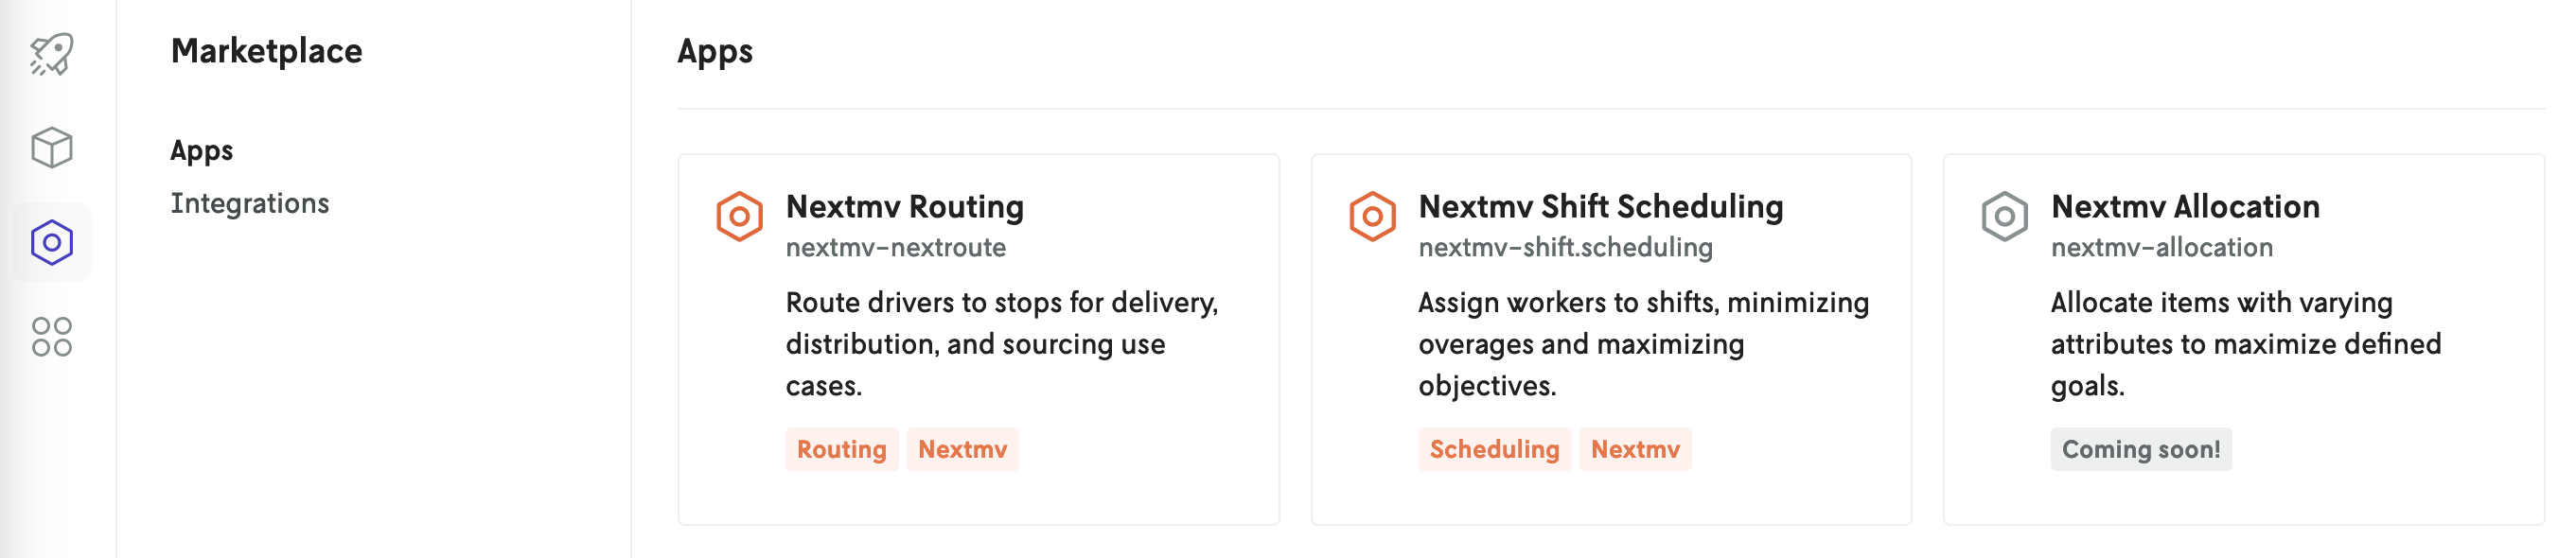
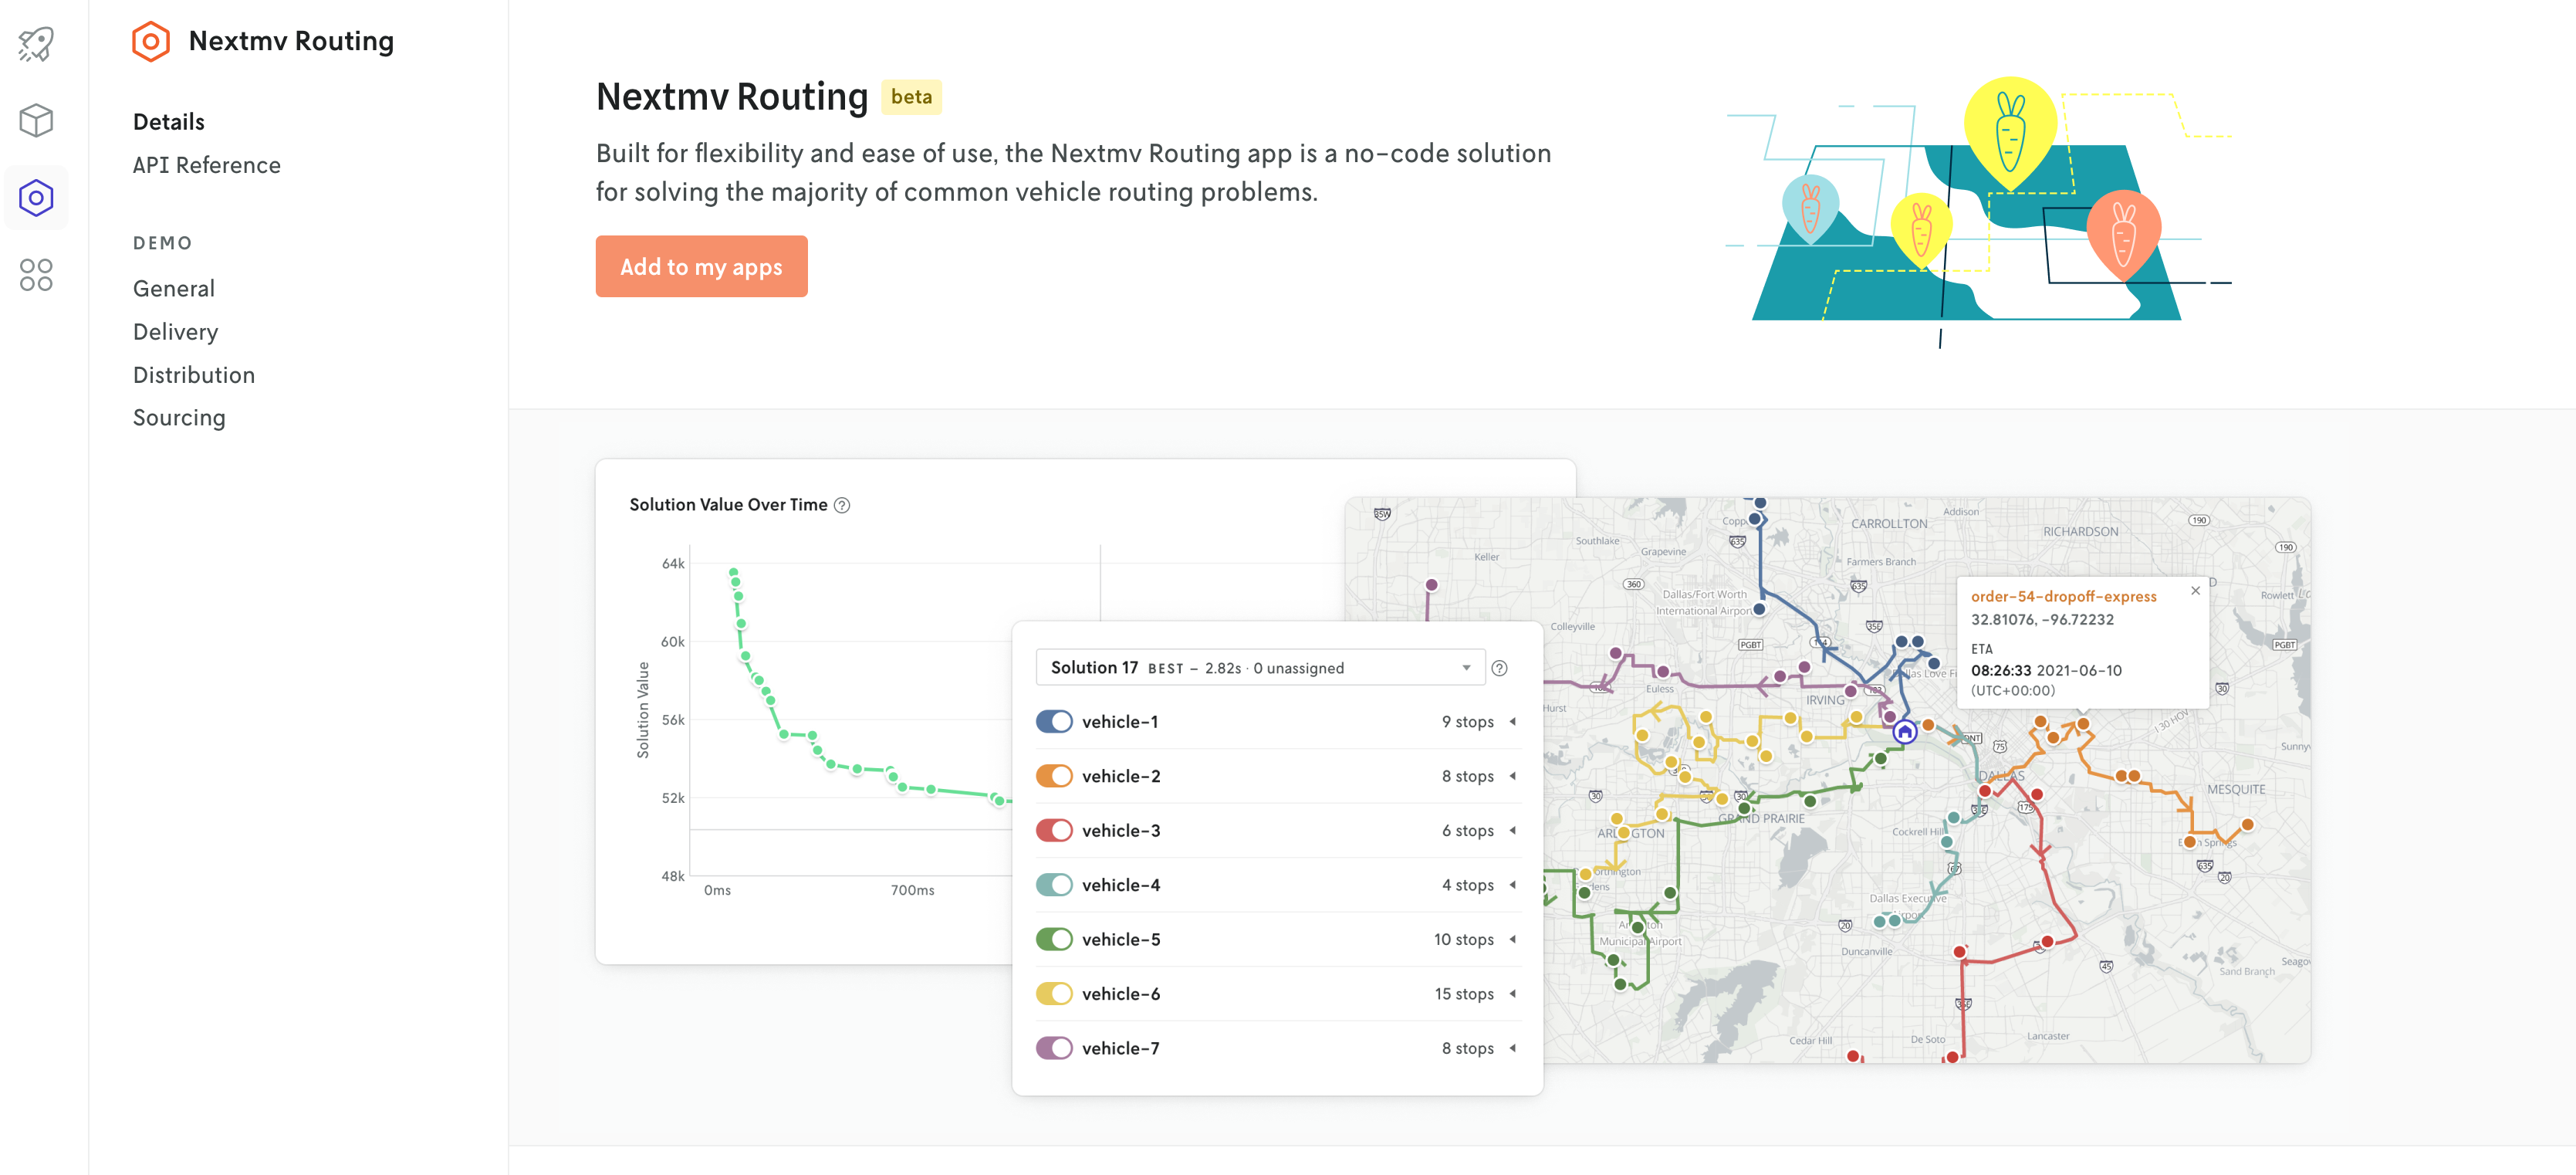
Nextmv routing app
The Nextmv routing app on marketplace provides a low-code entry point to the Nextmv platform and is the recommended starting point when solving a vehicle routing problem. It is a pre-built app with out-of-the-box functionality available now on Nextmv Cloud. (See the vehicle routing features page for a complete list of what's included).
Once you subscribe to the Nextmv routing app on marketplace, you can start running your model via the API.
The Nextmv routing app is based on the go-nextroute community app. This makes migrating from the marketplace app to a more custom app simple.
After subscribing to the marketplace app, you are ready to run.
Note, all requests must be authenticated with Bearer Authentication. Make sure your request has a header containing your Nextmv Cloud API key, as such:
- Key:
Authorization - Value:
Bearer <YOUR-API-KEY>
Use this endpoint to submit a run:
New application run.
Create new application run.
For the payload, use only the "input" key, and you can submit an object similar to this one, which follows the input schema:
{
  "defaults": {
    "vehicles": {
      "capacity": {
        "bunnies": 20,
        "rabbits": 10
      },
      "start_location": {
        "lat": 35.791729813680874,
        "lon": -78.7401685145487
      },
      "end_location": {
        "lat": 35.791729813680874,
        "lon": -78.7401685145487
      },
      "speed": 10
    },
    "stops": {
      "duration": 300,
      "quantity": {
        "bunnies": -1,
        "rabbits": -1
      },
      "unplanned_penalty": 200000,
      "target_arrival_time": "2023-01-01T10:00:00Z",
      "early_arrival_time_penalty": 1.5,
      "late_arrival_time_penalty": 1.5
    }
  },
  "stops": [
    {
      "id": "s1",
      "location": {
        "lon": -78.90919,
        "lat": 35.72389
      },
      "compatibility_attributes": ["premium"]
    },
    {
      "id": "s2",
      "location": {
        "lon": -78.813862,
        "lat": 35.75712
      },
      "compatibility_attributes": ["premium"]
    },
    {
      "id": "s3",
      "location": {
        "lon": -78.92996,
        "lat": 35.932795
      },
      "compatibility_attributes": ["premium"]
    },
    {
      "id": "s4",
      "location": {
        "lon": -78.505745,
        "lat": 35.77772
      },
      "compatibility_attributes": ["premium"]
    },
    {
      "id": "s5",
      "location": {
        "lon": -78.75084,
        "lat": 35.732995
      },
      "compatibility_attributes": ["premium"]
    },
    {
      "id": "s6",
      "location": {
        "lon": -78.788025,
        "lat": 35.813025
      },
      "compatibility_attributes": ["premium"]
    },
    {
      "id": "s7",
      "location": {
        "lon": -78.749391,
        "lat": 35.74261
      },
      "compatibility_attributes": ["premium"]
    },
    {
      "id": "s8",
      "location": {
        "lon": -78.94658,
        "lat": 36.039135
      },
      "compatibility_attributes": ["basic"]
    },
    {
      "id": "s9",
      "location": {
        "lon": -78.64972,
        "lat": 35.64796
      },
      "compatibility_attributes": ["basic"]
    },
    {
      "id": "s10",
      "location": {
        "lon": -78.747955,
        "lat": 35.672955
      },
      "compatibility_attributes": ["basic"]
    },
    {
      "id": "s11",
      "location": {
        "lon": -78.83403,
        "lat": 35.77013
      },
      "compatibility_attributes": ["basic"]
    },
    {
      "id": "s12",
      "location": {
        "lon": -78.864465,
        "lat": 35.782855
      },
      "compatibility_attributes": ["basic"]
    },
    {
      "id": "s13",
      "location": {
        "lon": -78.952142,
        "lat": 35.88029
      },
      "compatibility_attributes": ["basic"]
    },
    {
      "id": "s14",
      "location": {
        "lon": -78.52748,
        "lat": 35.961465
      },
      "compatibility_attributes": ["basic"]
    },
    {
      "id": "s15",
      "location": {
        "lon": -78.89832,
        "lat": 35.83202
      }
    },
    {
      "id": "s16",
      "location": {
        "lon": -78.63216,
        "lat": 35.83458
      }
    },
    {
      "id": "s17",
      "location": {
        "lon": -78.76063,
        "lat": 35.67337
      }
    },
    {
      "id": "s18",
      "location": {
        "lon": -78.911485,
        "lat": 36.009015
      }
    },
    {
      "id": "s19",
      "location": {
        "lon": -78.522705,
        "lat": 35.93663
      }
    },
    {
      "id": "s20",
      "location": {
        "lon": -78.995162,
        "lat": 35.97414
      }
    },
    {
      "id": "s21",
      "location": {
        "lon": -78.50509,
        "lat": 35.7606
      }
    },
    {
      "id": "s22",
      "location": {
        "lon": -78.828547,
        "lat": 35.962635
      },
      "precedes": ["s16", "s23"]
    },
    {
      "id": "s23",
      "location": {
        "lon": -78.60914,
        "lat": 35.84616
      },
      "start_time_window": [
        "2023-01-01T09:00:00-06:00",
        "2023-01-01T09:30:00-06:00"
      ]
    },
    {
      "id": "s24",
      "location": {
        "lon": -78.65521,
        "lat": 35.740605
      },
      "start_time_window": [
        "2023-01-01T09:00:00-06:00",
        "2023-01-01T09:30:00-06:00"
      ],
      "succeeds": "s25"
    },
    {
      "id": "s25",
      "location": {
        "lon": -78.92051,
        "lat": 35.887575
      },
      "start_time_window": [
        "2023-01-01T09:00:00-06:00",
        "2023-01-01T09:30:00-06:00"
      ],
      "precedes": "s26"
    },
    {
      "id": "s26",
      "location": {
        "lon": -78.84058,
        "lat": 35.823865
      },
      "start_time_window": [
        "2023-01-01T09:00:00-06:00",
        "2023-01-01T09:30:00-06:00"
      ]
    }
  ],
  "vehicles": [
    {
      "id": "vehicle-0",
      "start_time": "2023-01-01T06:00:00-06:00",
      "end_time": "2023-01-01T10:00:00-06:00",
      "activation_penalty": 4000,
      "compatibility_attributes": ["premium"]
    },
    {
      "id": "vehicle-1",
      "start_time": "2023-01-01T10:00:00-06:00",
      "end_time": "2023-01-01T16:00:00-06:00",
      "max_duration": 21000,
      "compatibility_attributes": ["basic"]
    }
  ]
}
You can also specify "options" in the payload, which will override the default options. All values must be a string. Visit the options section for more information. This is a sample of options that can be passed:
{
  "input": {},
  "options": {
    "solve.duration": "3s",
    "solve.iterations": "50",
    "model.constraints.disable.capacity": "true"
  }
}
Here is a curl command that summarizes the request:
curl -X 'POST' \
  'https://api.cloud.nextmv.io/v1/applications/{application_id}/runs?instance_id=latest' \
  -H 'accept: application/json' \
  -H 'Authorization: Bearer $API_KEY' \
  -H 'Content-Type: application/json' \
  -d '{
    "input": $INPUT,
    "options": $OPTIONS
  }'
After the run is submitted, you will obtain a run_id. To retrieve the results you can:
- Go to the
Runsof the app and look for therun_idin the table. Clicking on therun_idwill take you to the results page. - Use the endpoint below to get the results, using the
run_id. You should use polling to query for the results. When you poll, the.metadata.statusof the result will shown the run status. A status ofsucceededmeans the run is complete and the results are available.
Get run result.
Get the result of a run.
Here is a curl command that summarizes the request:
curl -sS -L -X GET \
  "https://api.cloud.nextmv.io/v1/applications/$APP_ID/runs/$RUN_ID" \
  -H "Content-Type: application/json" \
  -H "Authorization: Bearer $NEXTMV_API_KEY" | jq
After running, a JSON payload that follows the output schema, should have been returned with the solution, similar to this one:
{
"options": {
"check": {
"duration": 30000000000,
"verbosity": "off"
},
"format": {
"disable": {
"progression": true
}
},
"model": {
"constraints": {
"disable": {
"attributes": false,
"capacities": null,
"capacity": false,
"distance_limit": false,
"groups": false,
"maximum_duration": false,
"maximum_stops": false,
"maximum_wait_stop": false,
"maximum_wait_vehicle": false,
"mixing_items": false,
"precedence": false,
"start_time_windows": false,
"vehicle_end_time": false,
"vehicle_start_time": false
},
"enable": {
"cluster": false
}
},
"objectives": {
"capacities": "",
"cluster": 0,
"distance": 0,
"early_arrival_penalty": 1,
"late_arrival_penalty": 1,
"min_stops": 1,
"stop_balance": 0,
"travel_duration": 0,
"unplanned_penalty": 1,
"vehicle_activation_penalty": 1,
"vehicles_duration": 1
},
"properties": {
"disable": {
"duration_groups": false,
"durations": false,
"initial_solution": false,
"stop_duration_multipliers": false
},
"maximum_time_horizon": 15552000
},
"validate": {
"disable": {
"resources": false,
"start_time": false
},
"enable": {
"matrix": false,
"matrix_asymmetry_tolerance": 20
}
}
},
"solve": {
"duration": 10000000000,
"iterations": 50,
"parallel_runs": 1,
"plateau": {
"absolute_threshold": -1,
"delay": 0,
"duration": 0,
"iterations": 0,
"relative_threshold": 0
},
"run_deterministically": true,
"solver": {
"plan_group_size": {
"delta": 0,
"delta_after_iterations": 1000000000,
"max_value": 2,
"min_value": 2,
"snap_back_after_improvement": true,
"start_value": 2,
"zigzag": true
},
"unplan_units": {
"delta": 2,
"delta_after_iterations": 125,
"max_value": -1,
"min_value": 2,
"snap_back_after_improvement": true,
"start_value": 2,
"zigzag": true
},
"unplan_weights": "Vehicle:3,Island:1,Location:293"
},
"start_solutions": 1
}
},
"solutions": [
{
"objective": {
"name": "1 * vehicle_activation_penalty + 1 * vehicles_duration + 1 * unplanned_penalty + 1 * early_arrival_penalty + 1 * late_arrival_penalty",
"objectives": [
{
"base": 4000,
"factor": 1,
"name": "vehicle_activation_penalty",
"value": 4000
},
{
"base": 34394.3133084774,
"factor": 1,
"name": "vehicles_duration",
"value": 34394.3133084774
},
{
"base": 1400000,
"factor": 1,
"name": "unplanned_penalty",
"value": 1400000
},
{
"factor": 1,
"name": "early_arrival_penalty",
"value": 0
},
{
"base": 621271.1251366138,
"factor": 1,
"name": "late_arrival_penalty",
"value": 621271.1251366138
}
],
"value": 2059665.4384450912
},
"unplanned": [
{
"id": "s16",
"location": {
"lat": 35.83458,
"lon": -78.63216
}
},
{
"id": "s22",
"location": {
"lat": 35.962635,
"lon": -78.828547
}
},
{
"id": "s23",
"location": {
"lat": 35.84616,
"lon": -78.60914
}
},
{
"id": "s24",
"location": {
"lat": 35.740605,
"lon": -78.65521
}
},
{
"id": "s25",
"location": {
"lat": 35.887575,
"lon": -78.92051
}
},
{
"id": "s26",
"location": {
"lat": 35.823865,
"lon": -78.84058
}
},
{
"id": "s4",
"location": {
"lat": 35.77772,
"lon": -78.505745
}
}
],
"vehicles": [
{
"id": "vehicle-0",
"route": [
{
"arrival_time": "2023-01-01T06:00:00-06:00",
"cumulative_travel_duration": 0,
"end_time": "2023-01-01T06:00:00-06:00",
"start_time": "2023-01-01T06:00:00-06:00",
"stop": {
"id": "vehicle-0-start",
"location": {
"lat": 35.791729813680874,
"lon": -78.7401685145487
}
},
"travel_duration": 0
},
{
"arrival_time": "2023-01-01T06:09:12-06:00",
"cumulative_travel_distance": 5524,
"cumulative_travel_duration": 552,
"duration": 300,
"end_time": "2023-01-01T06:14:12-06:00",
"late_arrival_duration": 7752,
"start_time": "2023-01-01T06:09:12-06:00",
"stop": {
"id": "s7",
"location": {
"lat": 35.74261,
"lon": -78.749391
}
},
"target_arrival_time": "2023-01-01T04:00:00-06:00",
"travel_distance": 5524,
"travel_duration": 552
},
{
"arrival_time": "2023-01-01T06:28:29-06:00",
"cumulative_travel_distance": 14094,
"cumulative_travel_duration": 1409,
"duration": 300,
"end_time": "2023-01-01T06:33:29-06:00",
"late_arrival_duration": 8909,
"start_time": "2023-01-01T06:28:29-06:00",
"stop": {
"id": "s6",
"location": {
"lat": 35.813025,
"lon": -78.788025
}
},
"target_arrival_time": "2023-01-01T04:00:00-06:00",
"travel_distance": 8570,
"travel_duration": 857
},
{
"arrival_time": "2023-01-01T06:49:20-06:00",
"cumulative_travel_distance": 23604,
"cumulative_travel_duration": 2360,
"duration": 300,
"end_time": "2023-01-01T06:54:20-06:00",
"late_arrival_duration": 10160,
"start_time": "2023-01-01T06:49:20-06:00",
"stop": {
"id": "s5",
"location": {
"lat": 35.732995,
"lon": -78.75084
}
},
"target_arrival_time": "2023-01-01T04:00:00-06:00",
"travel_distance": 9510,
"travel_duration": 951
},
{
"arrival_time": "2023-01-01T07:05:29-06:00",
"cumulative_travel_distance": 30292,
"cumulative_travel_duration": 3029,
"duration": 300,
"end_time": "2023-01-01T07:10:29-06:00",
"late_arrival_duration": 11129,
"start_time": "2023-01-01T07:05:29-06:00",
"stop": {
"id": "s17",
"location": {
"lat": 35.67337,
"lon": -78.76063
}
},
"target_arrival_time": "2023-01-01T04:00:00-06:00",
"travel_distance": 6688,
"travel_duration": 668
},
{
"arrival_time": "2023-01-01T07:34:43-06:00",
"cumulative_travel_distance": 44835,
"cumulative_travel_duration": 4483,
"duration": 300,
"end_time": "2023-01-01T07:39:43-06:00",
"late_arrival_duration": 12883,
"start_time": "2023-01-01T07:34:43-06:00",
"stop": {
"id": "s1",
"location": {
"lat": 35.72389,
"lon": -78.90919
}
},
"target_arrival_time": "2023-01-01T04:00:00-06:00",
"travel_distance": 14543,
"travel_duration": 1454
},
{
"arrival_time": "2023-01-01T07:55:20-06:00",
"cumulative_travel_distance": 54198,
"cumulative_travel_duration": 5420,
"duration": 300,
"end_time": "2023-01-01T08:00:20-06:00",
"late_arrival_duration": 14120,
"start_time": "2023-01-01T07:55:20-06:00",
"stop": {
"id": "s2",
"location": {
"lat": 35.75712,
"lon": -78.813862
}
},
"target_arrival_time": "2023-01-01T04:00:00-06:00",
"travel_distance": 9363,
"travel_duration": 936
},
{
"arrival_time": "2023-01-01T08:19:08-06:00",
"cumulative_travel_distance": 65484,
"cumulative_travel_duration": 6548,
"duration": 300,
"end_time": "2023-01-01T08:24:08-06:00",
"late_arrival_duration": 15548,
"start_time": "2023-01-01T08:19:08-06:00",
"stop": {
"id": "s15",
"location": {
"lat": 35.83202,
"lon": -78.89832
}
},
"target_arrival_time": "2023-01-01T04:00:00-06:00",
"travel_distance": 11286,
"travel_duration": 1128
},
{
"arrival_time": "2023-01-01T08:43:25-06:00",
"cumulative_travel_distance": 77046,
"cumulative_travel_duration": 7705,
"duration": 300,
"end_time": "2023-01-01T08:48:25-06:00",
"late_arrival_duration": 17005,
"start_time": "2023-01-01T08:43:25-06:00",
"stop": {
"id": "s3",
"location": {
"lat": 35.932795,
"lon": -78.92996
}
},
"target_arrival_time": "2023-01-01T04:00:00-06:00",
"travel_distance": 11562,
"travel_duration": 1156
},
{
"arrival_time": "2023-01-01T09:02:48-06:00",
"cumulative_travel_distance": 85682,
"cumulative_travel_duration": 8568,
"duration": 300,
"end_time": "2023-01-01T09:07:48-06:00",
"late_arrival_duration": 18168,
"start_time": "2023-01-01T09:02:48-06:00",
"stop": {
"id": "s18",
"location": {
"lat": 36.009015,
"lon": -78.911485
}
},
"target_arrival_time": "2023-01-01T04:00:00-06:00",
"travel_distance": 8636,
"travel_duration": 863
},
{
"arrival_time": "2023-01-01T09:55:35-06:00",
"cumulative_travel_distance": 114350,
"cumulative_travel_duration": 11435,
"end_time": "2023-01-01T09:55:35-06:00",
"start_time": "2023-01-01T09:55:35-06:00",
"stop": {
"id": "vehicle-0-end",
"location": {
"lat": 35.791729813680874,
"lon": -78.7401685145487
}
},
"travel_distance": 28668,
"travel_duration": 2866
}
],
"route_duration": 14135,
"route_stops_duration": 2700,
"route_travel_distance": 114350,
"route_travel_duration": 11435
},
{
"id": "vehicle-1",
"route": [
{
"arrival_time": "2023-01-01T10:00:00-06:00",
"cumulative_travel_duration": 0,
"end_time": "2023-01-01T10:00:00-06:00",
"start_time": "2023-01-01T10:00:00-06:00",
"stop": {
"id": "vehicle-1-start",
"location": {
"lat": 35.791729813680874,
"lon": -78.7401685145487
}
},
"travel_duration": 0
},
{
"arrival_time": "2023-01-01T10:14:40-06:00",
"cumulative_travel_distance": 8801,
"cumulative_travel_duration": 880,
"duration": 300,
"end_time": "2023-01-01T10:19:40-06:00",
"late_arrival_duration": 22480,
"start_time": "2023-01-01T10:14:40-06:00",
"stop": {
"id": "s11",
"location": {
"lat": 35.77013,
"lon": -78.83403
}
},
"target_arrival_time": "2023-01-01T04:00:00-06:00",
"travel_distance": 8801,
"travel_duration": 880
},
{
"arrival_time": "2023-01-01T10:24:48-06:00",
"cumulative_travel_distance": 11889,
"cumulative_travel_duration": 1188,
"duration": 300,
"end_time": "2023-01-01T10:29:48-06:00",
"late_arrival_duration": 23088,
"start_time": "2023-01-01T10:24:48-06:00",
"stop": {
"id": "s12",
"location": {
"lat": 35.782855,
"lon": -78.864465
}
},
"target_arrival_time": "2023-01-01T04:00:00-06:00",
"travel_distance": 3088,
"travel_duration": 308
},
{
"arrival_time": "2023-01-01T10:56:41-06:00",
"cumulative_travel_distance": 28011,
"cumulative_travel_duration": 2801,
"duration": 300,
"end_time": "2023-01-01T11:01:41-06:00",
"late_arrival_duration": 25001,
"start_time": "2023-01-01T10:56:41-06:00",
"stop": {
"id": "s10",
"location": {
"lat": 35.672955,
"lon": -78.747955
}
},
"target_arrival_time": "2023-01-01T04:00:00-06:00",
"travel_distance": 16122,
"travel_duration": 1612
},
{
"arrival_time": "2023-01-01T11:17:11-06:00",
"cumulative_travel_distance": 37310,
"cumulative_travel_duration": 3731,
"duration": 300,
"end_time": "2023-01-01T11:22:11-06:00",
"late_arrival_duration": 26231,
"start_time": "2023-01-01T11:17:11-06:00",
"stop": {
"id": "s9",
"location": {
"lat": 35.64796,
"lon": -78.64972
}
},
"target_arrival_time": "2023-01-01T04:00:00-06:00",
"travel_distance": 9299,
"travel_duration": 929
},
{
"arrival_time": "2023-01-01T11:52:20-06:00",
"cumulative_travel_distance": 55404,
"cumulative_travel_duration": 5540,
"duration": 300,
"end_time": "2023-01-01T11:57:20-06:00",
"late_arrival_duration": 28340,
"start_time": "2023-01-01T11:52:20-06:00",
"stop": {
"id": "s21",
"location": {
"lat": 35.7606,
"lon": -78.50509
}
},
"target_arrival_time": "2023-01-01T04:00:00-06:00",
"travel_distance": 18094,
"travel_duration": 1809
},
{
"arrival_time": "2023-01-01T12:34:43-06:00",
"cumulative_travel_distance": 77830,
"cumulative_travel_duration": 7783,
"duration": 300,
"end_time": "2023-01-01T12:39:43-06:00",
"late_arrival_duration": 30883,
"start_time": "2023-01-01T12:34:43-06:00",
"stop": {
"id": "s14",
"location": {
"lat": 35.961465,
"lon": -78.52748
}
},
"target_arrival_time": "2023-01-01T04:00:00-06:00",
"travel_distance": 22426,
"travel_duration": 2242
},
{
"arrival_time": "2023-01-01T12:44:22-06:00",
"cumulative_travel_distance": 80624,
"cumulative_travel_duration": 8062,
"duration": 300,
"end_time": "2023-01-01T12:49:22-06:00",
"late_arrival_duration": 31462,
"start_time": "2023-01-01T12:44:22-06:00",
"stop": {
"id": "s19",
"location": {
"lat": 35.93663,
"lon": -78.522705
}
},
"target_arrival_time": "2023-01-01T04:00:00-06:00",
"travel_distance": 2794,
"travel_duration": 279
},
{
"arrival_time": "2023-01-01T13:54:40-06:00",
"cumulative_travel_distance": 119804,
"cumulative_travel_duration": 11980,
"duration": 300,
"end_time": "2023-01-01T13:59:40-06:00",
"late_arrival_duration": 35680,
"start_time": "2023-01-01T13:54:40-06:00",
"stop": {
"id": "s13",
"location": {
"lat": 35.88029,
"lon": -78.952142
}
},
"target_arrival_time": "2023-01-01T04:00:00-06:00",
"travel_distance": 39180,
"travel_duration": 3918
},
{
"arrival_time": "2023-01-01T14:18:14-06:00",
"cumulative_travel_distance": 130935,
"cumulative_travel_duration": 13094,
"duration": 300,
"end_time": "2023-01-01T14:23:14-06:00",
"late_arrival_duration": 37094,
"start_time": "2023-01-01T14:18:14-06:00",
"stop": {
"id": "s20",
"location": {
"lat": 35.97414,
"lon": -78.995162
}
},
"target_arrival_time": "2023-01-01T04:00:00-06:00",
"travel_distance": 11131,
"travel_duration": 1113
},
{
"arrival_time": "2023-01-01T14:37:18-06:00",
"cumulative_travel_distance": 139380,
"cumulative_travel_duration": 13938,
"duration": 300,
"end_time": "2023-01-01T14:42:18-06:00",
"late_arrival_duration": 38238,
"start_time": "2023-01-01T14:37:18-06:00",
"stop": {
"id": "s8",
"location": {
"lat": 36.039135,
"lon": -78.94658
}
},
"target_arrival_time": "2023-01-01T04:00:00-06:00",
"travel_distance": 8445,
"travel_duration": 844
},
{
"arrival_time": "2023-01-01T15:37:38-06:00",
"cumulative_travel_distance": 172581,
"cumulative_travel_duration": 17258,
"end_time": "2023-01-01T15:37:38-06:00",
"start_time": "2023-01-01T15:37:38-06:00",
"stop": {
"id": "vehicle-1-end",
"location": {
"lat": 35.791729813680874,
"lon": -78.7401685145487
}
},
"travel_distance": 33201,
"travel_duration": 3320
}
],
"route_duration": 20258,
"route_stops_duration": 3000,
"route_travel_distance": 172581,
"route_travel_duration": 17258
}
]
}
],
"statistics": {
"result": {
"custom": {
"activated_vehicles": 2,
"max_duration": 0.123,
"max_stops_in_vehicle": 10,
"max_travel_duration": 0.123,
"min_duration": 0.123,
"min_stops_in_vehicle": 9,
"min_travel_duration": 0.123,
"unplanned_stops": 7
},
"duration": 0.123,
"value": 0.123
},
"run": {
"duration": 0.123,
"iterations": 50
},
"schema": "v1"
},
"version": {
"sdk": "VERSION"
}
}
🎉 🎉 🎉 🎉 🎉 🎉 🎉 🎉 🎉 🎉 🎉 🎉
You are all set to keep exploring! Here are the next steps to continue your journey:
- Run remotely on Nextmv Cloud.
- Test and experiment with your app.
- Learn how to work with defaults.
- Learn how to work with options.
- Explore the available features that come with vehicle routing.
Custom app
If you require a custom constraint or value function (beyond those provided out-of-the-box with the Nextmv routing app on marketplace) or would like to leverage the experimentation framework, then you can work with Nextroute directly, in the following supported languages:
- Go
- Python
The best way to get started is through a community app. You have two options:
Clone the corresponding app using the Nextmv CLI. Make sure that you have it correctly installed.
Go to the GitHub repository and look at the source there.
- Using Go: go-nextroute.
- Using Python: python-nextroute.
After you have the app cloned locally, you can run it. Start by changing directories into the corresponding folder.
You should see the input.json file, which follows the input schema.
{
  "defaults": {
    "vehicles": {
      "capacity": {
        "bunnies": 20,
        "rabbits": 10
      },
      "start_location": {
        "lat": 35.791729813680874,
        "lon": -78.7401685145487
      },
      "end_location": {
        "lat": 35.791729813680874,
        "lon": -78.7401685145487
      },
      "speed": 10
    },
    "stops": {
      "duration": 300,
      "quantity": {
        "bunnies": -1,
        "rabbits": -1
      },
      "unplanned_penalty": 200000,
      "target_arrival_time": "2023-01-01T10:00:00Z",
      "early_arrival_time_penalty": 1.5,
      "late_arrival_time_penalty": 1.5
    }
  },
  "stops": [
    {
      "id": "s1",
      "location": {
        "lon": -78.90919,
        "lat": 35.72389
      },
      "compatibility_attributes": ["premium"]
    },
    {
      "id": "s2",
      "location": {
        "lon": -78.813862,
        "lat": 35.75712
      },
      "compatibility_attributes": ["premium"]
    },
    {
      "id": "s3",
      "location": {
        "lon": -78.92996,
        "lat": 35.932795
      },
      "compatibility_attributes": ["premium"]
    },
    {
      "id": "s4",
      "location": {
        "lon": -78.505745,
        "lat": 35.77772
      },
      "compatibility_attributes": ["premium"]
    },
    {
      "id": "s5",
      "location": {
        "lon": -78.75084,
        "lat": 35.732995
      },
      "compatibility_attributes": ["premium"]
    },
    {
      "id": "s6",
      "location": {
        "lon": -78.788025,
        "lat": 35.813025
      },
      "compatibility_attributes": ["premium"]
    },
    {
      "id": "s7",
      "location": {
        "lon": -78.749391,
        "lat": 35.74261
      },
      "compatibility_attributes": ["premium"]
    },
    {
      "id": "s8",
      "location": {
        "lon": -78.94658,
        "lat": 36.039135
      },
      "compatibility_attributes": ["basic"]
    },
    {
      "id": "s9",
      "location": {
        "lon": -78.64972,
        "lat": 35.64796
      },
      "compatibility_attributes": ["basic"]
    },
    {
      "id": "s10",
      "location": {
        "lon": -78.747955,
        "lat": 35.672955
      },
      "compatibility_attributes": ["basic"]
    },
    {
      "id": "s11",
      "location": {
        "lon": -78.83403,
        "lat": 35.77013
      },
      "compatibility_attributes": ["basic"]
    },
    {
      "id": "s12",
      "location": {
        "lon": -78.864465,
        "lat": 35.782855
      },
      "compatibility_attributes": ["basic"]
    },
    {
      "id": "s13",
      "location": {
        "lon": -78.952142,
        "lat": 35.88029
      },
      "compatibility_attributes": ["basic"]
    },
    {
      "id": "s14",
      "location": {
        "lon": -78.52748,
        "lat": 35.961465
      },
      "compatibility_attributes": ["basic"]
    },
    {
      "id": "s15",
      "location": {
        "lon": -78.89832,
        "lat": 35.83202
      }
    },
    {
      "id": "s16",
      "location": {
        "lon": -78.63216,
        "lat": 35.83458
      }
    },
    {
      "id": "s17",
      "location": {
        "lon": -78.76063,
        "lat": 35.67337
      }
    },
    {
      "id": "s18",
      "location": {
        "lon": -78.911485,
        "lat": 36.009015
      }
    },
    {
      "id": "s19",
      "location": {
        "lon": -78.522705,
        "lat": 35.93663
      }
    },
    {
      "id": "s20",
      "location": {
        "lon": -78.995162,
        "lat": 35.97414
      }
    },
    {
      "id": "s21",
      "location": {
        "lon": -78.50509,
        "lat": 35.7606
      }
    },
    {
      "id": "s22",
      "location": {
        "lon": -78.828547,
        "lat": 35.962635
      },
      "precedes": ["s16", "s23"]
    },
    {
      "id": "s23",
      "location": {
        "lon": -78.60914,
        "lat": 35.84616
      },
      "start_time_window": [
        "2023-01-01T09:00:00-06:00",
        "2023-01-01T09:30:00-06:00"
      ]
    },
    {
      "id": "s24",
      "location": {
        "lon": -78.65521,
        "lat": 35.740605
      },
      "start_time_window": [
        "2023-01-01T09:00:00-06:00",
        "2023-01-01T09:30:00-06:00"
      ],
      "succeeds": "s25"
    },
    {
      "id": "s25",
      "location": {
        "lon": -78.92051,
        "lat": 35.887575
      },
      "start_time_window": [
        "2023-01-01T09:00:00-06:00",
        "2023-01-01T09:30:00-06:00"
      ],
      "precedes": "s26"
    },
    {
      "id": "s26",
      "location": {
        "lon": -78.84058,
        "lat": 35.823865
      },
      "start_time_window": [
        "2023-01-01T09:00:00-06:00",
        "2023-01-01T09:30:00-06:00"
      ]
    }
  ],
  "vehicles": [
    {
      "id": "vehicle-0",
      "start_time": "2023-01-01T06:00:00-06:00",
      "end_time": "2023-01-01T10:00:00-06:00",
      "activation_penalty": 4000,
      "compatibility_attributes": ["premium"]
    },
    {
      "id": "vehicle-1",
      "start_time": "2023-01-01T10:00:00-06:00",
      "end_time": "2023-01-01T16:00:00-06:00",
      "max_duration": 21000,
      "compatibility_attributes": ["basic"]
    }
  ]
}
Depending on the language of choice, the main file contains the main code to solve a Vehicle Routing Problem.
// Package main holds the implementation for the app.
package main

import (
	"context"
	"log"

	"github.com/nextmv-io/nextroute"
	"github.com/nextmv-io/nextroute/check"
	"github.com/nextmv-io/nextroute/factory"
	"github.com/nextmv-io/nextroute/schema"
	"github.com/nextmv-io/sdk/run"
	runSchema "github.com/nextmv-io/sdk/run/schema"
)

func main() {
	runner := run.CLI(solver)
	err := runner.Run(context.Background())
	if err != nil {
		log.Fatal(err)
	}
}

type options struct {
	Model  factory.Options                `json:"model,omitempty"`
	Solve  nextroute.ParallelSolveOptions `json:"solve,omitempty"`
	Format nextroute.FormatOptions        `json:"format,omitempty"`
	Check  check.Options                  `json:"check,omitempty"`
}

func solver(
	ctx context.Context,
	input schema.Input,
	options options,
) (runSchema.Output, error) {
	model, err := factory.NewModel(input, options.Model)
	if err != nil {
		return runSchema.Output{}, err
	}

	solver, err := nextroute.NewParallelSolver(model)
	if err != nil {
		return runSchema.Output{}, err
	}

	solutions, err := solver.Solve(ctx, options.Solve)
	if err != nil {
		return runSchema.Output{}, err
	}

	last, err := solutions.Last()
	if err != nil {
		return runSchema.Output{}, err
	}

	output, err := check.Format(
		ctx,
		options,
		options.Check,
		solver,
		last,
	)
	if err != nil {
		return runSchema.Output{}, err
	}
	output.Statistics.Result.Custom = factory.DefaultCustomResultStatistics(last)

	return output, nil
}
Run the code, specifying the file to be used as input, and the file to be used as output, along with other options.
After running, an output.json file, that follows the output schema, should have been created with the solution, similar to this one:
{
"options": {
"check": {
"duration": 30000000000,
"verbosity": "off"
},
"format": {
"disable": {
"progression": true
}
},
"model": {
"constraints": {
"disable": {
"attributes": false,
"capacities": null,
"capacity": false,
"distance_limit": false,
"groups": false,
"maximum_duration": false,
"maximum_stops": false,
"maximum_wait_stop": false,
"maximum_wait_vehicle": false,
"mixing_items": false,
"precedence": false,
"start_time_windows": false,
"vehicle_end_time": false,
"vehicle_start_time": false
},
"enable": {
"cluster": false
}
},
"objectives": {
"capacities": "",
"cluster": 0,
"distance": 0,
"early_arrival_penalty": 1,
"late_arrival_penalty": 1,
"min_stops": 1,
"stop_balance": 0,
"travel_duration": 0,
"unplanned_penalty": 1,
"vehicle_activation_penalty": 1,
"vehicles_duration": 1
},
"properties": {
"disable": {
"duration_groups": false,
"durations": false,
"initial_solution": false,
"stop_duration_multipliers": false
},
"maximum_time_horizon": 15552000
},
"validate": {
"disable": {
"resources": false,
"start_time": false
},
"enable": {
"matrix": false,
"matrix_asymmetry_tolerance": 20
}
}
},
"solve": {
"duration": 10000000000,
"iterations": 50,
"parallel_runs": 1,
"plateau": {
"absolute_threshold": -1,
"delay": 0,
"duration": 0,
"iterations": 0,
"relative_threshold": 0
},
"run_deterministically": true,
"solver": {
"plan_group_size": {
"delta": 0,
"delta_after_iterations": 1000000000,
"max_value": 2,
"min_value": 2,
"snap_back_after_improvement": true,
"start_value": 2,
"zigzag": true
},
"unplan_units": {
"delta": 2,
"delta_after_iterations": 125,
"max_value": -1,
"min_value": 2,
"snap_back_after_improvement": true,
"start_value": 2,
"zigzag": true
},
"unplan_weights": "Vehicle:3,Island:1,Location:293"
},
"start_solutions": 1
}
},
"solutions": [
{
"objective": {
"name": "1 * vehicle_activation_penalty + 1 * vehicles_duration + 1 * unplanned_penalty + 1 * early_arrival_penalty + 1 * late_arrival_penalty",
"objectives": [
{
"base": 4000,
"factor": 1,
"name": "vehicle_activation_penalty",
"value": 4000
},
{
"base": 34394.3133084774,
"factor": 1,
"name": "vehicles_duration",
"value": 34394.3133084774
},
{
"base": 1400000,
"factor": 1,
"name": "unplanned_penalty",
"value": 1400000
},
{
"factor": 1,
"name": "early_arrival_penalty",
"value": 0
},
{
"base": 621271.1251366138,
"factor": 1,
"name": "late_arrival_penalty",
"value": 621271.1251366138
}
],
"value": 2059665.4384450912
},
"unplanned": [
{
"id": "s16",
"location": {
"lat": 35.83458,
"lon": -78.63216
}
},
{
"id": "s22",
"location": {
"lat": 35.962635,
"lon": -78.828547
}
},
{
"id": "s23",
"location": {
"lat": 35.84616,
"lon": -78.60914
}
},
{
"id": "s24",
"location": {
"lat": 35.740605,
"lon": -78.65521
}
},
{
"id": "s25",
"location": {
"lat": 35.887575,
"lon": -78.92051
}
},
{
"id": "s26",
"location": {
"lat": 35.823865,
"lon": -78.84058
}
},
{
"id": "s4",
"location": {
"lat": 35.77772,
"lon": -78.505745
}
}
],
"vehicles": [
{
"id": "vehicle-0",
"route": [
{
"arrival_time": "2023-01-01T06:00:00-06:00",
"cumulative_travel_duration": 0,
"end_time": "2023-01-01T06:00:00-06:00",
"start_time": "2023-01-01T06:00:00-06:00",
"stop": {
"id": "vehicle-0-start",
"location": {
"lat": 35.791729813680874,
"lon": -78.7401685145487
}
},
"travel_duration": 0
},
{
"arrival_time": "2023-01-01T06:09:12-06:00",
"cumulative_travel_distance": 5524,
"cumulative_travel_duration": 552,
"duration": 300,
"end_time": "2023-01-01T06:14:12-06:00",
"late_arrival_duration": 7752,
"start_time": "2023-01-01T06:09:12-06:00",
"stop": {
"id": "s7",
"location": {
"lat": 35.74261,
"lon": -78.749391
}
},
"target_arrival_time": "2023-01-01T04:00:00-06:00",
"travel_distance": 5524,
"travel_duration": 552
},
{
"arrival_time": "2023-01-01T06:28:29-06:00",
"cumulative_travel_distance": 14094,
"cumulative_travel_duration": 1409,
"duration": 300,
"end_time": "2023-01-01T06:33:29-06:00",
"late_arrival_duration": 8909,
"start_time": "2023-01-01T06:28:29-06:00",
"stop": {
"id": "s6",
"location": {
"lat": 35.813025,
"lon": -78.788025
}
},
"target_arrival_time": "2023-01-01T04:00:00-06:00",
"travel_distance": 8570,
"travel_duration": 857
},
{
"arrival_time": "2023-01-01T06:49:20-06:00",
"cumulative_travel_distance": 23604,
"cumulative_travel_duration": 2360,
"duration": 300,
"end_time": "2023-01-01T06:54:20-06:00",
"late_arrival_duration": 10160,
"start_time": "2023-01-01T06:49:20-06:00",
"stop": {
"id": "s5",
"location": {
"lat": 35.732995,
"lon": -78.75084
}
},
"target_arrival_time": "2023-01-01T04:00:00-06:00",
"travel_distance": 9510,
"travel_duration": 951
},
{
"arrival_time": "2023-01-01T07:05:29-06:00",
"cumulative_travel_distance": 30292,
"cumulative_travel_duration": 3029,
"duration": 300,
"end_time": "2023-01-01T07:10:29-06:00",
"late_arrival_duration": 11129,
"start_time": "2023-01-01T07:05:29-06:00",
"stop": {
"id": "s17",
"location": {
"lat": 35.67337,
"lon": -78.76063
}
},
"target_arrival_time": "2023-01-01T04:00:00-06:00",
"travel_distance": 6688,
"travel_duration": 668
},
{
"arrival_time": "2023-01-01T07:34:43-06:00",
"cumulative_travel_distance": 44835,
"cumulative_travel_duration": 4483,
"duration": 300,
"end_time": "2023-01-01T07:39:43-06:00",
"late_arrival_duration": 12883,
"start_time": "2023-01-01T07:34:43-06:00",
"stop": {
"id": "s1",
"location": {
"lat": 35.72389,
"lon": -78.90919
}
},
"target_arrival_time": "2023-01-01T04:00:00-06:00",
"travel_distance": 14543,
"travel_duration": 1454
},
{
"arrival_time": "2023-01-01T07:55:20-06:00",
"cumulative_travel_distance": 54198,
"cumulative_travel_duration": 5420,
"duration": 300,
"end_time": "2023-01-01T08:00:20-06:00",
"late_arrival_duration": 14120,
"start_time": "2023-01-01T07:55:20-06:00",
"stop": {
"id": "s2",
"location": {
"lat": 35.75712,
"lon": -78.813862
}
},
"target_arrival_time": "2023-01-01T04:00:00-06:00",
"travel_distance": 9363,
"travel_duration": 936
},
{
"arrival_time": "2023-01-01T08:19:08-06:00",
"cumulative_travel_distance": 65484,
"cumulative_travel_duration": 6548,
"duration": 300,
"end_time": "2023-01-01T08:24:08-06:00",
"late_arrival_duration": 15548,
"start_time": "2023-01-01T08:19:08-06:00",
"stop": {
"id": "s15",
"location": {
"lat": 35.83202,
"lon": -78.89832
}
},
"target_arrival_time": "2023-01-01T04:00:00-06:00",
"travel_distance": 11286,
"travel_duration": 1128
},
{
"arrival_time": "2023-01-01T08:43:25-06:00",
"cumulative_travel_distance": 77046,
"cumulative_travel_duration": 7705,
"duration": 300,
"end_time": "2023-01-01T08:48:25-06:00",
"late_arrival_duration": 17005,
"start_time": "2023-01-01T08:43:25-06:00",
"stop": {
"id": "s3",
"location": {
"lat": 35.932795,
"lon": -78.92996
}
},
"target_arrival_time": "2023-01-01T04:00:00-06:00",
"travel_distance": 11562,
"travel_duration": 1156
},
{
"arrival_time": "2023-01-01T09:02:48-06:00",
"cumulative_travel_distance": 85682,
"cumulative_travel_duration": 8568,
"duration": 300,
"end_time": "2023-01-01T09:07:48-06:00",
"late_arrival_duration": 18168,
"start_time": "2023-01-01T09:02:48-06:00",
"stop": {
"id": "s18",
"location": {
"lat": 36.009015,
"lon": -78.911485
}
},
"target_arrival_time": "2023-01-01T04:00:00-06:00",
"travel_distance": 8636,
"travel_duration": 863
},
{
"arrival_time": "2023-01-01T09:55:35-06:00",
"cumulative_travel_distance": 114350,
"cumulative_travel_duration": 11435,
"end_time": "2023-01-01T09:55:35-06:00",
"start_time": "2023-01-01T09:55:35-06:00",
"stop": {
"id": "vehicle-0-end",
"location": {
"lat": 35.791729813680874,
"lon": -78.7401685145487
}
},
"travel_distance": 28668,
"travel_duration": 2866
}
],
"route_duration": 14135,
"route_stops_duration": 2700,
"route_travel_distance": 114350,
"route_travel_duration": 11435
},
{
"id": "vehicle-1",
"route": [
{
"arrival_time": "2023-01-01T10:00:00-06:00",
"cumulative_travel_duration": 0,
"end_time": "2023-01-01T10:00:00-06:00",
"start_time": "2023-01-01T10:00:00-06:00",
"stop": {
"id": "vehicle-1-start",
"location": {
"lat": 35.791729813680874,
"lon": -78.7401685145487
}
},
"travel_duration": 0
},
{
"arrival_time": "2023-01-01T10:14:40-06:00",
"cumulative_travel_distance": 8801,
"cumulative_travel_duration": 880,
"duration": 300,
"end_time": "2023-01-01T10:19:40-06:00",
"late_arrival_duration": 22480,
"start_time": "2023-01-01T10:14:40-06:00",
"stop": {
"id": "s11",
"location": {
"lat": 35.77013,
"lon": -78.83403
}
},
"target_arrival_time": "2023-01-01T04:00:00-06:00",
"travel_distance": 8801,
"travel_duration": 880
},
{
"arrival_time": "2023-01-01T10:24:48-06:00",
"cumulative_travel_distance": 11889,
"cumulative_travel_duration": 1188,
"duration": 300,
"end_time": "2023-01-01T10:29:48-06:00",
"late_arrival_duration": 23088,
"start_time": "2023-01-01T10:24:48-06:00",
"stop": {
"id": "s12",
"location": {
"lat": 35.782855,
"lon": -78.864465
}
},
"target_arrival_time": "2023-01-01T04:00:00-06:00",
"travel_distance": 3088,
"travel_duration": 308
},
{
"arrival_time": "2023-01-01T10:56:41-06:00",
"cumulative_travel_distance": 28011,
"cumulative_travel_duration": 2801,
"duration": 300,
"end_time": "2023-01-01T11:01:41-06:00",
"late_arrival_duration": 25001,
"start_time": "2023-01-01T10:56:41-06:00",
"stop": {
"id": "s10",
"location": {
"lat": 35.672955,
"lon": -78.747955
}
},
"target_arrival_time": "2023-01-01T04:00:00-06:00",
"travel_distance": 16122,
"travel_duration": 1612
},
{
"arrival_time": "2023-01-01T11:17:11-06:00",
"cumulative_travel_distance": 37310,
"cumulative_travel_duration": 3731,
"duration": 300,
"end_time": "2023-01-01T11:22:11-06:00",
"late_arrival_duration": 26231,
"start_time": "2023-01-01T11:17:11-06:00",
"stop": {
"id": "s9",
"location": {
"lat": 35.64796,
"lon": -78.64972
}
},
"target_arrival_time": "2023-01-01T04:00:00-06:00",
"travel_distance": 9299,
"travel_duration": 929
},
{
"arrival_time": "2023-01-01T11:52:20-06:00",
"cumulative_travel_distance": 55404,
"cumulative_travel_duration": 5540,
"duration": 300,
"end_time": "2023-01-01T11:57:20-06:00",
"late_arrival_duration": 28340,
"start_time": "2023-01-01T11:52:20-06:00",
"stop": {
"id": "s21",
"location": {
"lat": 35.7606,
"lon": -78.50509
}
},
"target_arrival_time": "2023-01-01T04:00:00-06:00",
"travel_distance": 18094,
"travel_duration": 1809
},
{
"arrival_time": "2023-01-01T12:34:43-06:00",
"cumulative_travel_distance": 77830,
"cumulative_travel_duration": 7783,
"duration": 300,
"end_time": "2023-01-01T12:39:43-06:00",
"late_arrival_duration": 30883,
"start_time": "2023-01-01T12:34:43-06:00",
"stop": {
"id": "s14",
"location": {
"lat": 35.961465,
"lon": -78.52748
}
},
"target_arrival_time": "2023-01-01T04:00:00-06:00",
"travel_distance": 22426,
"travel_duration": 2242
},
{
"arrival_time": "2023-01-01T12:44:22-06:00",
"cumulative_travel_distance": 80624,
"cumulative_travel_duration": 8062,
"duration": 300,
"end_time": "2023-01-01T12:49:22-06:00",
"late_arrival_duration": 31462,
"start_time": "2023-01-01T12:44:22-06:00",
"stop": {
"id": "s19",
"location": {
"lat": 35.93663,
"lon": -78.522705
}
},
"target_arrival_time": "2023-01-01T04:00:00-06:00",
"travel_distance": 2794,
"travel_duration": 279
},
{
"arrival_time": "2023-01-01T13:54:40-06:00",
"cumulative_travel_distance": 119804,
"cumulative_travel_duration": 11980,
"duration": 300,
"end_time": "2023-01-01T13:59:40-06:00",
"late_arrival_duration": 35680,
"start_time": "2023-01-01T13:54:40-06:00",
"stop": {
"id": "s13",
"location": {
"lat": 35.88029,
"lon": -78.952142
}
},
"target_arrival_time": "2023-01-01T04:00:00-06:00",
"travel_distance": 39180,
"travel_duration": 3918
},
{
"arrival_time": "2023-01-01T14:18:14-06:00",
"cumulative_travel_distance": 130935,
"cumulative_travel_duration": 13094,
"duration": 300,
"end_time": "2023-01-01T14:23:14-06:00",
"late_arrival_duration": 37094,
"start_time": "2023-01-01T14:18:14-06:00",
"stop": {
"id": "s20",
"location": {
"lat": 35.97414,
"lon": -78.995162
}
},
"target_arrival_time": "2023-01-01T04:00:00-06:00",
"travel_distance": 11131,
"travel_duration": 1113
},
{
"arrival_time": "2023-01-01T14:37:18-06:00",
"cumulative_travel_distance": 139380,
"cumulative_travel_duration": 13938,
"duration": 300,
"end_time": "2023-01-01T14:42:18-06:00",
"late_arrival_duration": 38238,
"start_time": "2023-01-01T14:37:18-06:00",
"stop": {
"id": "s8",
"location": {
"lat": 36.039135,
"lon": -78.94658
}
},
"target_arrival_time": "2023-01-01T04:00:00-06:00",
"travel_distance": 8445,
"travel_duration": 844
},
{
"arrival_time": "2023-01-01T15:37:38-06:00",
"cumulative_travel_distance": 172581,
"cumulative_travel_duration": 17258,
"end_time": "2023-01-01T15:37:38-06:00",
"start_time": "2023-01-01T15:37:38-06:00",
"stop": {
"id": "vehicle-1-end",
"location": {
"lat": 35.791729813680874,
"lon": -78.7401685145487
}
},
"travel_distance": 33201,
"travel_duration": 3320
}
],
"route_duration": 20258,
"route_stops_duration": 3000,
"route_travel_distance": 172581,
"route_travel_duration": 17258
}
]
}
],
"statistics": {
"result": {
"custom": {
"activated_vehicles": 2,
"max_duration": 0.123,
"max_stops_in_vehicle": 10,
"max_travel_duration": 0.123,
"min_duration": 0.123,
"min_stops_in_vehicle": 9,
"min_travel_duration": 0.123,
"unplanned_stops": 7
},
"duration": 0.123,
"value": 0.123
},
"run": {
"duration": 0.123,
"iterations": 50
},
"schema": "v1"
},
"version": {
"sdk": "VERSION"
}
}
🎉 🎉 🎉 🎉 🎉 🎉 🎉 🎉 🎉 🎉 🎉 🎉
You are all set to keep exploring! Here are the next steps to continue your journey:
- Deploy your app to Nextmv Cloud.
- Run remotely on Nextmv Cloud.
- Test and experiment with your app.
- Learn how to work with defaults.
- Learn how to work with options.
- Explore the available features that come with vehicle routing.
Defaults
defaults apply default properties to all vehicles and stops. Properties added to specific vehicles or stops override the default settings, when both are present. Please reference the vehicle schema and stop schema to see which features are configurable via defaults.
Here is an example of using features for vehicles and stops. A sample output obtained after solving the problem is also shown.
{
  "defaults": {
    "vehicles": {
      "speed": 15,
      "max_stops": 2,
      "start_time": "2023-01-01T12:00:00Z",
      "start_location": {
        "lon": 135.772695,
        "lat": 34.967146
      },
      "end_location": {
        "lon": 135.772695,
        "lat": 34.967146
      }
    },
    "stops": {
      "target_arrival_time": "2023-01-01T12:20:00Z",
      "duration": 300,
      "unplanned_penalty": 5000000,
      "early_arrival_time_penalty": 1.5,
      "late_arrival_time_penalty": 1.5
    }
  },
  "stops": [
    {
      "id": "Fushimi Inari Taisha",
      "location": { "lon": 135.772695, "lat": 34.967146 }
    },
    {
      "id": "Kiyomizu-dera",
      "location": { "lon": 135.78506, "lat": 34.994857 }
    },
    {
      "id": "Nijō Castle",
      "location": { "lon": 135.748134, "lat": 35.014239 }
    },
    {
      "id": "Kyoto Imperial Palace",
      "location": { "lon": 135.762057, "lat": 35.025431 },
      "compatibility_attributes": ["category_1"],
      "precedes": "Fushimi Inari Taisha"
    },
    {
      "id": "Gionmachi",
      "location": { "lon": 135.775682, "lat": 35.002457 },
      "compatibility_attributes": ["category_3"]
    },
    {
      "id": "Kinkaku-ji",
      "location": { "lon": 135.728898, "lat": 35.039705 },
      "compatibility_attributes": ["category_2"],
      "precedes": "Kiyomizu-dera"
    },
    {
      "id": "Arashiyama Bamboo Forest",
      "location": { "lon": 135.672009, "lat": 35.017209 },
      "compatibility_attributes": ["category_4"],
      "precedes": "Nijō Castle"
    }
  ],
  "vehicles": [
    {
      "id": "v1",
      "compatibility_attributes": ["category_1"]
    },
    {
      "id": "v2",
      "compatibility_attributes": ["category_2"]
    },
    {
      "id": "v3",
      "compatibility_attributes": ["category_3"]
    },
    {
      "id": "v4",
      "compatibility_attributes": ["category_4"]
    }
  ]
}
Visit the defaults schema for detailed information.
Options
All applications are configurable through options.
- Model options change how the model is parsed from the input.
- Runner options change how the runner outputs solutions and reads/writes data.
- Solve options change the behavior of the solver.
Options can be configured when running locally with a custom app or when running remotely on Nextmv Cloud. Running remotely is possible with the Nextmv marketplace routing app or with a custom app that has been deployed.
Visit the options reference for detailed information on all the available options.
Options - running locally
- CLI flags. They are added with one (
-) or two (--) dashes, depending on the language. Consider the same examples that were shown in the custom app section for running the code:
- Environment variables. To set an environment variable, convert its corresponding CLI flag to uppercase, replacing periods (.) (if applicable) with an underscore (_) and removing the leading dashes. For example:
-solve.duration(used with Go) or-solve_duration(used with Python) is equivalent toSOLVE_DURATION. Here you can find the same example that was shown above. This time, however, we show how to use environment variables instead of CLI flags.
If both an environment variable and its corresponding CLI flag are defined, the CLI flag will overwrite the environment variable.
Options - running remotely
Use the "options" key in the JSON payload when executing a run on Nextmv cloud. The leading dash (-) is removed from the option name, when compared to running locally. For example, -solve.duration on a local run is equivalent to solve.duration run remotely.
Note that all values should be set as a string, regardless of the type.
Here is an example of how to use options when running remotely:
{
  "input": {},
  "options": {
    "solve.duration": "3s",
    "solve.iterations": "50",
    "model.constraints.disable.capacity": "true"
  }
}
Options - output
Most options are parsed to the output, under the options key:
{
  "model": {
    "constraints": {
      "disable": {
        "attributes": false,
        "capacity": false,
        "capacities": null,
        "distance_limit": false,
        "groups": false,
        "maximum_duration": false,
        "maximum_stops": false,
        "maximum_wait_stop": false,
        "maximum_wait_vehicle": false,
        "mixing_items": false,
        "precedence": false,
        "vehicle_start_time": false,
        "vehicle_end_time": false,
        "start_time_windows": false
      },
      "enable": {
        "cluster": false
      }
    },
    "objectives": {
      "capacities": "",
      "min_stops": 1,
      "early_arrival_penalty": 1,
      "late_arrival_penalty": 1,
      "vehicle_activation_penalty": 1,
      "distance": 0,
      "travel_duration": 0,
      "vehicles_duration": 1,
      "unplanned_penalty": 1,
      "cluster": 0,
      "stop_balance": 0
    },
    "properties": {
      "disable": {
        "durations": false,
        "stop_duration_multipliers": false,
        "duration_groups": false,
        "initial_solution": false
      },
      "maximum_time_horizon": 15552000
    },
    "validate": {
      "disable": {
        "start_time": false,
        "resources": false
      },
      "enable": {
        "matrix": false,
        "matrix_asymmetry_tolerance": 20
      }
    }
  },
  "solve": {
    "iterations": 50,
    "duration": 10000000000,
    "plateau": {
      "delay": 0,
      "duration": 0,
      "iterations": 0,
      "relative_threshold": 0,
      "absolute_threshold": -1
    },
    "parallel_runs": 1,
    "start_solutions": 1,
    "solver": {
      "unplan_units": {
        "start_value": 2,
        "delta_after_iterations": 125,
        "delta": 2,
        "min_value": 2,
        "max_value": -1,
        "snap_back_after_improvement": true,
        "zigzag": true
      },
      "unplan_weights": "Vehicle:3,Island:1,Location:293",
      "plan_group_size": {
        "start_value": 2,
        "delta_after_iterations": 1000000000,
        "delta": 0,
        "min_value": 2,
        "max_value": 2,
        "snap_back_after_improvement": true,
        "zigzag": true
      }
    },
    "run_deterministically": true
  },
  "format": {
    "disable": {
      "progression": true
    }
  },
  "check": {
    "duration": 30000000000,
    "verbosity": "off"
  }
}
When working with a custom app, you may also modify the options in code, which would override the ones passed from the runner. Here is an example of how this is done and how the resulting output shows the modified options. Notice that options is modified multiple times inside the solver function.
// © 2019-present nextmv.io inc

// package main holds the implementation of the nextroute template.
package main

import (
	"context"
	"log"
	"time"

	"github.com/nextmv-io/nextroute"
	"github.com/nextmv-io/nextroute/check"
	"github.com/nextmv-io/nextroute/factory"
	"github.com/nextmv-io/nextroute/schema"
	"github.com/nextmv-io/sdk/run"
	runSchema "github.com/nextmv-io/sdk/run/schema"
)

func main() {
	runner := run.CLI(solver)
	err := runner.Run(context.Background())
	if err != nil {
		log.Fatal(err)
	}
}

type options struct {
	Model  factory.Options                `json:"model,omitempty"`
	Solve  nextroute.ParallelSolveOptions `json:"solve,omitempty"`
	Format nextroute.FormatOptions        `json:"format,omitempty"`
	Check  check.Options                  `json:"check,omitempty"`
}

func solver(
	ctx context.Context,
	input schema.Input,
	options options,
) (runSchema.Output, error) {
	// Customize options in the code.
	options.Model.Objectives.TravelDuration = 0.5
	options.Model.Objectives.UnplannedPenalty = 0.3
	options.Model.Constraints.Disable.Capacity = true
	options.Model.Constraints.Disable.Attributes = true
	options.Model.Constraints.Disable.Precedence = true
	options.Solve.Duration = time.Duration(11) * time.Second
	options.Solve.Iterations = 51
	options.Format.Disable.Progression = true

	model, err := factory.NewModel(input, options.Model)
	if err != nil {
		return runSchema.Output{}, err
	}

	solver, err := nextroute.NewParallelSolver(model)
	if err != nil {
		return runSchema.Output{}, err
	}

	solutions, err := solver.Solve(ctx, options.Solve)
	if err != nil {
		return runSchema.Output{}, err
	}
	last, err := solutions.Last()
	if err != nil {
		return runSchema.Output{}, err
	}

	output, err := check.Format(ctx, options, options.Check, solver, last)
	if err != nil {
		return runSchema.Output{}, err
	}
	output.Statistics.Result.Custom = factory.DefaultCustomResultStatistics(last)

	return output, nil
}