Our platform is written in Go. Creating models requires writing basic Go code. This page provides some basic tips and tricks for using Go effectively in the context of Nextmv.
Go provides extensive docs which we have no intention of replicating. Here, we focus on common patterns and tricks for those who are new to Go and need it to work with Hop. It also includes advice on structuring model source.
If you are new to Go, we recommend that you check out "A Tour of Go" and "How to write Go code" on the Go website.
Why Go
Briefly, we chose Go because of performance, simplicity, and interoperability.
- Performance. Go performance is frequently in line with Java, and one or more orders of magnitude faster than Python (see various benchmarks). Go helps us build an efficient core, and lets you improve model performance once that matters.
- Simplicity. Go has structures and methods, but no inheritance or polymorphism. Its elegant use of interfaces makes decoupling software components convenient. We find we can write performant Go code faster than in other languages.
- Interoperability. Go simplifies model deployment and interoperability with software services. Hop models are usually atomic binary artifacts that read and write JSON data. That is made possible partly by our use of Go.
Organizing model source
Modules and packages
Modules are a recent addition to Go, and are sometimes confused with packages. A package is a directory containing .go files. A module is a collection of one or more packages with a go.mod file specifying the module name, the required version of Go, and any dependencies.
For example, the root directory of Hop is a module which contains three packages. These then contain various sub-packages.
If a module has dependencies, Go stores their checksums in a go.sum file. You should commit both go.mod and go.sum to your source control repository so your builds are repeatable.
To create a new module in a directory, run go mod init. Running go get will scan your module's packages for dependencies and add these to your go.mod and go.sum, defaulting to current releases.
To upgrade (or downgrade) to a different version of Hop or any other dependency, use go get.
This will update your go.mod and go.sum files with the new version. Optionally, you can run go mod tidy to remove unused versions of any dependencies. Be sure to commit your go.mod and go.sum files to save the updated versions.
Project structure
Go code is easy to organize once you understand packages and modules. Simple models or simulations may not need anything more than a main package.
This is easy to build and deploy. Run go build in the root of the project to get a binary named simple-model.
As projects become more complex, it is advantageous to structure the source. The example below has multiple binaries that share modeling code and types: one for the CLI and one for AWS Lambda. Main packages live under cmd/ by convention.
Use the -o flag to go build the two main packages into binaries with names that are not the same as the directory name (cli and lambda, respectively in this case).
Go package docs
Go package documentation is the best way to learn the Nextmv Decision Stack. To read the package documentation, first get the godoc package.
When using modules, it is sometimes helpful to cd into the desired module and launch a godoc server from there. Whenever reading the documentation, start a local godoc server from your terminal.
Leave your terminal open and access package docs at code/hop and code/engines. Alternately, you can download these for offline use with wget.
Building and testing projects
To build a Go project, use go build and to test a Go project, use go test.
For example, if you are using the source distribution, you can build from the code/hop/, code/dash/, and code/engines directories with the following go command.
And to run tests, the following command can be invoked in test/hop (to run tests for Hop, for example).
Note, API testing code for hop and engines is separated into its own modules in order to reduce dependencies, keep build times short, and keep binaries small for production.
Coding patterns
In the sections that follow, we provide a few pointers on using Go effectively. Each example is runnable as a standalone program.
Initializing variables
Variables are declared with var, or declared and initialized with :=. Use := most of the time. Use var if the initial value of a variable is not important because it will be overwritten soon.
Error handling
Many Go functions return multiple values, with the last one being either an error or a boolean indicating some condition. You should capture these values and act on them immediately.
Errors indicate something is wrong, but not unrecoverable. Create an error from a string using errors.New. Insert variable values into an error string with fmt.Errorf.
Boolean return values indicate an expected condition. For instance, if a map key is not present, that is a condition instead of an error.
Function receivers
Any user-defined type in Go can have methods. The (r record) before the method name is a "receiver." Note that fmt.Println calls record.String for us.
Go passes variables by value. This means that the value of a receiver inside a method call is a copy of the original variable. Structures can mutate themselves using pointer receivers. Go handles the details of pointer manipulation for us.
Modifying slices and maps
Slices and maps are pointer values. Changing them modifies the original variable. If you want to copy and modify a slice, there are two ways to do that. The first one uses make to pre-allocate memory for the new slice. You can also do this in the second function using make([]int, 0, len(x)+1).
A similar pattern applies to maps.
Note that Go intentionally randomizes the order of map keys when using range. This prevents subtle errors caused by relying on such an order, but can be disorienting the first time you see it. If you want your Hop models to execute deterministically, don't use a map to keep track of unmade decisions.
Working with JSON
Go provides convenient facilities for reading and writing JSON to and from structures. Exported fields on structures are automatically marshaled. The json annotation changes the name of the field in the output so it's "number" instead of "Number".
The JSON package only accesses the exported fields of struct types (those that begin with an uppercase letter). Therefore only the exported fields of a struct will be present in the JSON output. Visit this page for more information.
To provide custom marshaling, add a MarshalJSON method.
Working with time durations
Go provides syntax for working with time durations. For example, 90 seconds is 1m30s, 20 seconds is 20s, and 100 milliseconds is 100ms.
Choosing an IDE
There are many ways to code in Go and among the most popular IDEs are:
- Visual Studio Code
- VIM
- GoLand
- EMACS
We recommend using Visual Studio Code.
Visual Studio Code
We recommend using the following extensions and configurations with Visual Studio Code (VS Code). Search and install the following extensions Shift+CMD+X:
- Go
- Go-critic
- vscode-go-syntax
- Rewrap
- Prettier - Code Formatter
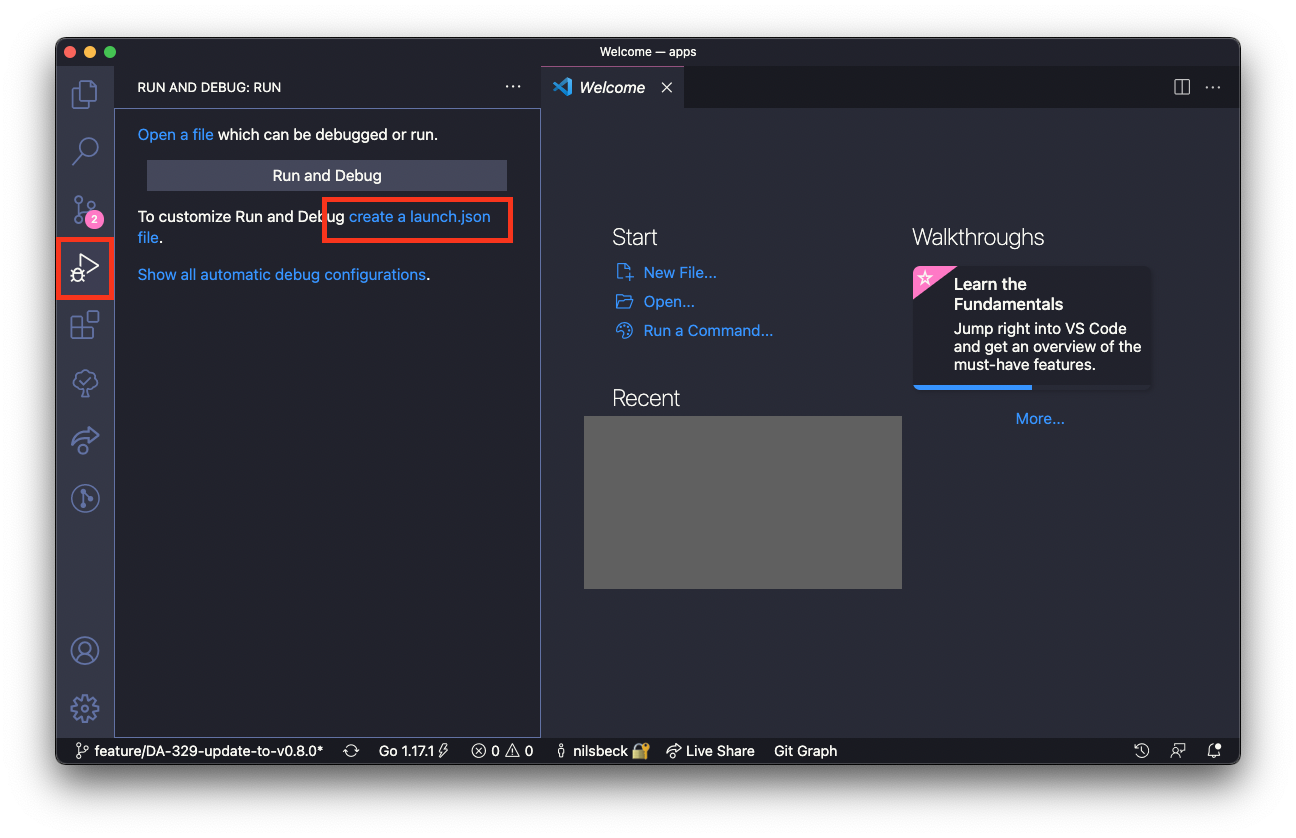
Creating a launch json
Create a launch.json for Go of type launch package to be able to run/debug the solution from within Visual Studio Code and output the result in the Debug Console. Just copy the following json into your new launch.json.
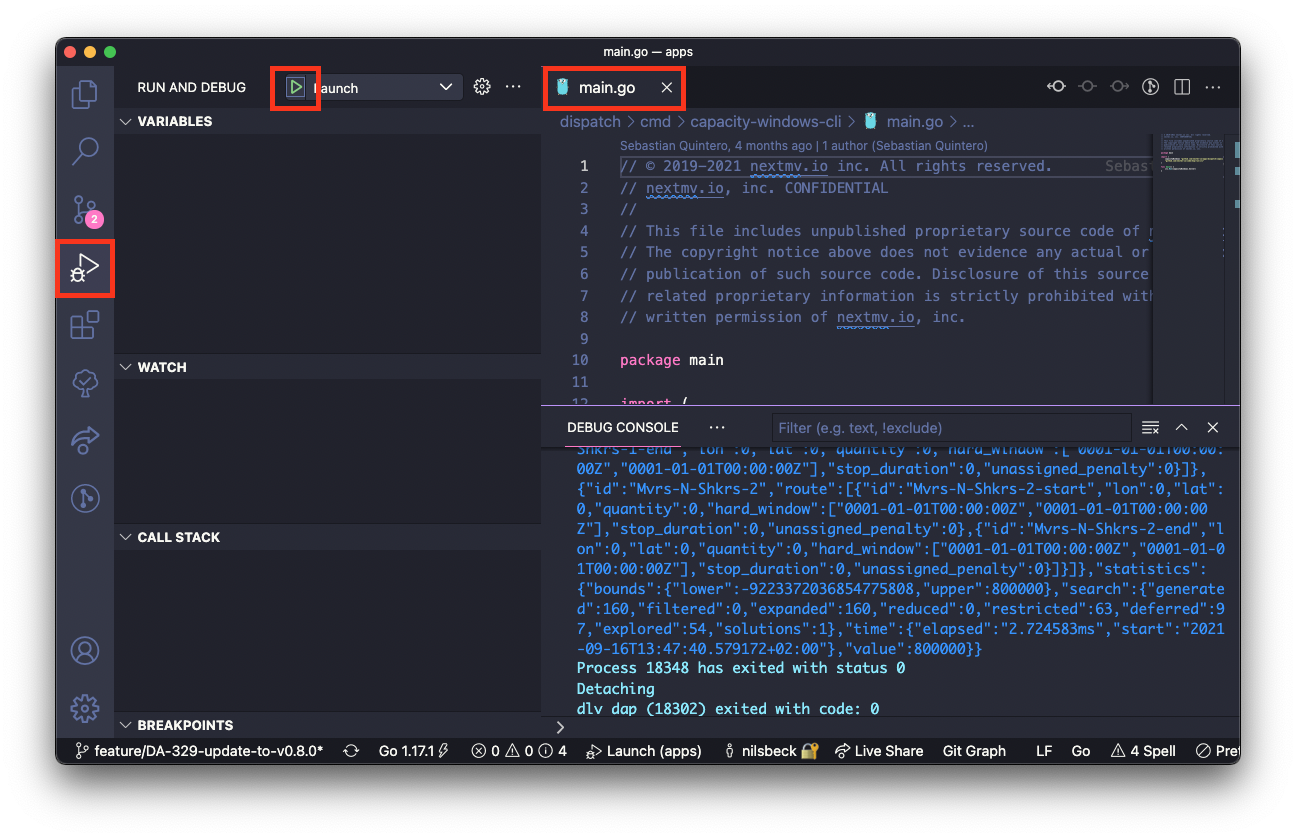
Debug and run your app from within Visual Studio Code
You can now open the main.go in the cmd directory and click on the Play icon or hit F5 to debug.