AWS Batch
Info
Access to the AWS Batch integration must be activated on your account. Please contact us if you would like more information about running on AWS Batch.
Nextmv uses an AWS Batch job queue and job definition as a compute integration target. The AWS Batch service handles provisioning of compute resources based upon Fargate or EC2 for executing container workloads.
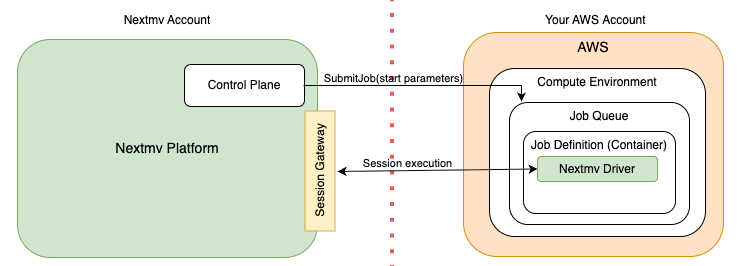
The integration relies upon several AWS Batch concepts:
- A Job Definition defines the container and resources to be used by a Job. The Nextmv driver is installed onto the container image referenced by the definition.
- A Job Queue manages the scheduling and execution of a job, using the container defined by a Job Definition.
- A Job is a unit of work to run within a container. A run in Nextmv maps 1:1 with a Job.
- A Cross-Account Role is an AWS IAM role assumable by the Nextmv account to submit Jobs to the Job Queue using the Job Definition.
The Nextmv AWS Batch integration operates as follows:
- Job Submission: When you initiate a run in Nextmv using this integration, Nextmv assumes the cross-account role and submits a job to your configured AWS Batch Job Queue and Job Definition.
- Run Execution: Once the job starts, the Nextmv driver processes the parameters submitted at job initiation to execute the specific run session, and runs the session protocol with the session gateway.
- Cancellation: If a Batch run is canceled from within the Nextmv platform, the driver will terminate immediately, typically within 30 seconds of the cancellation request.
To facilitate the setup, Nextmv provides a Python-based AWS CDK project. This code enables you to establish the batch installation within your own AWS account and gives you control over configuring the resources for the AWS Batch Job Queue and Job Definition. The source code includes a simple Dockerfile definition. This serves as a starting point for creating the container image used by the Job Definition and as a reference for setting up the Nextmv driver in the container. You can extend this Dockerfile to build a container that meets your needs. The installation also creates the cross-account role.
After completing the CDK installation you configure an integration in your Nextmv account with your Job Queue, Job Definition, and cross-account Role ARN. Nextmv internally creates another AWS Role that is allowed to assume the cross-account role you provided. This information is stored in an encrypted secret within Nextmv.
Get started
This quickstart guide will walk you through integrating Nextmv with AWS Batch running in your account. At the end of the walk-through you will be able to run your Nextmv-managed models in your AWS account while still being able to view all of the run’s details and results in Nextmv. You can use your compute integration for any capability in Nextmv including running experiments, ensemble runs, or shadow runs.
This tutorial assumes that you have familiarity with:
- Pushing a model to Nextmv (using either Nextmv CLI or Nextmv Python SDK).
- Managing instances used to run your model.
Once you've completed the setup you'll have an environment described by the following diagram:
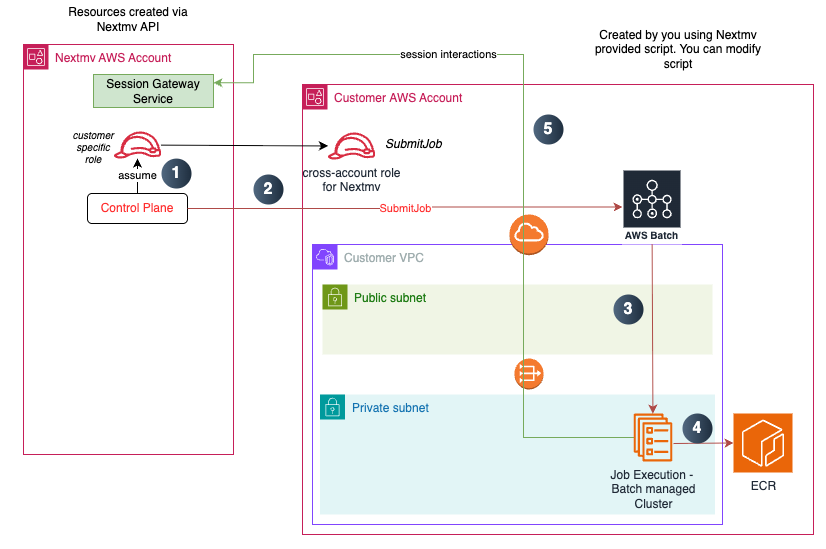
The steps that occur are:
- When you submit a run, the Nextmv control plane assumes an AWS IAM role internally that has permission to assume the cross-account role created when you set up the AWS Batch environment. It then assumes the cross-account role in your account.
- The control plane executes a
SubmitJobto AWS Batch in your account, specifying the Batch Queue and Batch Job Definition you configured. - AWS Batch runtime starts the container in the cluster.
- The cluster pulls the Docker image created based on your definition from a repository and initiates execution.
- The Nextmv driver interacts with the Nextmv session gateway to complete the run.
1. Set up AWS Batch
This first section will walk through the steps and requirements to set up an AWS Batch environment that allows the Nextmv integration connection. In order to proceed you will need the Nextmv AWS Batch installation package distributed by request, and a Nextmv account.
1.1. Install AWS Batch to your AWS Account
Info
The installation package has a README.md which explains details of the installation
process. The installation package is a CDK project with source code written in Python.
The script can be customized by an experienced engineer working with Nextmv to ensure
changes are compatible. The default Dockerfile in the installation
package supports python and binary runtime types.
Follow those installation instructions in the package for specific steps. In order
to run the script you must have AWS admin permissions and python 3.9 or above
installed. For the purposes of this quick start we used the base name of acme
with a job definition name of python_3_11. You control these values when you
install the AWS Batch integration package.
2. Configure your app manifest
Info
The capabilities of your integration depend upon the container created
during AWS Batch installation in step 1. If your app manifest already
matches your container capabilities, then no changes are needed. The below example
shows a configuration for a python application where your AWS Batch docker
configuration uses an amd64 instead of arm64 architecture.
Once you have matched the compute environment of your AWS Batch container, no other changes are required to your app manifest.
3. Set up Nextmv integration
Once your AWS account is configured, you can create an integration in Nextmv that holds the relevant AWS Batch information. This integration can then be assigned to application runs which will execute in your account. In Nextmv, integrations are created at the account level and applied at the app level. You can constrain the applications that are allowed to use the integration when setting it up.
In this section we are going to create a new AWS Batch integration and a new app that uses the integration. Note that while the tutorial walks through the process of creating a new app, if you have an existing Nextmv application that you would like to connect to AWS Batch, you can use that application in place of the new one created in this tutorial.
3.1. Create the integration
First we will create the integration at the account level. In the top navigation
bar, click on Settings and then in the left sidebar click on
Integrations and then click the + button in the upper right to create a
new integration.
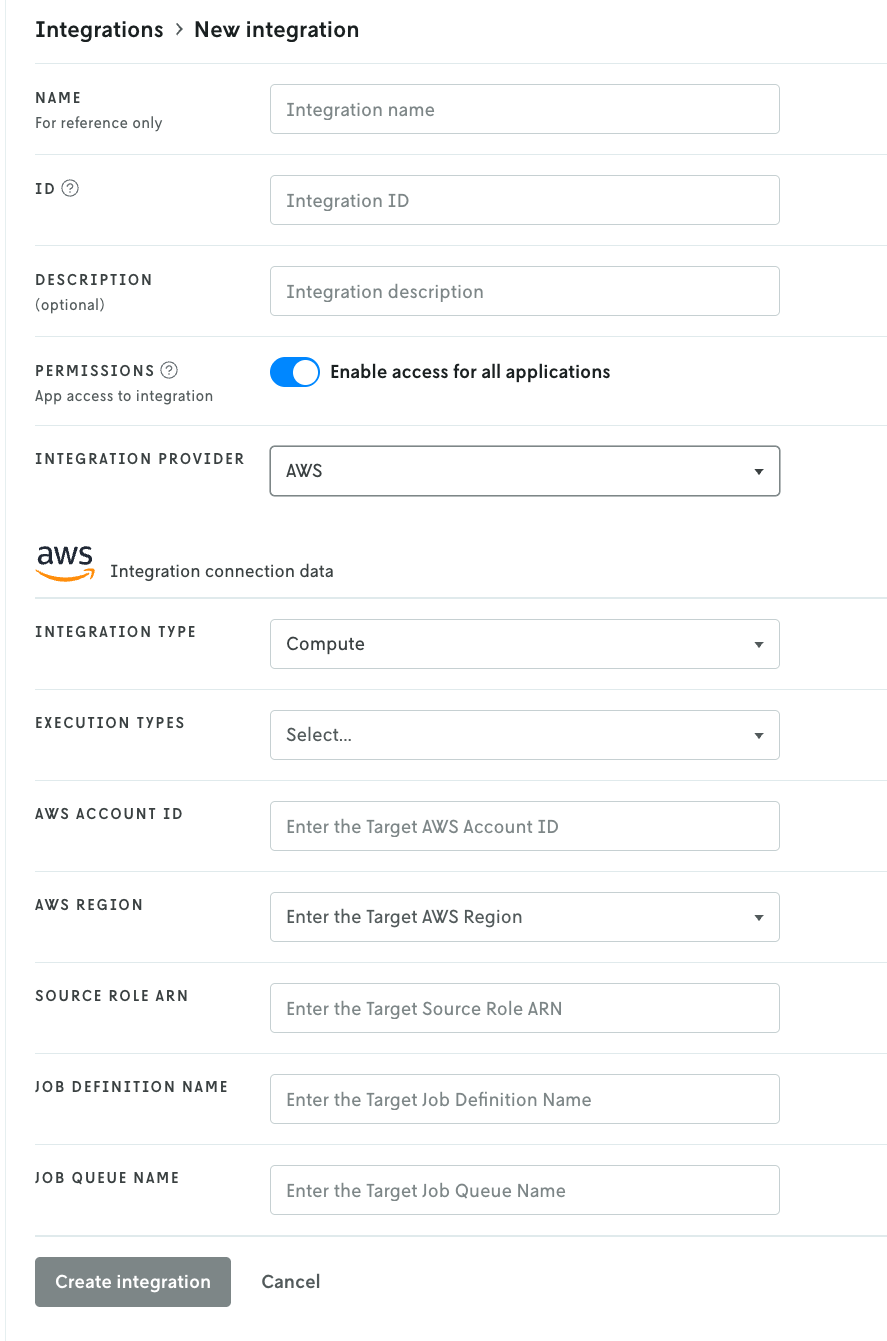
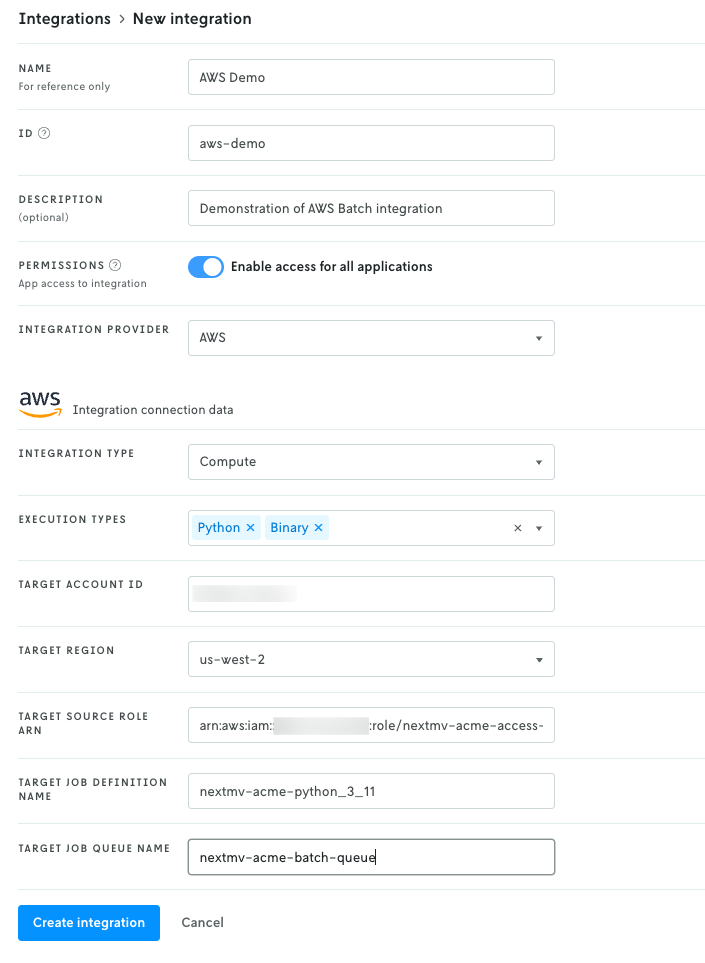
The create integration screen is essentially divided into two parts: the first part is the configuration of the integration on the Nextmv side, the second part is for the AWS Batch details.
Here is a breakdown of the fields for the first part:
Name,ID, anddescription: these fields are for your use and reference only. The name and ID are required, the description is optional. Note that the ID cannot be edited once created, but you can always delete the integration and re-create it with a different ID. IDs need to be unique within your account.Permissions: this field sets access for which apps in Nextmv are allowed to use the integration. IfEnable access for all applicationsis toggled on, then all applications have access to the integration. If you toggle the switch off, an additional interface will appear to allow you to select specific applications that can use the integration; any app not on the list will not have access to the integration. For this tutorial we are going to enable global access, if you decide to limit access just make sure the app you want to use the AWS Batch integration with is granted access.Integration provider: This dropdown select box is for choosing which kind of integration you are creating. The provider is the service you are integrating with — in this case, AWS Batch. The fields below are populated based on the selection in this dropdown.
Once the fields above have been filled out, the create new form should look something like this:
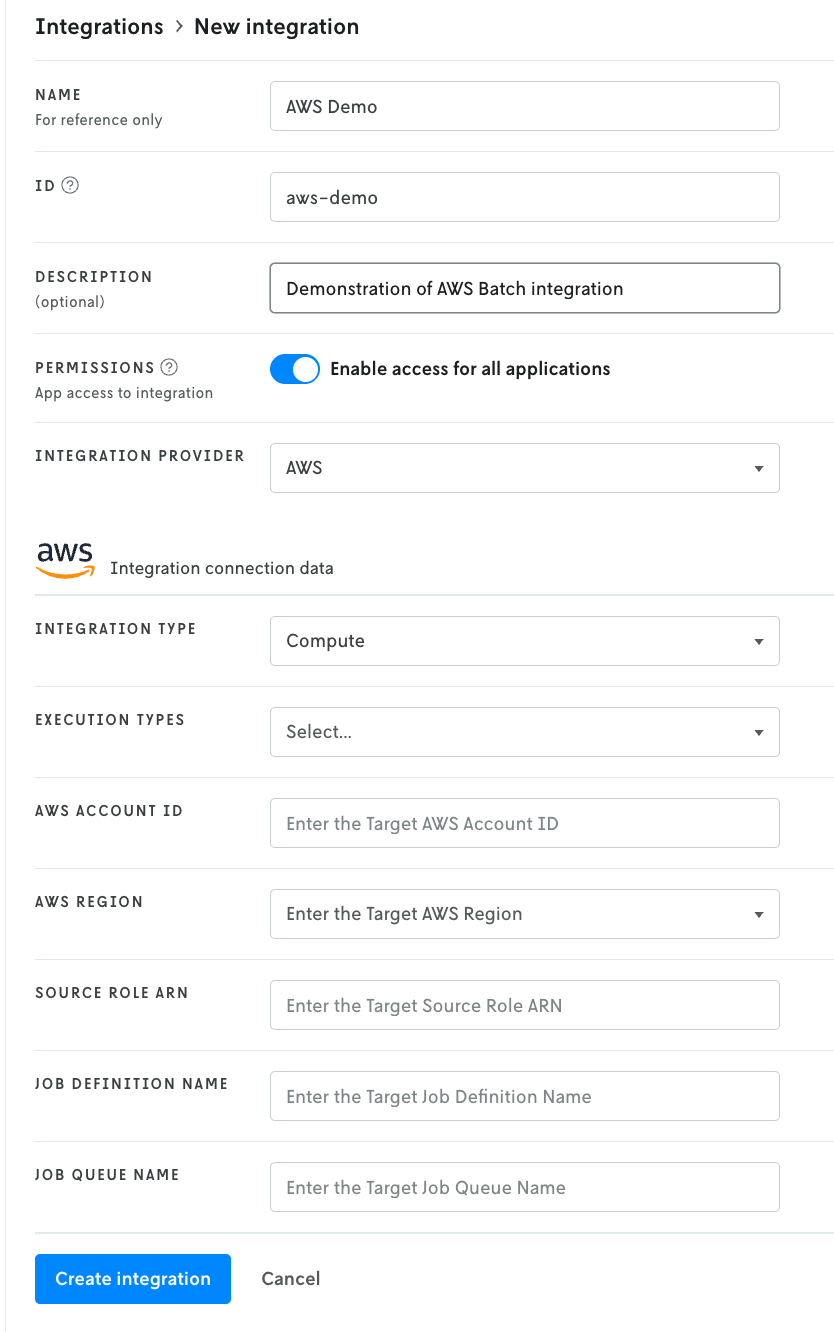
You can enter your own name and ID or you can match the fields shown in the screenshot above. Having different values from what’s shown in the screenshot above will not affect your integration.
The AWS Batch integration requires seven fields:
Integration type: This field is set by default by the AWS integration and there is only one option:Compute. This field communicates the integration type to the Nextmv driver; in this case a compute integration, which means it’s used as an execution environment.Execution types: There are three different execution types: Python, Java, and Binary. You can select one or more of the types that match up with your application and the capabilities of your container image. The default example container image created by the AWS Batch integration supports binary or Python 3.11 apps. To run both types on your integration you would selectPythonandBinaryin the drop down list.AWS Account ID: This is the AWS account ID where you deployed the AWS Batch integration. The value is a 12 digit number found in your AWS console.AWS Region: The region for your AWS Batch integration deployment. This selection only allows US based regions (us-east-1, us-east-2, us-west-1, us-west-2).Source Role ARN: This value can be found in theOutputstab of the CloudFormation stack in the AWS Console for your deployed integration. Copy and paste the value here.Job Definition Name: This value can be found inOutputstab of the CloudFormation stack. It will of the formnextmv-<basename>-<job definition-name>wherebasenameandjob-definition-namewere specified in your deployment configuration.Job Queue Name: This value can be found in the Batch service in the AWS console. It will be of the formnextmv-<basename>-batch-queue.
Once you have these fields filled out, click the Create integration button.
(Note that your exact values will be different than what is shown in the screenshot
above.)
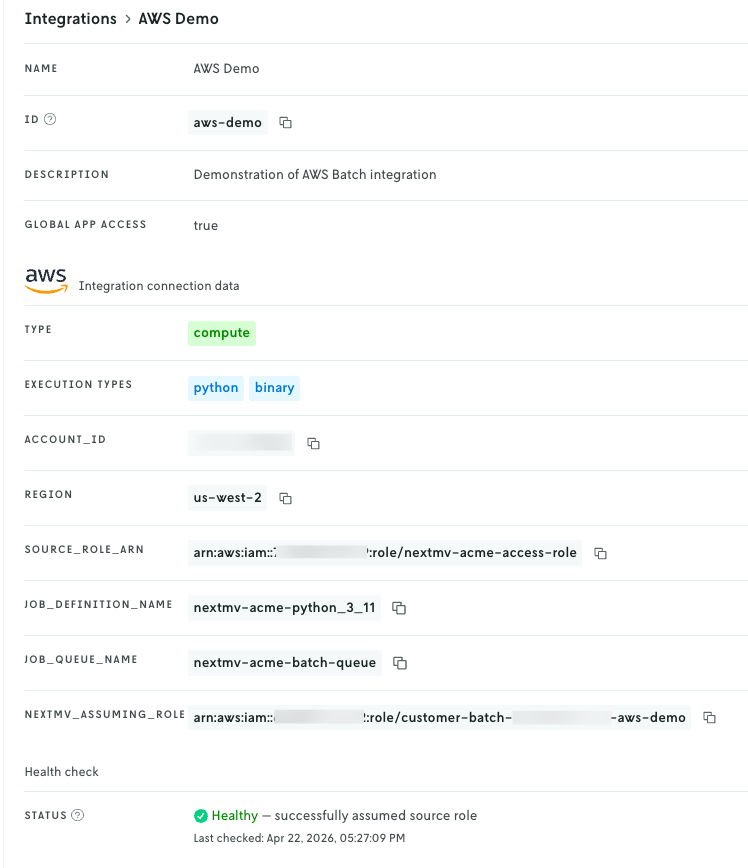
The integration will run a check that the security configuration resolves correctly
and display a message on the result, which should indicate Healthy.
3.2. Create an app
Tip
If you have an existing app you would like to use instead of creating a new one, skip this step and proceed to Push updated binary.
Next, in Nextmv Console, create a new app by clicking on the Apps &
Workflows main navigation link in the top header and then clicking the +
button in the upper right. Select New custom app and then follow the steps
to create a new custom app.
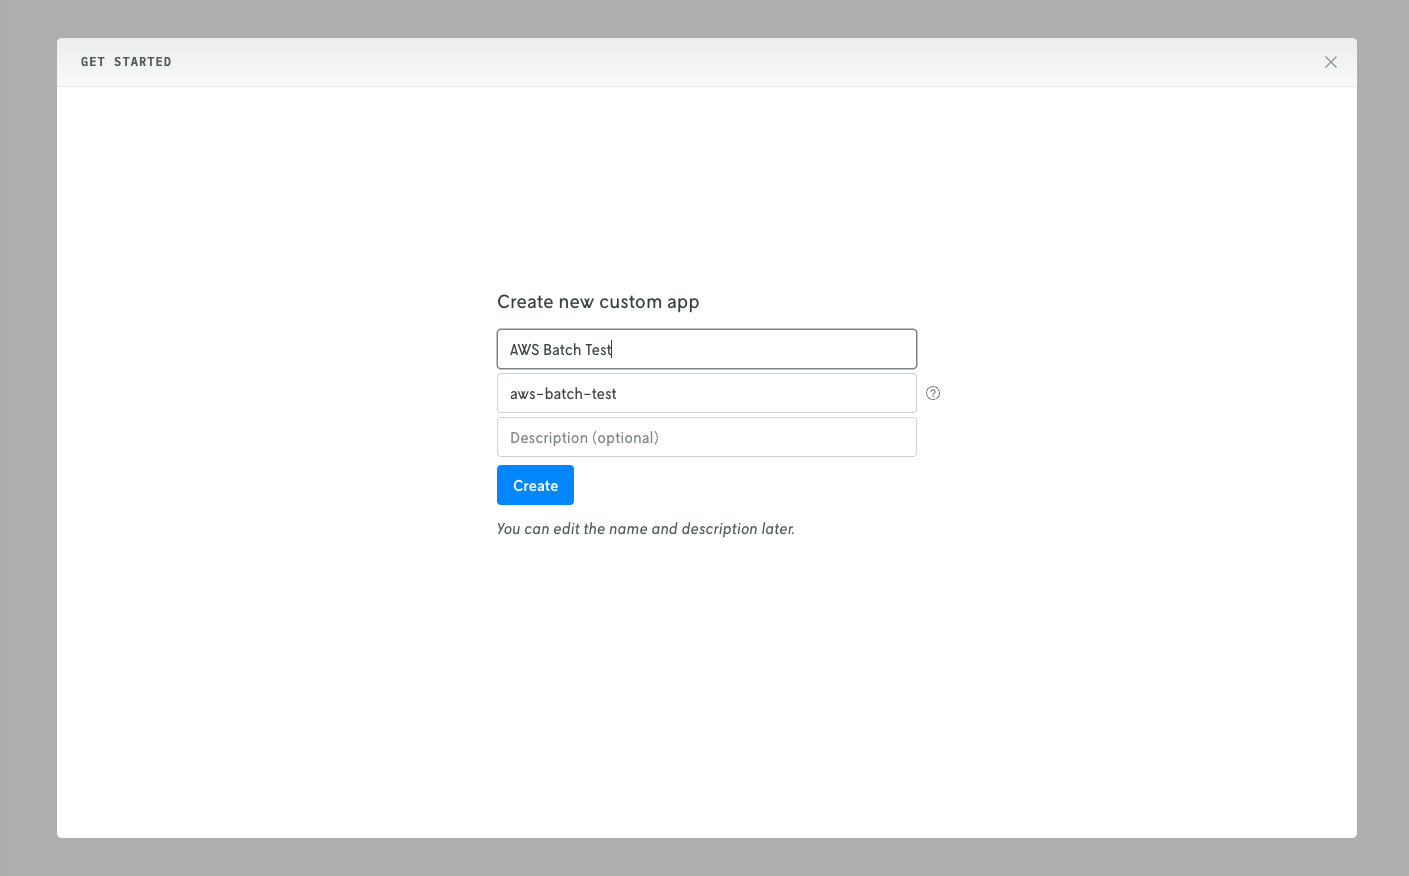
After filling out the name, ID, and description fields and clicking Create.
3.3. Push updated binary
On the dashboard view for your app, at the top, copy the app’s ID to use for the push commands below.
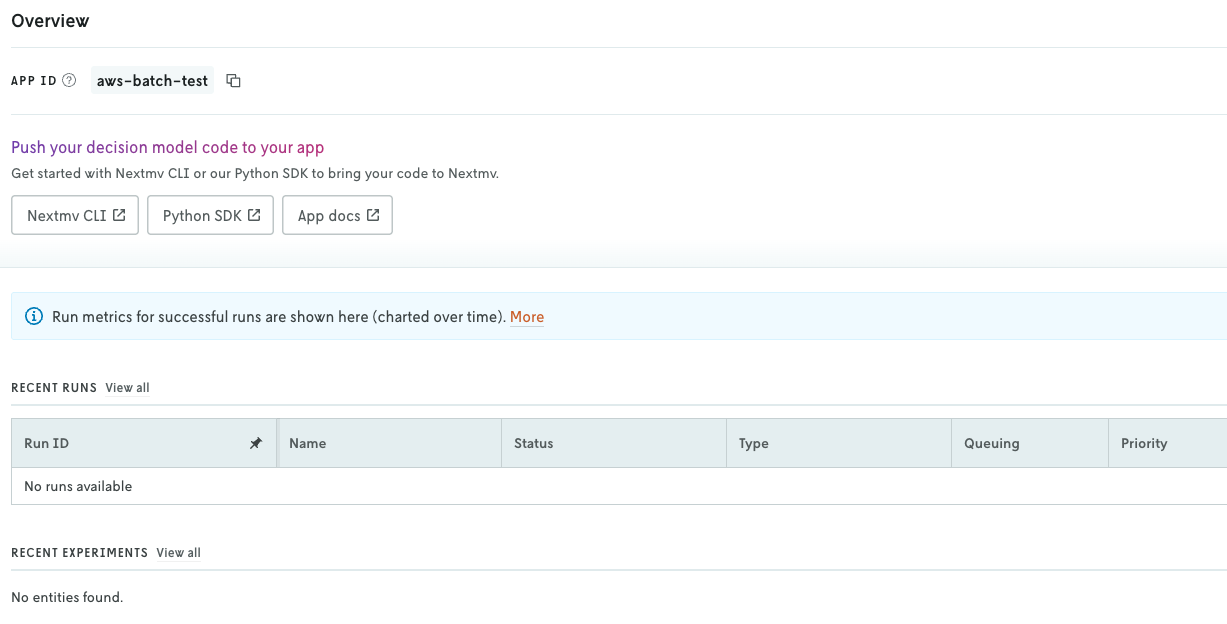
First, if you made any updates to your app’s app.yaml file in section 2, make
sure that these changes are saved. Then push your model to your app with either
Nextmv CLI or the Python SDK. Examples for each are shown below (note the
<YOUR_APP_ID> is the app ID you copied at the beginning of this step).
import os

import nextmv
from nextmv import cloud

# Instantiate the cloud application.
client = cloud.Client(api_key=os.getenv("NEXTMV_API_KEY"))
cloud_app = cloud.Application(client=client, id="<YOUR_APP_ID>")

# Push the app.
manifest = nextmv.Manifest.from_yaml(dirpath=".")
cloud_app.push(manifest=manifest, app_dir=".", verbose=True)
Once the push has completed, proceed to the next step.
3.4. Attach integration to Latest instance
In this step you will configure your Latest instance to use the AWS Batch integration so that whenever an application run is made with the Latest instance, the AWS Batch integration is initiated automatically and the run executed in AWS Batch.
Note that you do not need an instance to use integrations for runs. You can apply the AWS Batch integration directly to an application run via the advanced run settings menu; which is especially useful when you are doing ad hoc application runs. You could also programmatically apply the integration on a per run basis within your systems. However, in this tutorial, the integration will be configured on the Latest instance and used via the instance.
In your application in Nextmv Console, navigate to your Instances page and you
should see an instance named Latest. (Note that you may need to refresh the
page.)
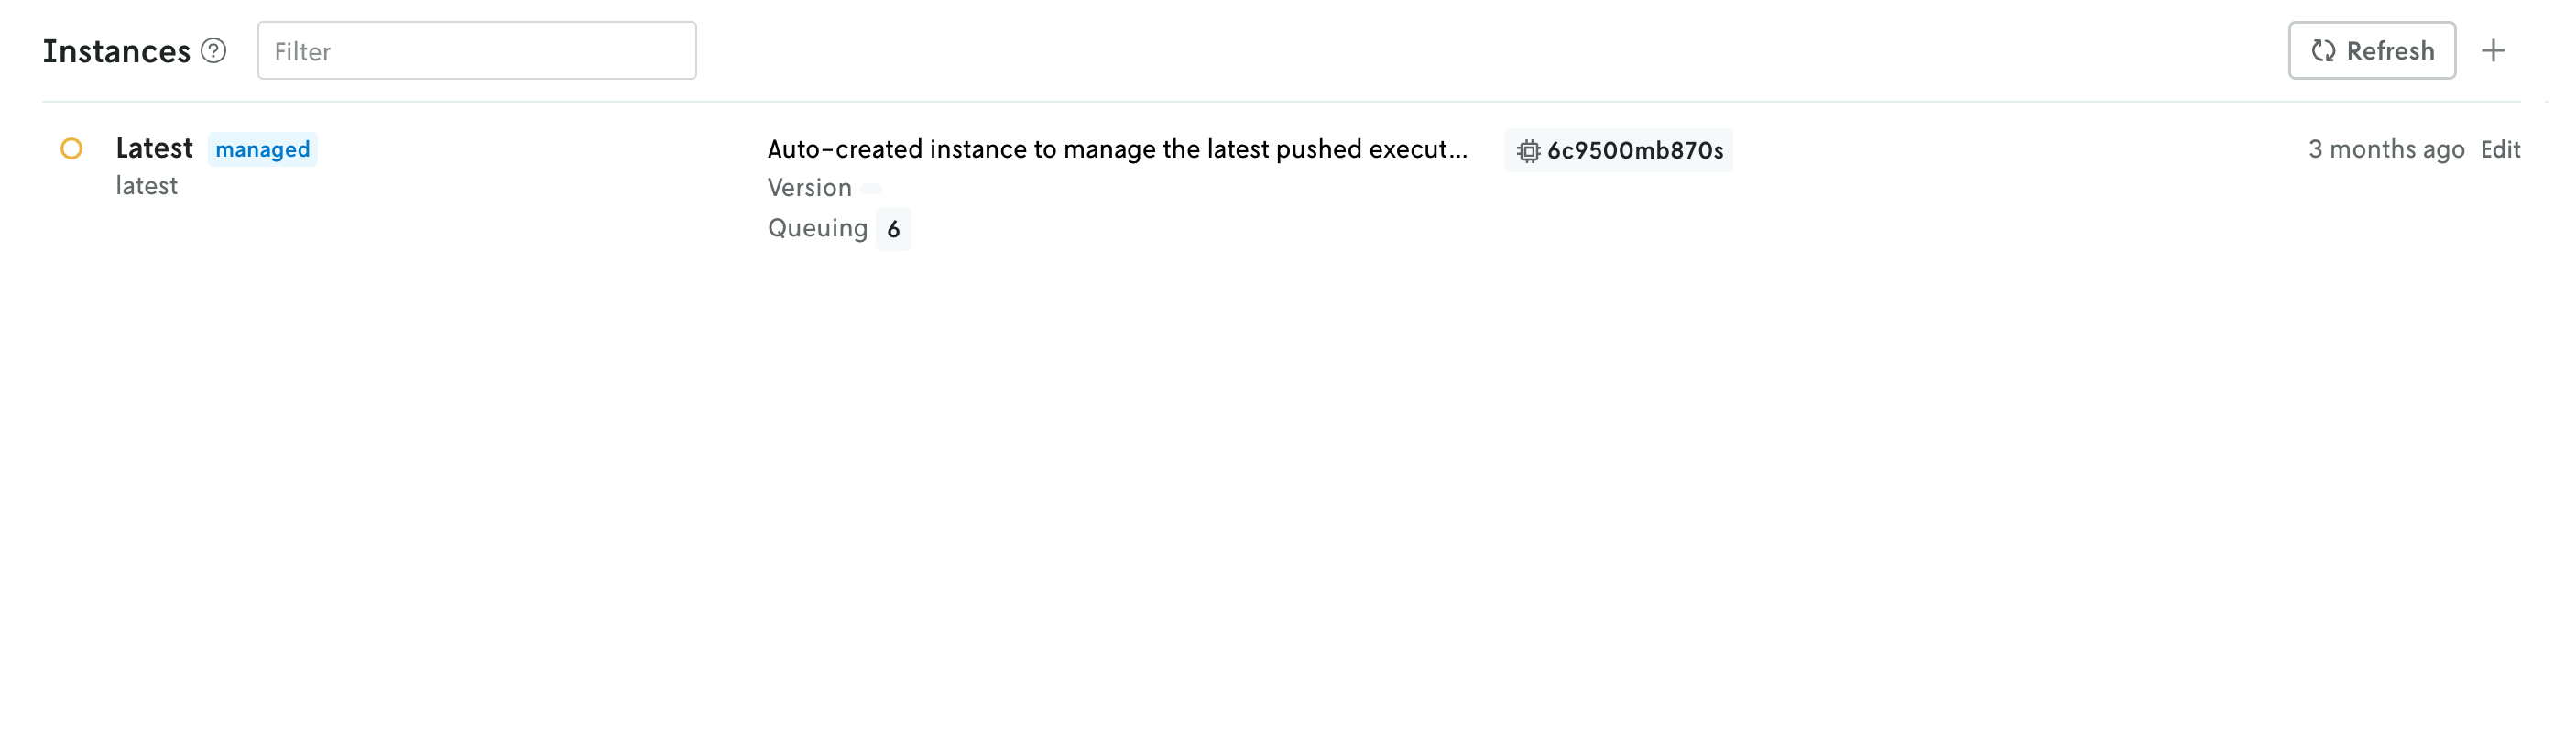
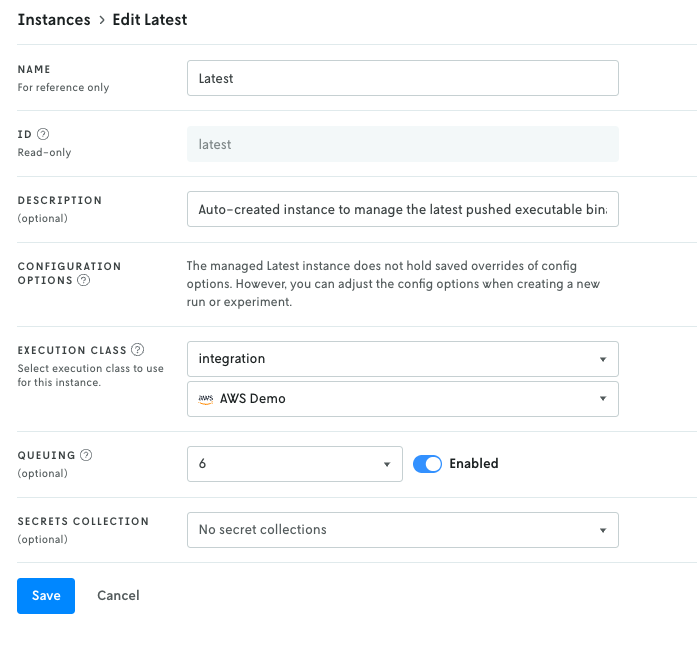
Click on this Latest instance to view the details. The integration is applied by way of the Execution Class field. Click the Edit button in the top right to edit your Latest instance.
On the edit view, in the Execution class dropdown, select integration as
the execution class. Once selected, a new select dropdown box should appear
beneath it that will allow you to select your integration. Select which
integration you would like to use and then click Save to apply your changes.
3.5. Run with the Integration
Now that the integration is attached to the Latest instance, when you create a new run using that instance, your run will be executed in AWS Batch instead of in Nextmv’s infrastructure. However, you’ll still be able to view the input, output, metadata, and any other custom assets or metrics from your model runs in the Nextmv Console.
To create a run:
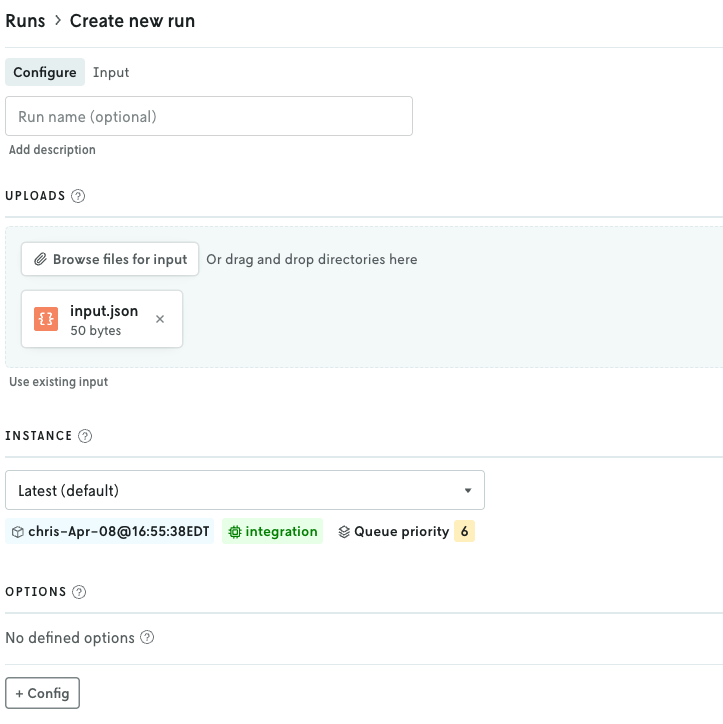
- In Nextmv, on the left sidebar of your application navigation, click the
New
   run
button (at the bottom of the list). - Add the input for your model.
- In the
Instancedropdown menu, select the Latest instance if it’s not already selected. Note that if your Nextmv role is Operator, the dropdown for selecting the instance will be in the advanced menu in the upper right. - Click the
Start runbutton to start the run.
If you navigate to AWS Batch in the AWS console, and search for jobs in your job queue, you should see your job initiated.
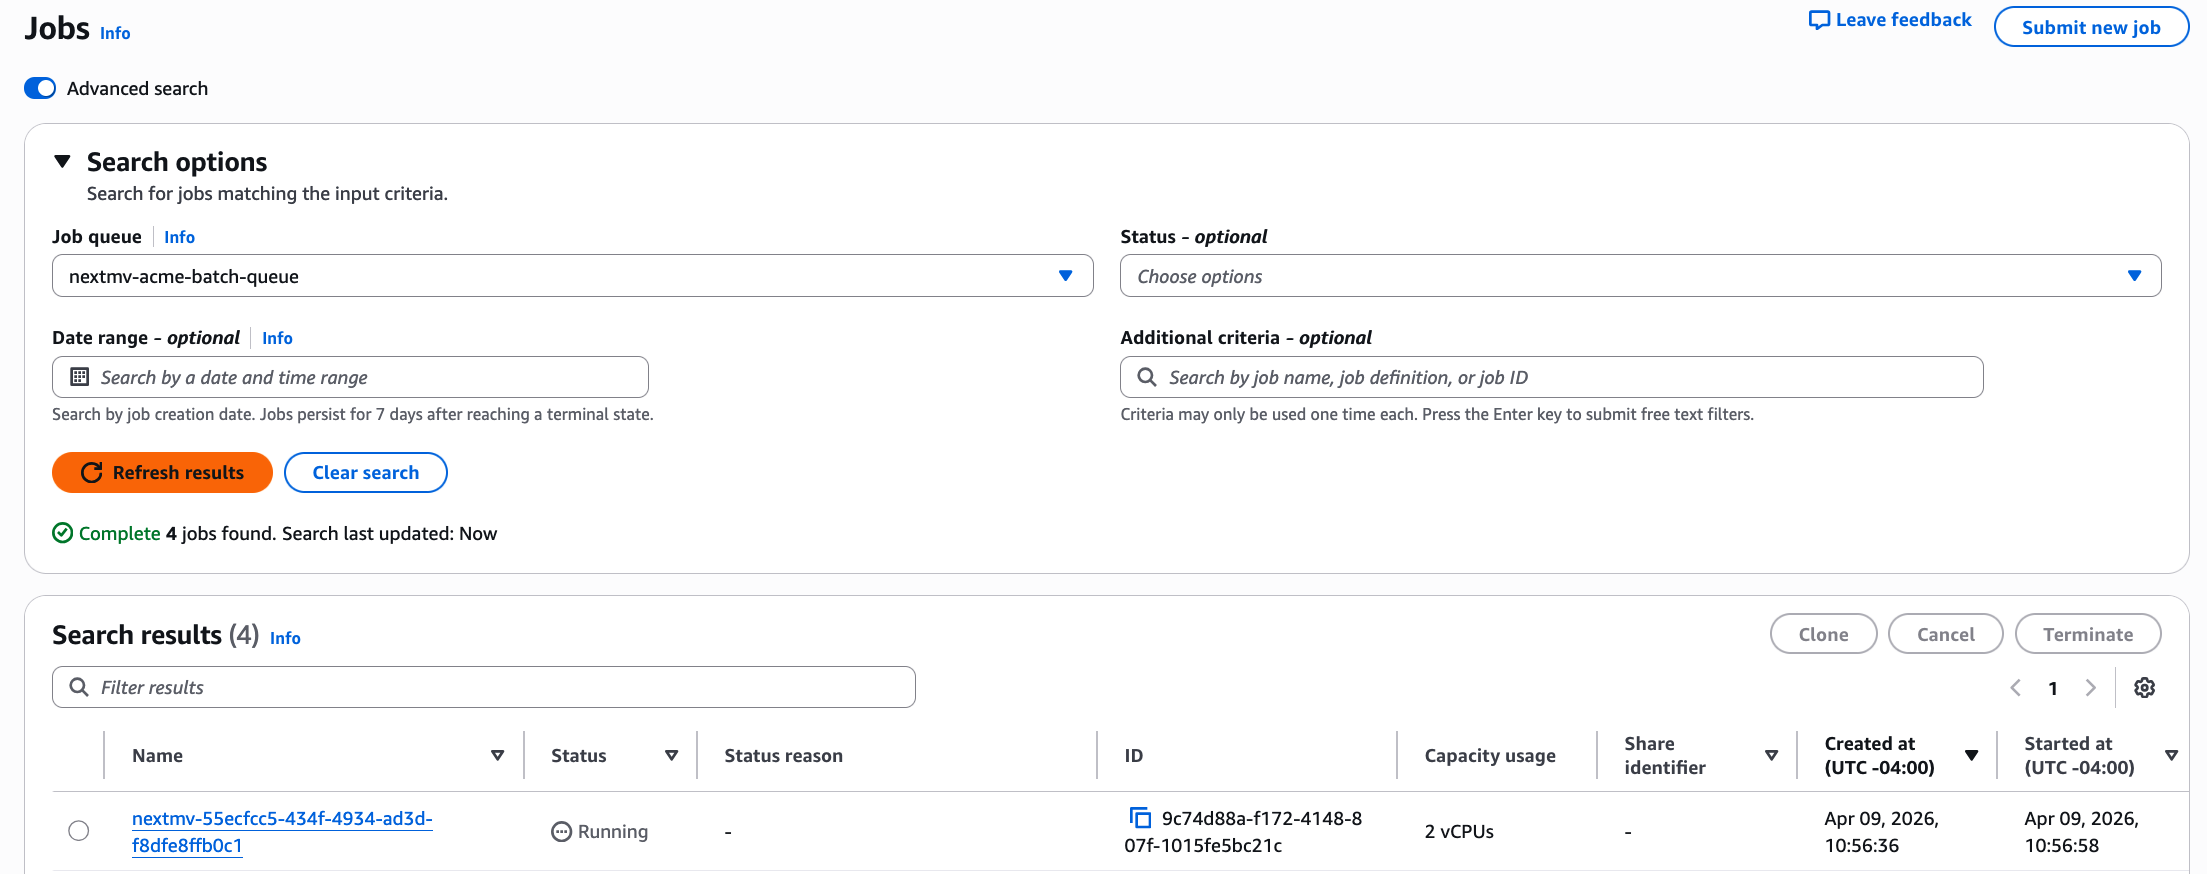
You can click into this run to view the output of the run and its details. This run will also be in Nextmv and you can view the run input and output like normally.
🎉🎉🎉 Congratulations, you have finished setting up your Nextmv integration!
Further
You can use the instance with the AWS Batch integration just like you would any other instance. Whatever version is assigned to the instance is the version that will run in AWS Batch. And any configuration set on the instance will be applied to the run sent to AWS Batch (likewise for any run-specific configuration). And when you run scenario tests with an instance with the AWS Batch integration, the runs for that test will execute in AWS Batch.